Introduction
Google Tag Manager (GTM) is the latest Google tool to manage Google Analytics (GA) and Google adwords. Because of this tool, it is easy to track conversions and traffic across different websites (cross-domain tracking).
As we all know Google Analytics is a data collector that captures the user’s count on a website. Also, it gives metrics about page views, events, and conversions. Conversion tracking with Google Tag Manager of the website is possible by integrating GA and GTM.
Google Ads is an advertising platform that is used for optimizing ad campaigns using Google accounts. If you connect all these three, here are some benefits that you will get:
1. Measuring ROI of Google Ad Campaigns: Setting up Google Ads conversion tracking tags within your Google Analytics setup allows you to accurately measure the revenue your ads are generating, going beyond simple clicks and visits.
2. Boost Conversion Rate: After analyzing users’ behavior in GA, website owners can identify the areas having higher bounce rates and those that need improvements.
3. Targeted Ad Campaigns: Having a better audience understanding helps in creating engaging ads that resonate with their interest.
Note: Before setting up the Google Tag Manager, users need to have an active account on Google Analytics and Google AdWords.
Set up Google Tag Manager, Google Analytics, & Google Ads
Before adding GTM scripts on the site, it is crucial to have a GTM container. Kindly refer to the steps mentioned below to initiate the Google Tag Manager conversion tracking.
1. Visit https://tagmanager.google.com/#/home page to create a container. Click on “Create Account”.

2. Add relevant account information like company name, domain URL, country and others.
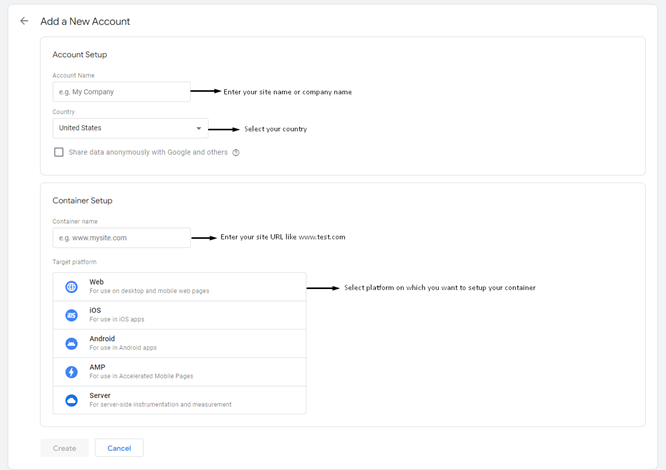
- Click on Create to complete the container setup.
3. Once you have created a container, you will be redirected to GTM dashboard with the mentioned scripts in head and body tag.
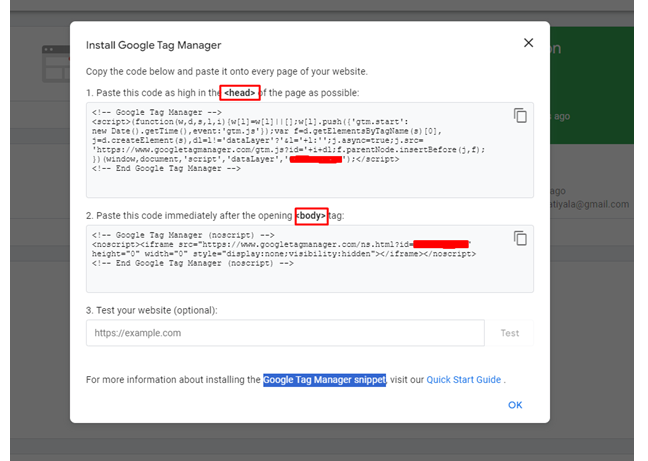
Google Analytics Setup Using GTM
Follow the steps given below to setup GA using Tag manager.
1. Go to Google tag manager’s site -> click on Tags -> click on new option.

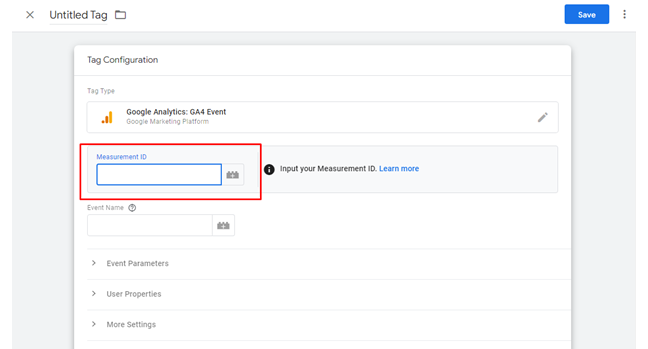
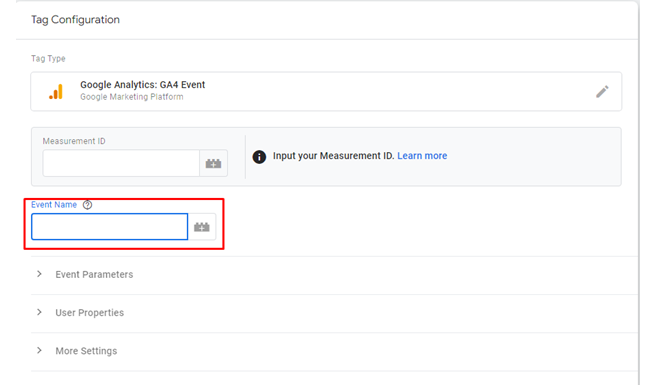
2. Choose tag type ->click on Google Analytics ->Choose Google Analytics: GA4 Event.
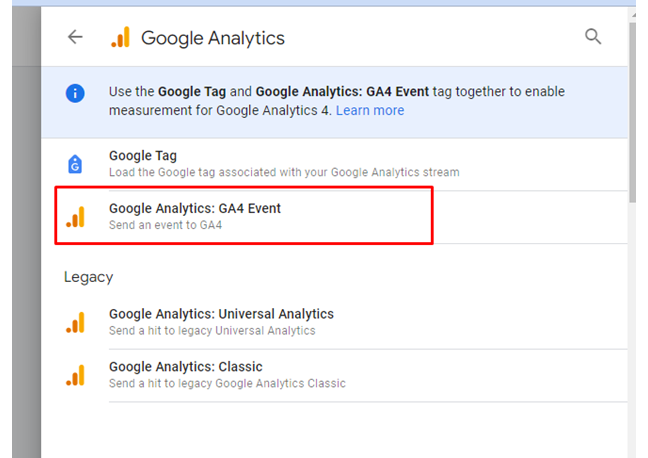
Enter measurement ID
To have a measurement ID, there is an active Google Analytics account setup requirement. Here are the steps given below for setup.
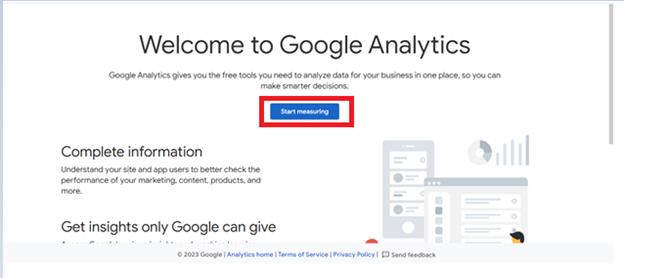
1. Visit https://analytics.google.com/, Click on start measuring
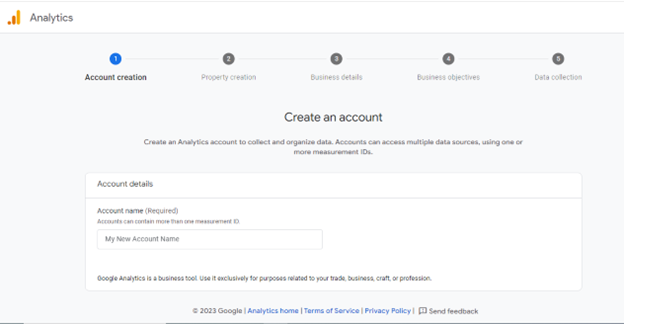
2. Then, create an account by entering right properties, business details and relevant information.
To get measurement Id -> go to Analytics panel ->At the Left bottom corner, choose “Admin” setting option-> Select Data streams options.
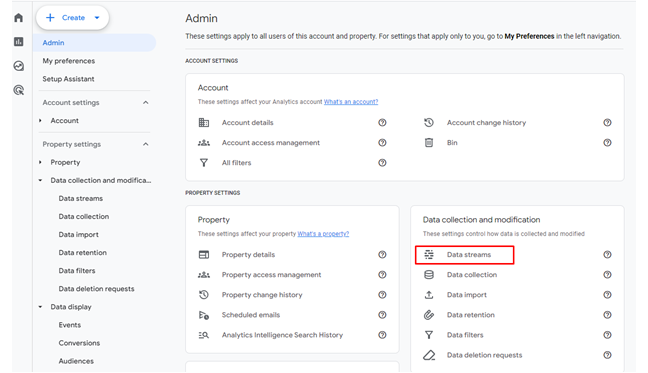
4. Click on available Data stream option, you will be redirected to “Web stream details” to copy Measurement ID. Then, enter it in GTM.
5.Click on Event Parameter option to enter new event name and value. If you want track URL then enter page_location in event parameter and {{Page URL}} in Value.

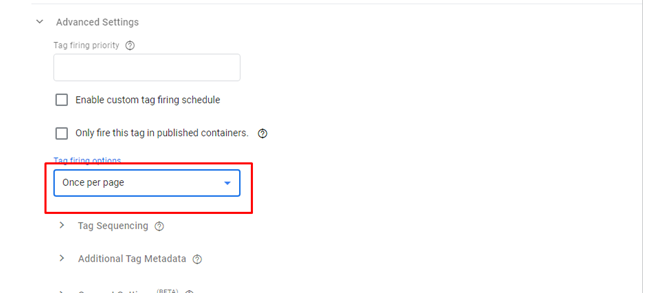
6. In Advanced setting option, choose Tag firing options ->Select once per page.
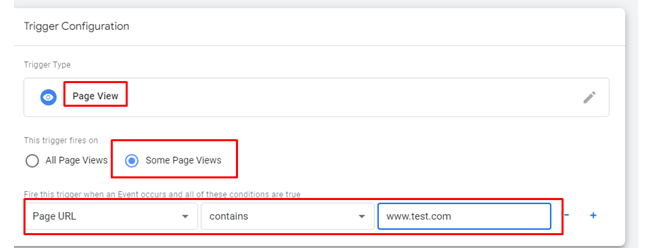
7. After that select new trigger option ->Choose trigger type ->Page View.
8. After that select “This trigger fires on” option -> Click on Some Page Views -> Select page URL option -> equals-> enter URL you want to track.
After completing the conversion tracking tag creation steps, you need to use Google Analytics for event tracking as mentioned below:
Steps
When we will create a GTM tag, then the event name should be entered and it will appear in Google analytics dashboard within 24 hours.
However, if you want to track that same event as a conversion -> Click on “Admin”-> Events -> Click on toggle button to Mark as conversion.

Google Ads Conversion Tracking with Google Tag Manager
To setup a Google Ads, you need to use Google Tag Manager for a successful setup. Here are the key steps mentioned below.
In Google Tag Manager
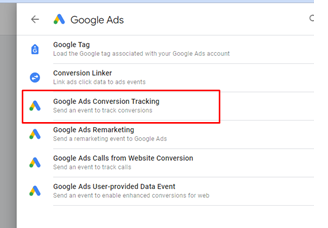
1. Click on new tag -> Choose tag type ->Choose Google ads ->Click Google Ads Conversion Tracking.
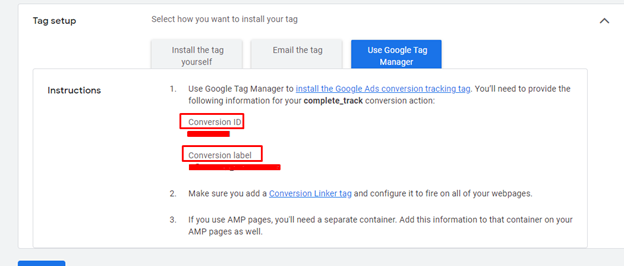
2. After that enter conversion Id -> To get Conversion Id -> go to Google Ads dashboard -> click on conversion and then the conversion details will appear-> Click on Tag Setup -> Then, choose the tag type for which you will be creating a tag -> Later, choose “Use Google Tag Manager” option.
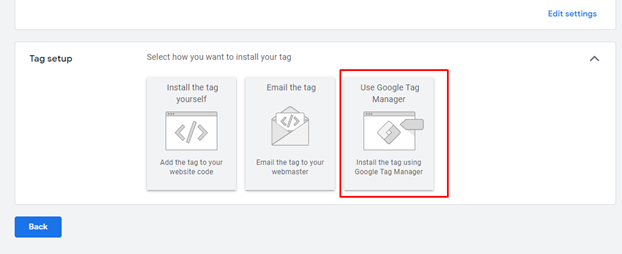
Copy conversion id and the conversion label and use it in Google Tag Manger to create a tag.
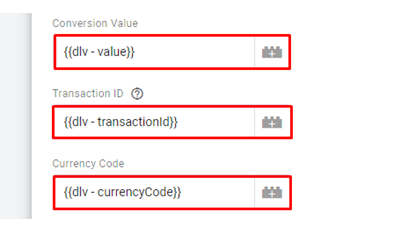
2. Assign data layer variables like conversion value, transaction Id, and currency code to track Google Ads. Leave blank if you don’t want to track conversion.
How set Data Layer Variable?
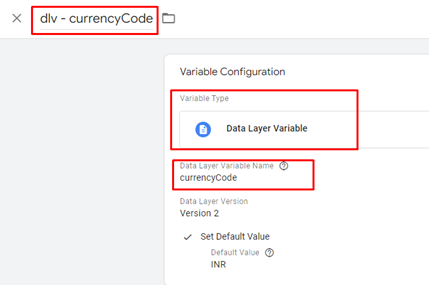
3. Select the variables module->Choose variable type ->Select Data layer variable.
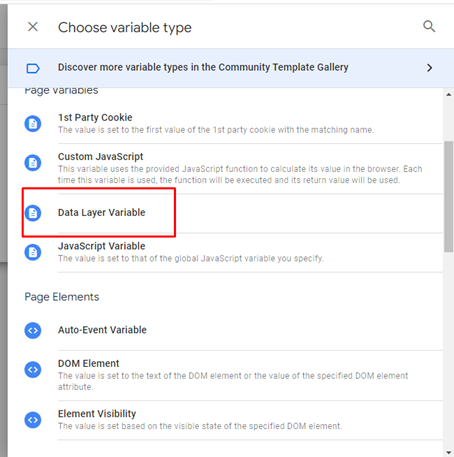
4. Enter data layer variable name like “currencyCode” which you have set in data layer variable script.
5. How to Write a Data Layer Variable Script?
First, initiate the data layer variable array, then insert the variable into the array. Enter the event name that you wish to track.
<script>
window.dataLayer = window.dataLayer || [];
dataLayer.push({
'event': 'complete_track',
'value': '{/literal}{$smarty.session.orderdetails.TotalDue}{literal}',
'transactionId': '{/literal}{$smarty.session.orderdetails.OrderNumber}{literal}',
'currency': '{/literal}{$currency.code}{literal}'});
</script>
6. Insert the above script directly on the website page just above the Google Tag Manager script.
7. You can setup the trigger as per your requirement after events like transaction is successful, sent mails and etc.
AdWords Conversion Tracking with Google Tag Manager
You can check conversions on Google AdWords dashboard by creating conversion events.
1. Choose conversions from Tools and Settings ->Measurement ->Conversion.
2. Click on New Conversion Action.
3. Select tracking conversion option ->Website ->enter website domain ->Click scan -> Then open create conversion actions manually using code -> Click on ‘+.’
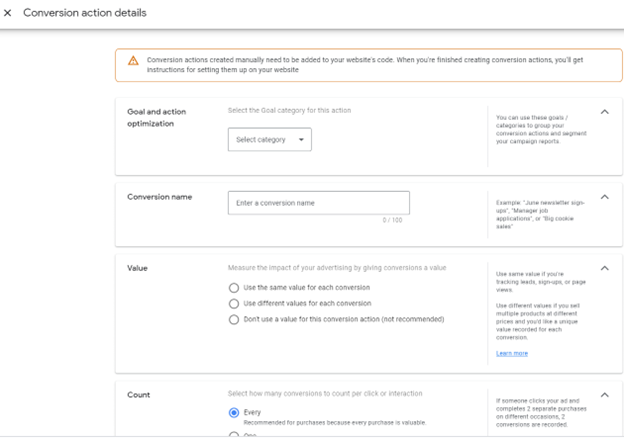
4. Fill conversion action details like
Goal and action optimization as purchase because you may need totrack conversion of payment -> Enter conversion name -> In Value of AdWords section, choose select same value for each conversion if there is (static value), but you have different value (dynamic value), then select Use different value for each conversion.
5. Then choose Count Option, if you want to track conversion for purchase then select “Every” conversion count option or else go with One option.
6. Attribution Module-> Choose Data – Driven attribution Module.
7. After complete create conversion -> Go to Google tag manager publish all details by clicking submit button and debug it using preview option.
