High availability and excellent performance are extremely important attributes considered by the developers while selecting a hosting platform. It is obvious that no one likes to lose money because of the downtimes caused to the website; but having said that it is also true that no one can be completely safe from downtimes. Therefore, in order to reduce the risk of the occurrences of downtime and in order to ensure an additional level of redundancy the cluster approach can be utilized.

This article will illustrate the process of adjusting an ordinary application in order to match the enterprise level demands with the example of the ‘WordPress Cluster’. WordPress is considered as a widely used blogging platform and an efficient content management system (CMS) that is powered by PHP. By applying some special configurations to run WordPress as a highly available and auto-scalable cluster, we will demonstrate the process of easily creating a trustworthy and affordable managed WordPress cloud hosting solution for your website or blog with a wide range of users. This solution can ensure the functionality of your service in many complex situations like single server downtime or high users influx (also known as traffic spikes).
Let’s have a look at the pre-packaged WordPress cluster specifications along with the ways of its deployment and management:
Auto-Scalable WordPress Cluster In Containers
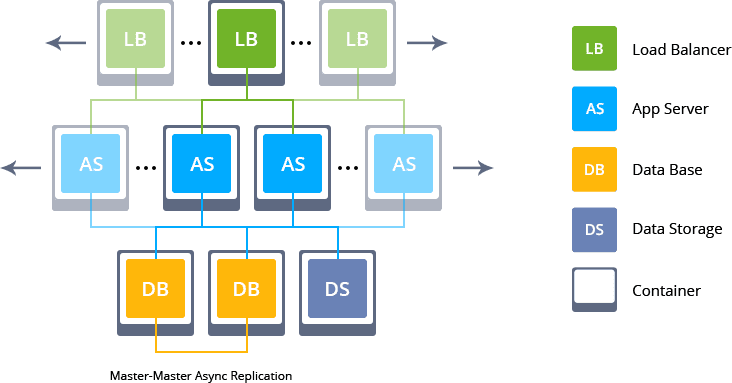
The distinctive automated WordPress cluster solution provided by MilesWeb is created on the basis of dockerized templates and consists of the latest WordPress version. The main elements of this WordPress cluster environment deployed with this package are mentioned below:
- In order to distribute the incoming traffic within a cluster an NGINX load balancer is utilized. After this, it can be manually scaled horizontally once the installation is done while the node(s) that are newly added detect the available application servers automatically.
- The WordPress application is managed with two NGINX PHP servers that are scaled automatically on the basis of pre-configured triggers.
- Two replicated MySQL servers are provided for storing and operating the user data.
- In order to eliminate data duplication, a dedicated data storage node is offered and it is ensured that the same content is present throughout all the application servers.
All the software stacks use the default image tag while creating suitable containers. The containers generally point to the latest software version by default; but they can be customized by your web hosting provider. Every node has a resource limit of 8 cloudlets by default that equals to 1 GiB of RAM and 3.2 GHz of CPU. It is possible to subsequently increase this limit.
During the process of WordPress cluster installation, the system automatically runs the operations mentioned below with the use of the cloud orchestration.
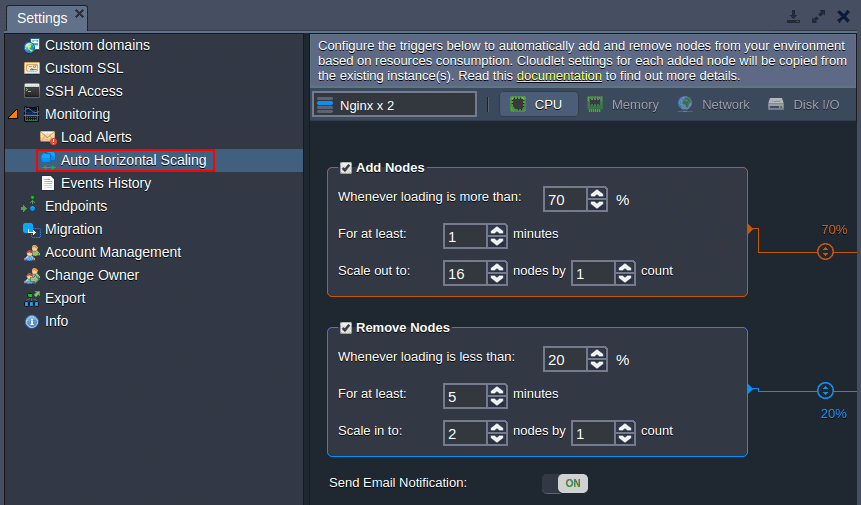
Configuration of the automatic horizontal scaling process to tackle the load spikes on the application servers, where usually the bottlenecks happen; one more node is added if the CPU usage exceeds 70% of the allocated resources. This node is removed if the CPU consumption falls below 20%.
- Implementing ‘asynchronous Multi-Master Replication’ for the DB cluster in order to increase the data reliability, attain high-availability and to prevent app downtime in case of a failure of a single database server.
- Using the official WordPress website to install the latest WordPress version and extracting its content in the /data directory present on the ‘Storage’ node, this will be subsequently added to the application server layer.
- Mounting the /data folder on the ‘Data Storage’ container to the application server’s directory that is named – /var/www/webroot/ROOT so that all the present nodes including the automatically connected newly added nodes will operate through a single data set instead of managing and constantly synchronizing changes within their own content copies. This is done with the common cached pages storage.
- Configuration of an advanced ‘HyperDB’ class for supporting replication, load balancing, failover and partitioning.
- Adding the ‘SuperCache’ plugin to improve the cluster productivity and response time by returning the auto-generated static HTML pages for the frequently created requests rather than processing relatively heavier WordPress PHP scripts every time.
In this way, a user can be confident of data safety and availability as these are the most important elements for production-propose websites. As these actions are entirely automated, the process of creating an auto-scalable, efficient and reliable WordPress cluster is simplified for the users.
Deploying The WordPress Cluster In One Click
Deploying a cluster can be complicated and time-consuming but with MilesWeb, the process of WordPress cluster deployment and configuration is completely automated. All you need to do is perform some simple tasks mentioned below:
- Login to MilesWeb’s dashboard with your login credentials and start the installation process through one of the following ways:
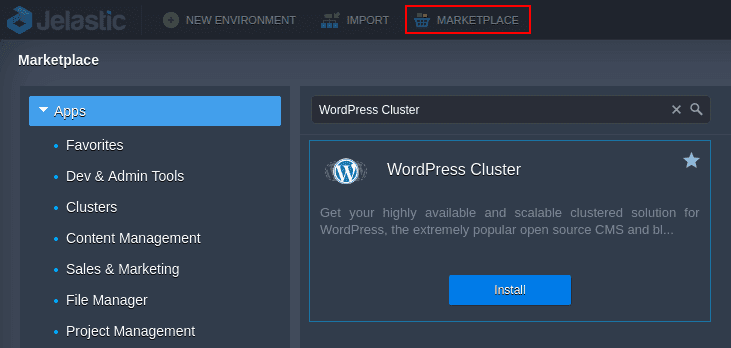
Marketplace
Just type the name of the package in the search field within the opened window and click on the ‘Install’ button.
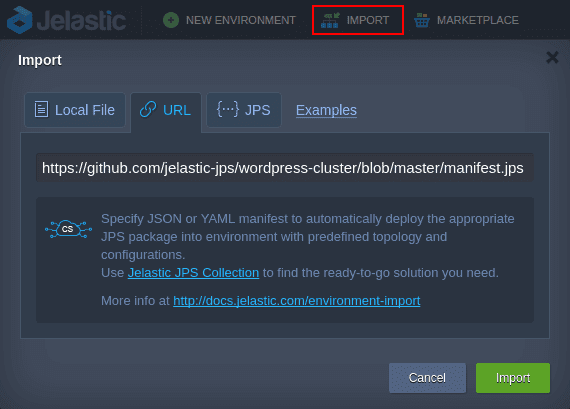
Import
Within the open window, go to the ‘URL’ tab and import this link – https://github.com/jelastic-jps/wordpress-cluster/blob/master/manifest.jps for fetching the appropriate WordPress cluster manifest file.
- In the confirmation window, enter the appropriate WP title for your blog website
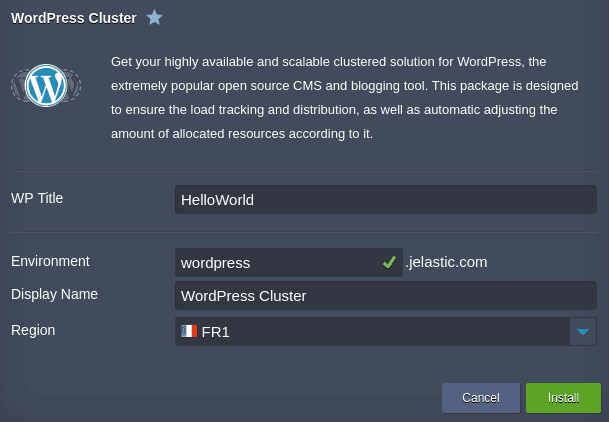
Also, enter ‘Environment’ name and customize its ‘Display Name’ (optional). After this, select the appropriate region (if several are available) and click on the ‘Install’ button.
Note : Keeping in mind the complex nature of the packages topology, you might have to upgrade to the paid option in order to get the required amount of resources.
- When the environment installation and configuration is done, a frame will be displayed that shows your administration data and your credentials will be sent to your account email as well.
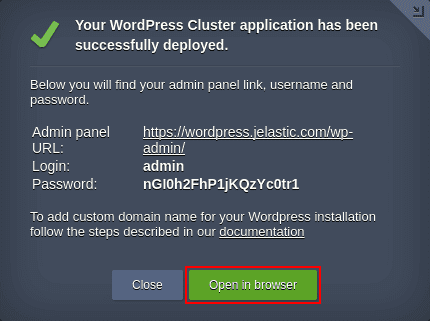
You have now successfully deployed WordPress cluster to the cloud and you can start using it immediately. Click on the option – ‘Open in browser’ in order to enable the created environment to access your website or utilize the credentials mentioned above for getting into the WP control panel.
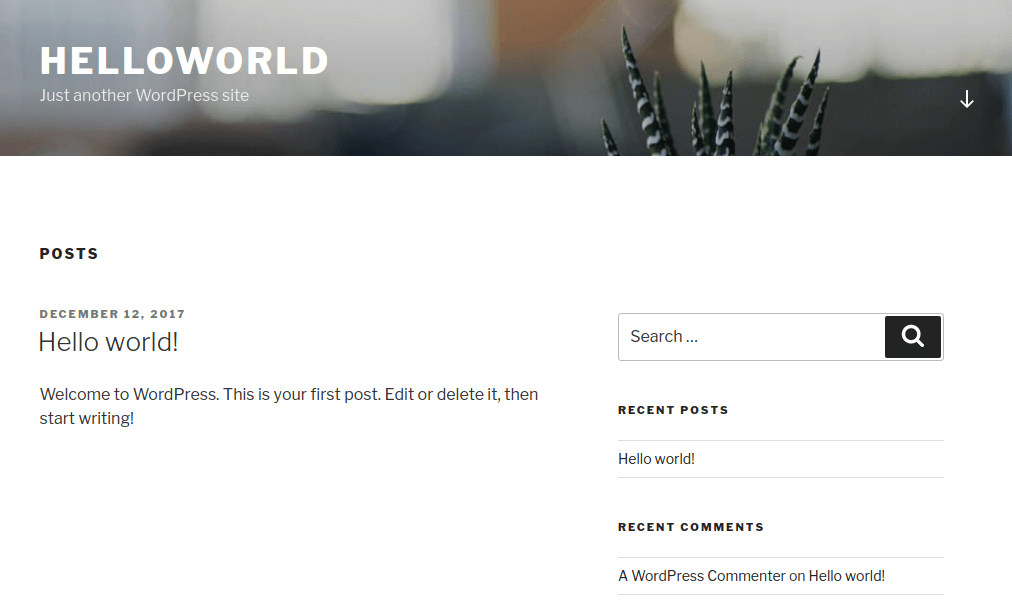
Now you can start working with your automatically scaled WordPress content management system and post the required content to it for getting maximum incoming traffic without the fear of overloading the website.
Management Of Your Scalable WordPress Cluster
Even though there is a pre-defined structure in place, this WordPress cluster solution is fully customizable after the installation process is complete. For instance, the user can adjust the triggers for automatic scaling for some specific needs and the user can also extend the environment with additional services or features.
Here is an insight on the most common operations that can be performed through the intuitive UI with just a few clicks:
Adjusting The Environment Topology
The current structure and the main elements of your WordPress cluster can be instantly changed by clicking on the option – ‘Change environment topology’ that is present next to the environment name.
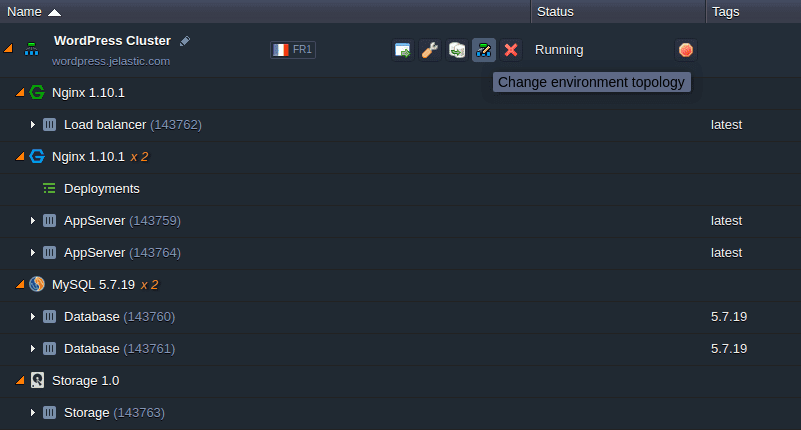
Inside the open window, you can adjust the required topology settings (same as during the creation of environment) and ‘Apply’ the changes made. For example, in this window you can enlarge the default number of containers in every layer or bound a public IP address to the cluster entry point for increased availability.
Encrypt Connection With Customized SSL
For safeguarding the environment and ensuring safety for application data, the user can activate an SSL certificate. In order to do this, the user can enable MilesWeb SSL while editing the environment topology.
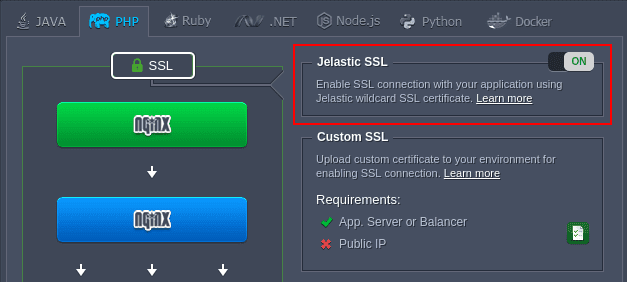
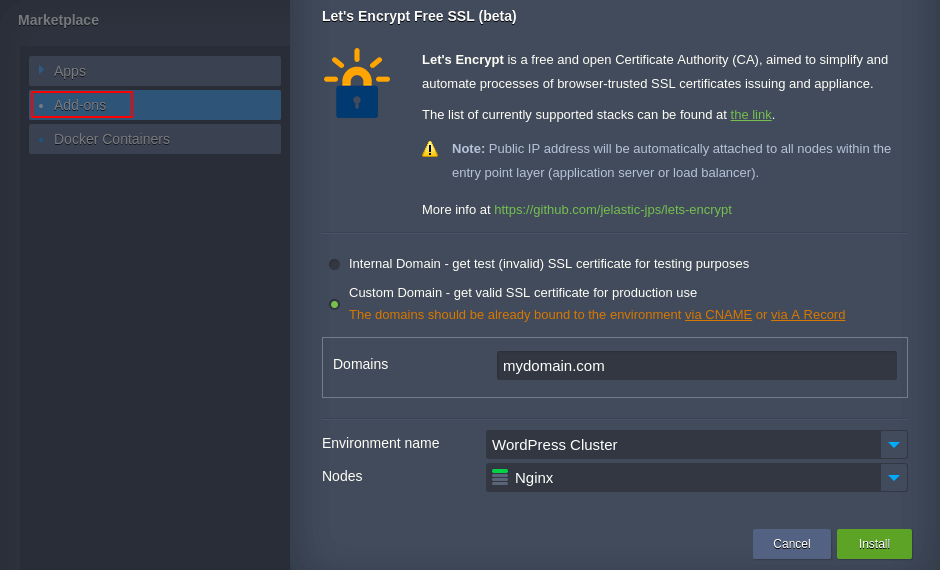
An easier way of achieving this is by applying the ‘Let’s Encrypt’ addon. This addon can be automatically installed through the Marketplace and it provides the required protection level for the internal and external environment domain(s) without any kind of manual configurations. Note that this process will require a public IP that is available in a full account only.
During the process of installation, select the cluster environment and entry node, enter the preliminary bound domain name and confirm – the rest of the configurations will be done by MilesWeb for saving your time.
Customizing The Automatic Scaling Conditions
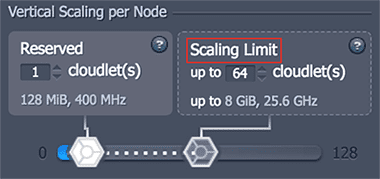
The user can increase the resource range that is allocated for the highly-loaded node in the ‘Change environment topology’ window by adjusting the ‘Scaling limit’ of the cloudlet. This process will not affect the real consumption of resources but it will provide some buffer for the traffic load spikes.
The distinctive ‘automatic vertical scaling’ method followed by MilesWeb’s PaaS environment enables you to pay only for the real resources that are used and you don’t have to pay for the allocated resource limits. Therefore, even the complex clusters ensure affordability.
Moreover, the user can re-configure the behavior of the default WordPress cluster horizontal auto-scaling through Settings > Monitoring > Auto Horizontal Scaling section by editing the available setup.
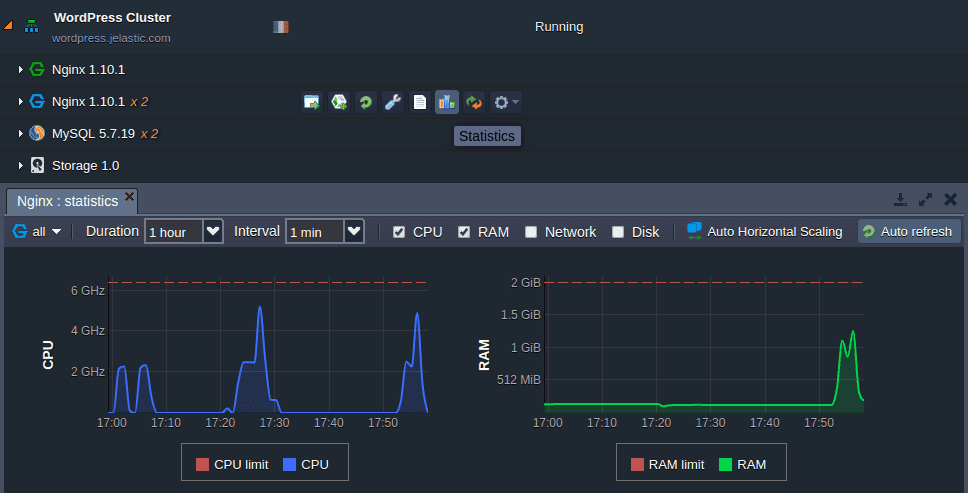
Keep a track on the resource usage level for every node through ‘Statistics’ and scaling rules whenever required.
It is very easy to improve the quality of your service with a wide range of features provided by the MilesWeb PaaS platform.


