Table of Content
Introduction to Website Hosting
When you type a website’s address into your browser, you’re directed to a digital space where the site’s content, images, and files reside. This is possible because of website hosting, a service that provides the necessary storage for your website’s data, making it accessible online. Think of web hosting as renting a space on the internet where everything your website needs to function is kept safe and readily available for users.
Website hosting not only stores files but also ensures that your website remains functional and secure. Hosting providers maintain powerful servers equipped with advanced infrastructure to keep your site live and perform smoothly, even as it faces heavy traffic or potential security threats. Without reliable hosting, websites may experience downtime, security issues, or slow loading times, which can harm user experience and credibility.
What Is Website Hosting?
Website hosting is the process of renting or purchasing space on a web server to store website files and data. Just as we store items in our homes, websites need a digital space to store essential files, images, and content. Web hosting companies provide these servers—specialized, high-performance computers connected to the internet around the clock—that store these files and make them accessible whenever someone visits the website.
Each hosting type offers unique features suited for different needs, such as shared hosting for small sites, VPS for medium-sized businesses, or dedicated hosting for high-traffic websites. By choosing the right type of hosting, website owners can optimize site performance, increase security, and ensure a better experience for visitors. The flexibility of these hosting solutions enables businesses and individuals to establish their online presence efficiently and cost-effectively.
Why Do You Need Hosting for Your Website?
Web hosting is a crucial thing for any website because it makes your site accessible on the internet, allowing users to view it anytime, anywhere. When visitors type in your website’s URL, their browser sends a request to the server where your files are stored, retrieving the data to display your site. Without hosting, a website is merely a collection of files on a computer—unreachable and invisible to others on the web.
Beyond accessibility, hosting provides essential features that enhance user experience, such as fast loading times, data backups, and security measures against threats. By using reliable hosting, website owners can avoid issues like downtime or data loss, which can affect credibility and trustworthiness. With professional hosting, you can focus on building and improving your site while the hosting provider manages these technical aspects.
Understanding the Basics of Web Hosting
For those new to the concept, web hosting can seem complex. However, understanding the basics can simplify it significantly. At its core, web hosting involves storing website files on servers, which act as storage facilities, and providing tools that help keep your website functional, secure, and accessible to users.
How Web Hosting Works?
Web hosting works by storing your website files on a server maintained by a hosting provider, which keeps it running 24/7 so your site is always accessible. When someone types in your website’s domain, the server delivers your site files to their browser, allowing them to view your site in real-time. This process is quick and seamless, making it possible for users worldwide to access your site without delay.
Hosting providers maintain the server infrastructure and software updates, often including security features and data backups to ensure high availability and safety. By taking care of these technical aspects, web hosting services allow you to focus on building content and engaging users, knowing that the technical foundation of your website is robust, stable, and well-managed.
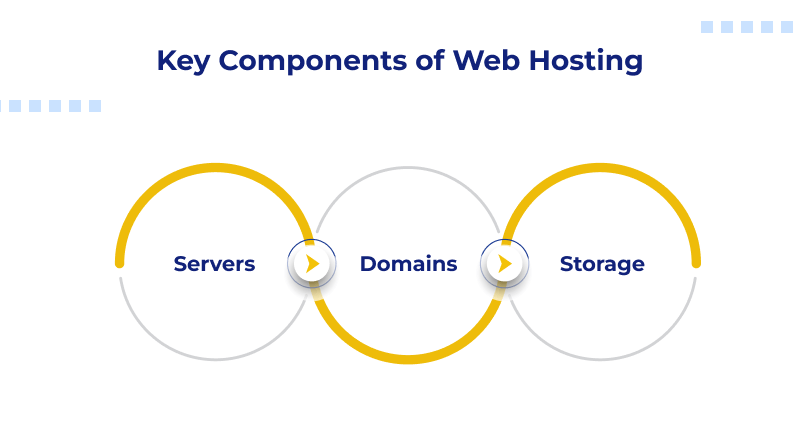
Key Components of Web Hosting: Servers, Domains, and Storage

- Servers: Servers are powerful computers designed to store and deliver your website data to users. Web hosting providers maintain these servers in secured data centers, climate control, and backup power systems to ensure optimal uptime and performance.
- Domains: A domain is the website address that users type to reach your website (ex: www.abc.com). It’s linked to the server’s IP address to direct visitors to the right location. Domains are easy to remember, making it simpler for users to find your website.
- Storage: Web hosting storage houses your website files, including images, videos, scripts, and databases. Hosting providers offer various storage options based on your site’s needs, from limited storage for small sites to ample capacity for resource-heavy websites like e-commerce platforms.
Types of Web Hosting Explained
– Shared Hosting: Pros and Cons
Shared web hosting is one of the common and affordable hosting types, making it a go-to option for beginners and small websites. In shared web hosting, multiple websites share the same server resources, that helps keep the low cost. However, this shared structure can impact performance during peak times, as all websites compete for resources, potentially slowing down response times.
Shared Hosting: Pros
One of the main advantages of shared hosting is its affordability. Since the server’s resources are shared among multiple websites, the costs are divided, making it budget-friendly option.
Shared Hosting: Cons
On the downside, shared hosting have the limitations in terms of performance and reliability. Since multiple sites use the same resources, any spike in traffic on one website can impact others on the server.
– VPS Hosting: When and Why to Upgrade?
Virtual Private Server (VPS) hosting is a significant step up from shared web hosting. It provides dedicated resources within a shared environment by using virtualization technology. This option offers better control, improved security, and enhanced performance, making it ideal for growing websites or applications that need more than what shared hosting can provide.
VPS hosting is suitable for those looking to scale but who are not yet ready for dedicated hosting. It provides an affordable solution with scalable features, allowing users to customize their environment based on unique needs. Many businesses upgrade to VPS when their traffic increases, requiring more reliability and control.
– Dedicated Hosting: Who Needs It?
Dedicated hosting is the top-tier option for web hosting. It provides an entire server exclusively for one website or application, offering maximum performance, security, and flexibility. This hosting is typically chosen by large businesses or websites with heavy traffic, where server performance is crucial.
With dedicated hosting, users have the ultimate control over the server settings, software, and security protocols, giving them complete customization capabilities. However, dedicated hosting also comes with a higher cost, so it’s generally recommended for businesses or individuals who have the technical expertise and a need for high-performance hosting.
– Cloud Hosting: Is It the Future?
Cloud hosting is a highly innovative approach to hosting a website across many connected servers instead of holding a site on one physical server. The advantage lies in making the solution reliable since even when one fails, there are other systems within that network to carry on the availability. Additionally, scaling in this kind of cloud configuration makes it quite flexible to respond to peaks and lulls in the traffic coming into a website.
This technology has an incredible future in terms of scale, cost-effectiveness, and resilience. Such a model is apt for a business of any scale due to its ability to expand based on the organization it develops and provides high uptimes and security. Probably with time, cloud hosting may be the way most firms will go about it together with the individual users as more efforts are put towards achieving more in the digital world transformation.
Managed Hosting vs. Unmanaged Hosting: Which Is Better for You?
Managed hosting gives more complete support in hosting services, performing server configuration, maintenance, security, and updates. This will benefit the customer if they have no technical know-how and wish to devote their time and effort in growing a particular business without bothering about the hassles of maintaining a server. Generally, managed hosting fetches more money, though only when convenience and support justify the premium price.
Unmanaged hosting requires that users handle the server management themselves. Although this is cheaper, it is ideal for users with technical knowledge about managing configurations, updates, and security independently. As such, the choice between managed and unmanaged hosting depends on budget, technical skills, and the degree of control the user would want to have over his hosting environment.
Step-by-Step Guide to Hosting a Website

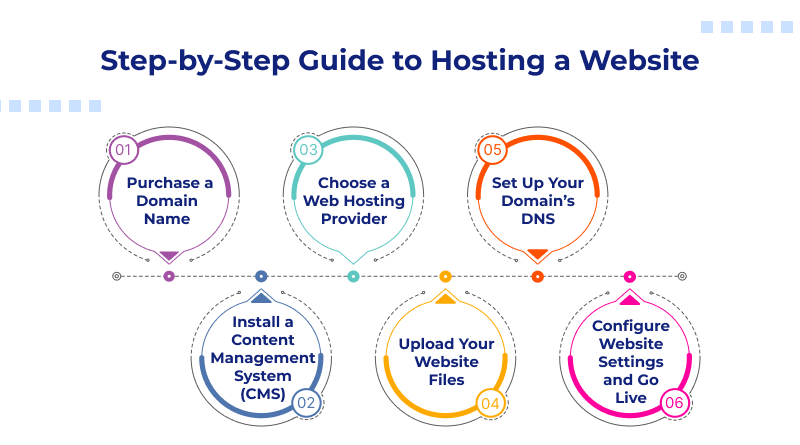
Let’s decode about what is the right step-by-step guide to host a website. Setting up a website involves a few key steps, from purchasing a domain name to uploading your website files. Here’s a comprehensive, step-by-step tutorial to guide you through the process:
1. Purchase a Domain Name
A domain name is your website’s address, like “yourwebsite.com.” Purchasing one is the first step to making your website accessible on the internet. You can buy domains from popular domain registrars like MilesWeb. Try to keep the domain name short, memorable, and relevant to your brand or content.
2. Choose a Web Hosting Provider
Web hosting providers offer the resources your website needs to be accessible online. Choose the web host based on the type of website you plan to build, your anticipated traffic, and budget. Options range from shared hosting (for small websites) to VPS or dedicated hosting (for larger, more resource-intensive sites). Some reliable hosting providers include Bluehost, MilesWeb, and SiteGround.
3. Set Up Your Domain’s DNS
Domain Name System (DNS) connects your domain name to your hosting server. After purchasing a web hosting plan, your service provider gives you the DNS nameservers. Log into your domain registrar account, navigate to DNS settings, and replace the default nameservers with those provided by your web host. This process takes the few hours to propogate.
4. Install a Content Management System (CMS)
A CMS allows you to add, edit, and modify website content without requiring technical knowledge. Perhaps the most widely used CMS is WordPress, which you can easily install using the majority of hosting control panels, including cPanel. Alternatively, you can upload custom-built website files directly.
5. Upload Your Website Files
If you have designed your website yourself or have custom HTML, CSS, and JavaScript files, then you’ll need to upload those files to the host. Most hosts allow you to upload files through cPanel’s File Manager or even with an FTP client such as FileZilla. Using your account credentials, log into your host and drag your files into the public_html directory, which is where they can be accessed online.
6. Configure Website Settings and Go Live
Upload your website files and consider the technical settings which you want to reflect on it. Always evaluate SEO parameters, security, and caching features before configurations. Ask your developers to run some test checks before the page is live.
Installing a Website on Your Hosting
Here are the steps mentioned below for installing your website on the hosting server.
– How to Install WordPress (or Another CMS)?
Installing WordPress or any other CMS is a simple but essential step for building your website. Follow these instructions to get your CMS up and running:
- Download the CMS: Begin by visiting the official website of the CMS (e.g., WordPress.org) and downloading the latest version. Once downloaded, the CMS files are usually provided in a .zip file format.
- Create a Database: Access your hosting control panel (e.g., cPanel or Plesk) and locate the “MySQL Databases” section. Here, create a new database and a database user. Make sure to note down the database name, username, and password, as you will need them during the installation process.
- Upload CMS Files: To transfer the CMS files to your server, connect via an FTP client like FileZilla. Use your FTP credentials to log in and upload the CMS files to your website’s root directory, often named public_html.
- Run the Installation Script: After uploading the files, open your web browser and navigate to your domain (e.g., yourwebsite.com). The installation wizard should launch automatically. You’ll be prompted to enter the database details you created earlier. Follow the on-screen instructions to complete the setup.
- Finish Setup: After entering the necessary information, the CMS will set up the database and finalize the installation. You’ll then be able to log in to your CMS dashboard to begin customizing your website.
– Manually Uploading Website Files through FTP
Uploading website files manually through FTP is useful when migrating a website or installing a custom theme. Follow these steps to make it happen.
- Prepare Your Files: Make sure that all website files, including HTML, CSS, JavaScript, images, and any other assets, are properly organized in folders. It is the best to compress them into a .zip file if possible for a smoother upload.
- Connect to Your Server via FTP: Download and install an FTP client like FileZilla. Open the client and enter your FTP credentials—usually the hostname, username, password, and port (typically 21). Once connected, navigate to the public_html or root folder on your server, where you want to upload the files.
- Transfer Files: Locate the files on your local computer (usually in the left panel of the FTP clients) and select the folders you want to upload. Right-click and choose “Upload” to transfer them to the server’s root directory. Depending on the file size and your internet speed, this may take some time.
- Verify the Upload: Once the transfer is complete, check the root directory on your server to confirm that all files are present. You can verify if the website is live by visiting your domain.
- Test Your Website: Once you have uploaded the files, open your website in a browser to ensure everything loads correctly. If there are issues, double-check file paths, permissions, and file types to resolve them.
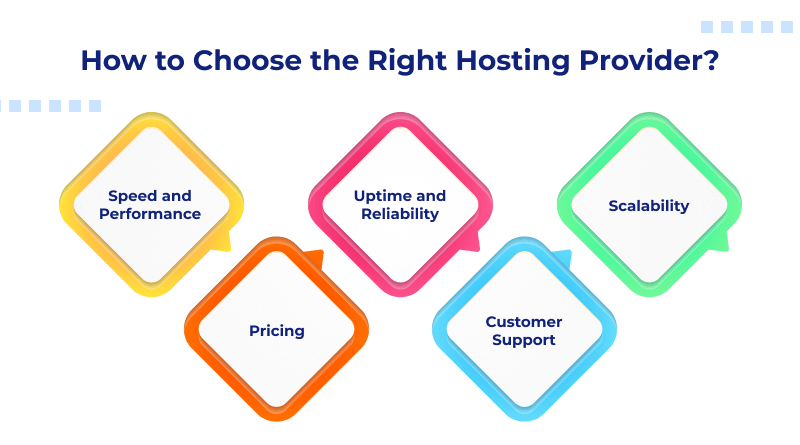
How to Choose the Right Hosting Provider?

– Speed and Performance
Website performance matters a lot when you are hosting crucial websites like eCommerce, IT services, and others. Website visitors do not have the patience to wait for a long time on one webpage. According to reports, there is a 50% bounce rate increase on slower websites. Due to this, there is a loss of potential sales and leads as well.
Hence, a web hosting provider with higher credibility like MilesWeb offers SSD NVMe storage, unmetered bandwidth, high-network speed, Tier IV data centers, and more. Having these features ensures there is a minimal latency rate and not have any issues regarding the website performance.
– Uptime and Reliability
Uptime is the reflection of stronger website performance. The average expected uptime of any website is 99.95%. MilesWeb’s robust IT infrastructure includes Intel Xeon processors, LiteSpeed nameservers, LSCache technology, and more. These resources boost the website’s uptime rate and make them available online for everyone 24/7.
Moreover, customer support is available round-the-clock which helps in assisting in the technical hurdles. As a result, if website owners need any help with its performance or operations, technical professionals are available all the time.
– Scalability
With the growing enterprise needs, you need to grow your server resources as well. This is what the exact scalability means. Right web hosting services come up with the best scalable resources possible. Custom configurations with different storage spaces are helpful for different customer requirements.
Cloud hosting is mostly feasible for scalability where enterprises easily scale up or down the resources as per the requirement.
– Customer Support
Technical issues are inevitable during web hosting operations. Hence, there are reliable customer support services available from the web hosting provider. Choose a trustworthy web hosting provider that delivers 24×7 customer support. MilesWeb offers technical assistance 24×7. They fix security patches, monitor server resources, and others where users easily focus on their business operations rather than the server management.
Whether it’s troubleshooting complex server issues, guiding through hosting configurations, or offering real-time advice on optimizing website performance, MilesWeb’s customer support goes above and beyond to keep your website running smoothly.
– Pricing
When choosing a hosting provider, pricing is one of the key factors to consider, as it directly impacts both your budget and the features available to support your website. Hosting providers offer a range of plans from basic, affordable options to premium packages with advanced capabilities. It’s essential to evaluate what each plan includes, such as storage space, bandwidth, and security features, and whether these match your needs.
Additionally, many hosting providers offer flexible payment options, such as monthly, yearly, or multi-year plans, and may provide discounts for long-term commitments. It’s worth examining the renewal rates, as initial prices are often discounted but may increase after the first term.
Hosting a website may seem complex at first, but with the right guidance and hosting provider, it becomes much simpler. In this guide, we explored the essential steps: registering a domain, selecting the best hosting type for your needs, setting up your website, and ensuring security. Each step plays a crucial role in establishing a stable, reliable online presence.
Choosing the right hosting provider and plan is essential for both performance and scalability. The right hosting solution empowers your site to handle traffic effectively, maintain high uptime, and provide a seamless user experience. By assessing your website’s unique needs and aligning them with the right hosting type, you’re set to create a strong, dependable foundation for your online success.
FAQs
How Long Does It Take to Set Up Website Hosting?
Setting up website hosting is typically a quick and straightforward process, often taking only a few minutes to a few hours. Once you’ve chosen a hosting provider and plan, setup usually begins as soon as payment is processed. Many hosting providers offer instant activation, which means your account and hosting services are available within moments of purchase.
Can I Host Multiple Websites Using One Hosting Plan?
Yes, many hosting plans allow you to host multiple websites under a single account, provided your hosting provider offers this feature. Shared and reseller hosting plans often come with the option to add multiple domains, allowing you to manage several sites from one control panel. However, each website will share the plan’s resources, such as bandwidth and storage, which can affect performance if one site uses more resources than expected.
What Happens if I Outgrow My Hosting Plan?
If you outgrow your hosting plan, most hosting providers offer easy upgrade options to accommodate your expanding needs. For example, if your site exceeds the resources on a shared hosting plan, you may upgrade to VPS or dedicated hosting, where resources are more abundant and tailored to handle higher traffic and processing demands.
Is Free Web Hosting a Good Option?
Free web hosting can be a decent option for temporary or experimental websites but may not be ideal for professional use. Free hosting typically has limitations on resources, bandwidth, and features, which can restrict your website’s functionality and growth. Additionally, free plans often come with advertisements, lack advanced security measures, and provide minimal support.
How Do I Ensure My Hosting is Secure?
Ensuring the security of your hosting involves taking steps to protect both the server and your website’s content. Start by choosing a reputable hosting provider that offers security features like SSL certificates, firewalls, and regular backups. Implement strong, unique passwords for your hosting account and website admin areas, and keep all software, plugins, and themes up to date.


