Testing new WordPress free themes and the best WordPress plugins can cause functionality concerns, such as slow loading times. Securing and optimizing WordPress for speed without testing the website becomes daunting. Therefore, knowing how to install WordPress locally is essential.
Using a WordPress version stored on the computer, you can make changes you like, and your visitors won’t see them. It enables one to test software, learn coding skills, and scan for performance errors securely. You can leverage it as a staging environment before going live.
This blog will guide you for installing WordPress on a local server, Windows and on MacOS with 3 most efficient methods. You can go with the one most suitable for you.
Table Of Content
Installing WordPress on a Localhost
Setting up a local WordPress website is simple. However, it is crucial to note that WordPress cannot run directly on the local machine. Instead, it requires a web server, PHP, and a database to create an operating-friendly environment.
Follow these steps to build a local WordPress environment:
- Set up the environment: Install the necessary components, including a web server, PHP, and a database.
- Download a stable WordPress version: Download the latest WordPress version from the official website.
- Install WordPress on the local host: Follow the installation instructions to install WordPress on the local machine.
Installing WordPress on Windows
All Windows OS users must follow these steps to install WordPress on this operating system.
Step 1: Download XAMPP and WordPress
Before installing WordPress, setting up the proper environment on Windows is important.
DesktopServer is ServerPress’s WordPress product, making it easier for you to install WordPress locally:

You can quickly launch a new development install with just a few clicks. You get support for multisite and WP-CLI, which works on both Windows and Mac.
ServerPress offers free and premium versions. In the premium version, these are the advanced features:
- Multisite support.
- Import and export of third-party backups.
- Deployment directly to your live website.
- Bypassing any login plugins.
Step 2: Download DesktopServer to Your Computer
First, download DesktopServer from its website to install WordPress locally. There are Windows and Mac versions, but you must choose the Windows version.
Go to the ServerPress website and click the Free Download button in the top right-hand corner for DesktopServer (or Buy Premium if you want to).
Using this, the .zip will be automatically downloaded to your system.
Launching the DesktopServer Installer
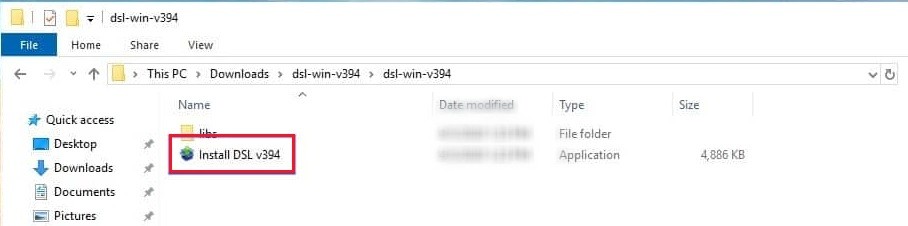
After downloading the file, launch the DesktopServer installer. Before that, unzip the file you just downloaded. Be patient till it is complete.
Then click on Install DSL:
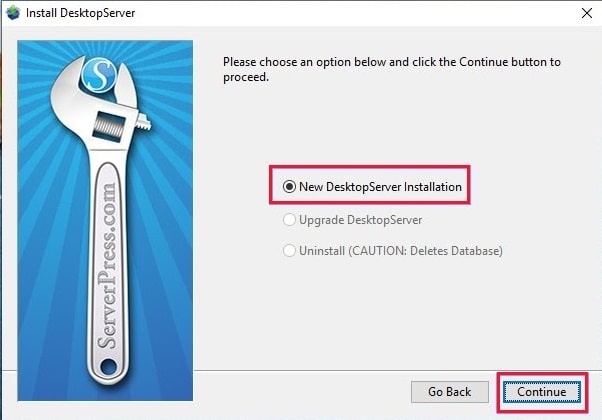
At first, you will be asked to restart with administrator privileges. Select Continue. Next, you will be asked to accept the terms of service and select an option for your installation:
Select “New Desktop Installation” and click on “Continue”. The installation process starts with this and it will take sometime to complete.
Once the installation is complete, a popup stating it has been completed will appear. You will also know where the application is located on your computer. Once you are done, click on Finish.
Step 3: Enabling Plugins and Starting Apache and MySQL Services
The following developer plugins can be enabled after the installation is complete:
- Debug and Trace
- DS-CLI
- Mailbox Viewer
- InnoDB Autoconvert
Step 4: Creating a New Development Site
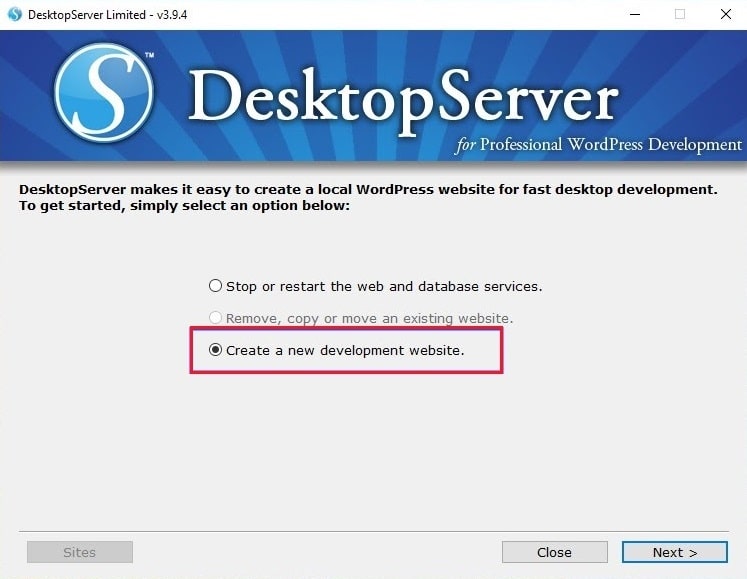
After you have enabled plugins and started the web and database services, you will be prompted to select Create a new development website:
Here, the program will install WordPress for you. Select the website’s name, which will also be its local address. We are using here “testabc”, so the development URL will be “testa.dev” on the local machine:
DesktopServer allows you to create multiple blueprints, similar to a pre-built template. However, we want a fresh installation here. The latest WordPress version is the default blueprint, so you don’t need to download it from the repository and unzip it manually.
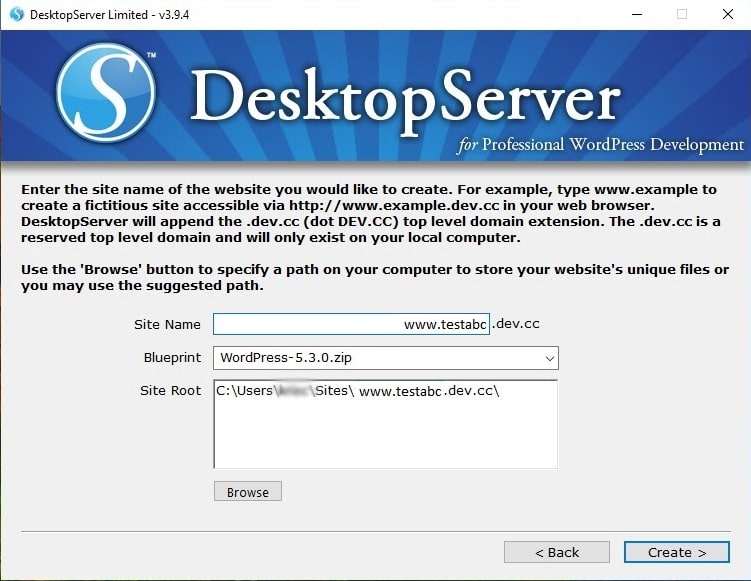
Your site’s root is located in My Documents by default. If you don’t have any issues with this, you can leave it as is. We moved them to a folder called “WordPress” at the root of our C: drive to simplify things. Once you’re done, click on “Create.” Then, you will see the URL of your local WordPress install. To complete the installation, click that button.
Step 5: Installing and Configuring Your WordPress Site
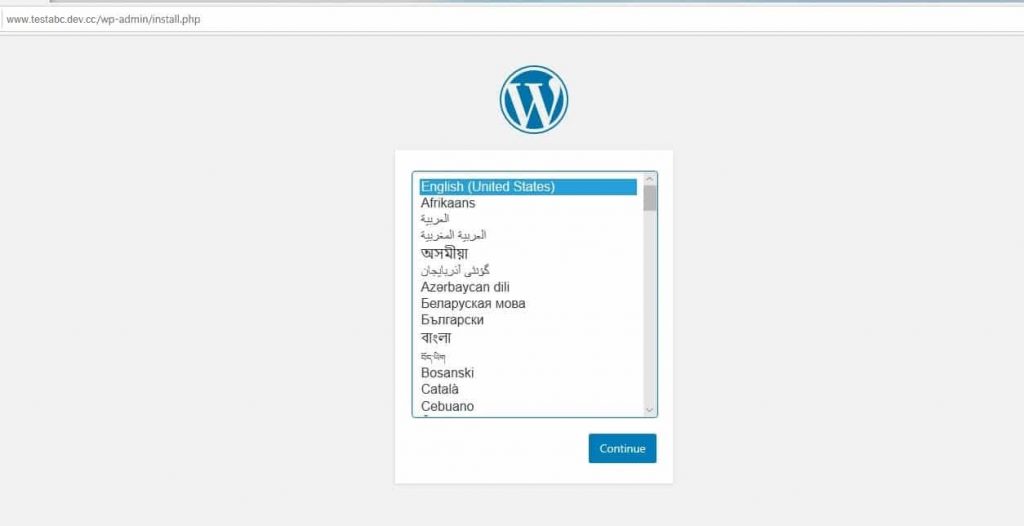
Upon clicking the URL, your WordPress website will open in a browser tab:
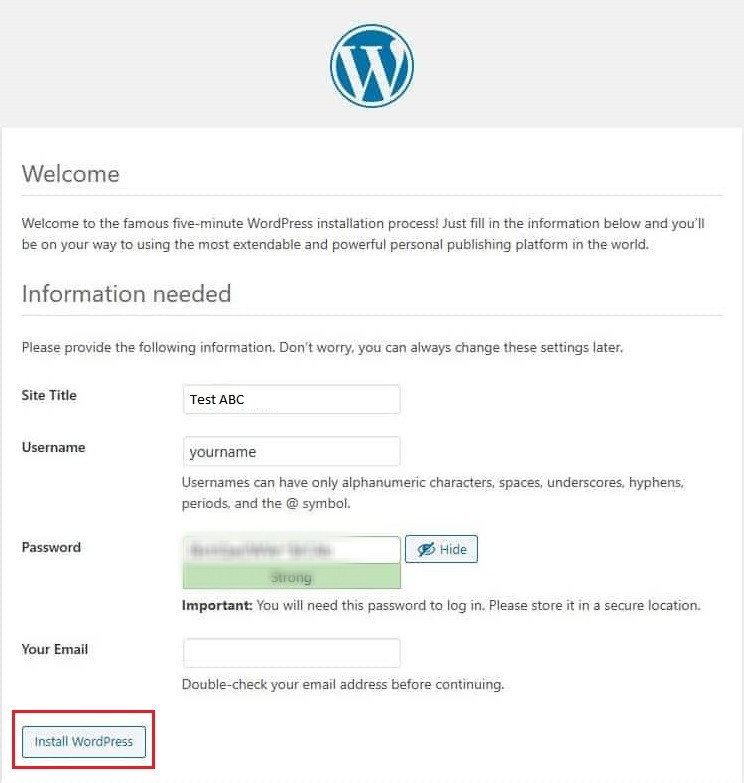
Select your language and click on Continue. You then need to enter your site title and select a username (in case you want to make the site live later, avoid using “admin” as a username), type a strong password, and your email address:
Then, select install WordPress. Now, you have installed WordPress locally, and your website is running. Browse the local install and test to see if your website works. Let’s browse to “testabc.dev” in our browser. Bypassing the login plugin feature selected during setup allows you to choose the admin and be automatically logged in. It’s easy to use in a development environment but not on a production website.
Tips for Using DesktopServer for Installing WordPress Locally
Windows handles file permissions differently, which may sometimes cause an error message when logging in, indicating that WordPress fails to update.
To resolve this, open the Command Prompt as an administrator and navigate to your WordPress directory. Then, run the following command:
attrib -s *.*If you need to create or modify an additional WordPress website, relaunch the DesktopServer.exe file. With DesktopServer, you can stop and restart services, set up new websites, make edits, and even export or import projects.
To access phpMyAdmin, click the Sites button at the bottom left of the interface. Alternatively, enter “localhost” into your browser’s address bar to access the administrator interface. You’ll find links to all your WordPress sites, including their dashboards and phpMyAdmin access.
One of DesktopServer’s best features is WP-CLI (or DS-CLI), which can be launched with a single click. If you selected DS-CLI during the installation, a direct link will appear on your dashboard, allowing you to execute WP-CLI commands effortlessly.
Additionally, DesktopServer provides an export feature, enabling you to transfer your WordPress website directly to a live server or save it as a .zip file. However, this feature is only available in the premium version. Now, you have successfully installed WordPress locally with DesktopServer and you can easily manage it with the following steps:
Accessing the WordPress Dashboard
Follow these tips to access the WordPress dashboard successfully.
1. Logging into the WordPress Dashboard
After successfully installing WordPress, you can access its dashboard. To do this, open your web browser and enter http://localhost/your-site-name/wp-admin/ in the address bar. Replace your site name with the actual folder name where you installed WordPress.
Replace your site name with the actual folder name where you installed WordPress. This will take you to the WordPress login page. Enter the password and username you set during installation and click Log In.
After you sign in successfully, you will reach the WordPress dashboard. From here, you can run your WordPress website, create content, enable themes and plugins, and set website preferences. The dashboard shows all important items in the left column, making it easy for both beginners and experts to use.
2. Exploring the WordPress Dashboard
The WordPress dashboard serves as your prime work environment. You will find different sections labeled Posts, Media, Pages, Comments, Appearance, Plugins, Users, Tools, and Settings in the left navigation menu. They organize specific parts of WordPress with particular tasks. You can make and handle blog entries under Posts and place static pages (such as About or Contact) under Pages.
From Appearance, you can upload themes, adjust your website design, and modify menu options. The Plugins section helps you add software extensions to your website to provide more features. You can control user roles from a single interface through the Users tab and navigate to Settings to edit the site title and permalink settings. Before working with WordPress, you should familiarize yourself with its core areas to manage your website better.
3. Creating and Managing Content
One of the main objectives for installing WordPress is to create and manage content effortlessly. You can add new posts by navigating to Posts> Add New, where you draft articles, add images, and format content using the Gutenberg Block Editor. Similarly, you create static pages under the Pages tab and organize your website’s structure.
You can also manage media files in the Media Library by writing posts and pages. It allows you to upload images, videos, and other files. Additionally, WordPress has basic tools to plan content release times and arrange content tags while using special link formatting to boost search engine rankings. You can manage website updates and make it grow larger by learning content management features.
4. Customizing Your Website
After logging into the WordPress dashboard, you can personalize your site to match your brand or preference. Under the Appearance tab, you can explore various free and premium themes to change your website’s layout and style. The “Customize” option allows you to modify the site title, colors, fonts, menus, and other elements without touching a single line of code.
Another important customization aspect is widgets and menus. You can add widgets to your sidebar, footer, or other areas, such as recent posts, categories, or a search bar. Through the “Menus” area, you can plan navigation menus, including essential links, and make the user interface easy to follow. You can modify your WordPress website effortlessly using its simple design tools without specialized knowledge.
Use XAMPP to Install WordPress on Windows 11
XAMPP is a free, open-source, cross-platform web server solution stack package that provides a local web server environment for testing and development, consisting of Apache, MariaDB, PHP, and Perl. Using this platform, you can install WordPress on Windows 11.
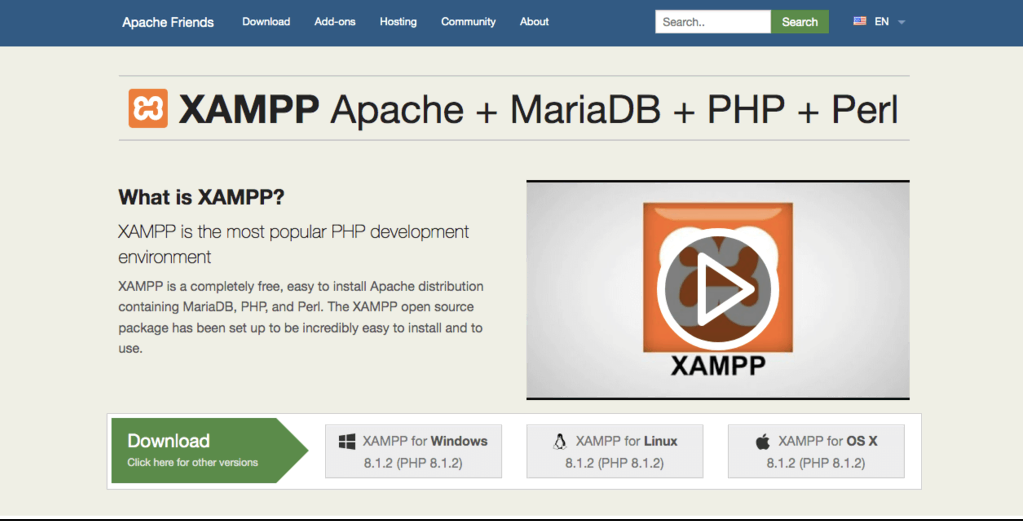
Step 1: Installing XAMPP on a Windows Computer
Firstly, you have to download and install XAMPP on your computer.
Once the download is finished, the XAMPP installer must run the newly downloaded file.
If there is an antivirus program running, you may get a popup message like this:
Popup virus message
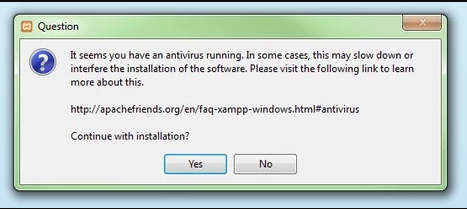
Just click “Yes” and continue installing it.
You may also obtain a User Account Control (UAC) prompt. If it does, click OK to continue.
After you have read all the pre-install messages and warnings, you should see the following message to start the installation process. Click “Next”.
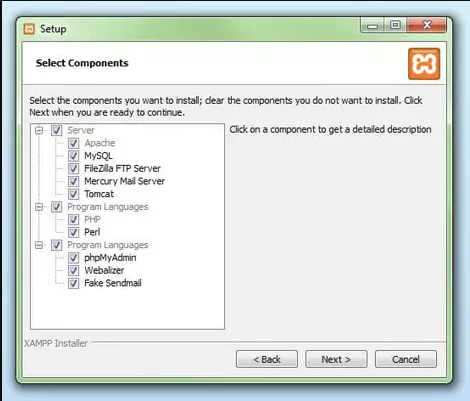
You can choose the desired components, as all others are optional. Once selected, click the Next button.
Next, select the installation folder for XAMPP. You can create a new folder or use an existing one within the C: directory. We recommend keeping the default location.
XAMPP is now ready to install the selected files.
Step 2: Starting the Installation Process
Click “Next” to start the installation process. Depending on how many packages you install, it takes a few minutes to finish. Once the installation is done, immediately begin with the XAMPP Control Panel by checking the “Do you want to start Control Panel now?” checkbox and click Finish.
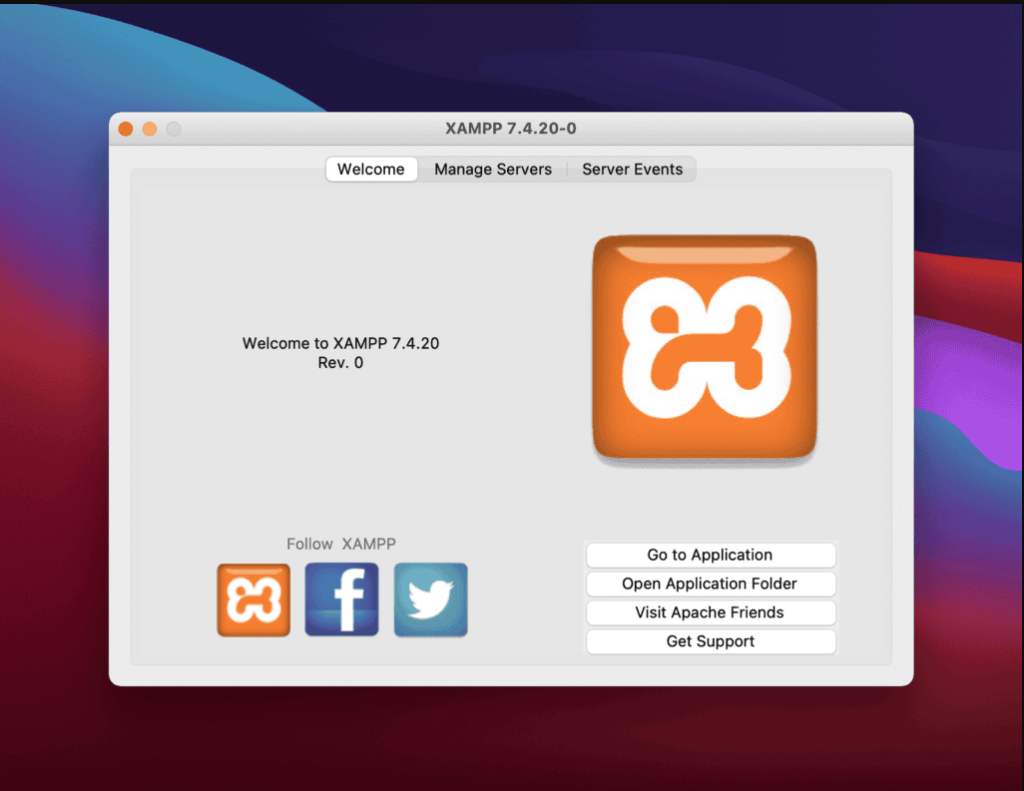
If you need to start XAMPP differently, navigate to the XAMPP folder in your chosen installation directory and open the XAMPP Control Panel file. When the Control Panel opens for the first time, select your preferred language and click the “Save button.” You will then see the XAMPP Control Panel screen.
Step 3: Downloading the WordPress files
Now, it is time for you to add WordPress to the local host site, which has just been created. You need to download the latest version from WordPress’s official website.
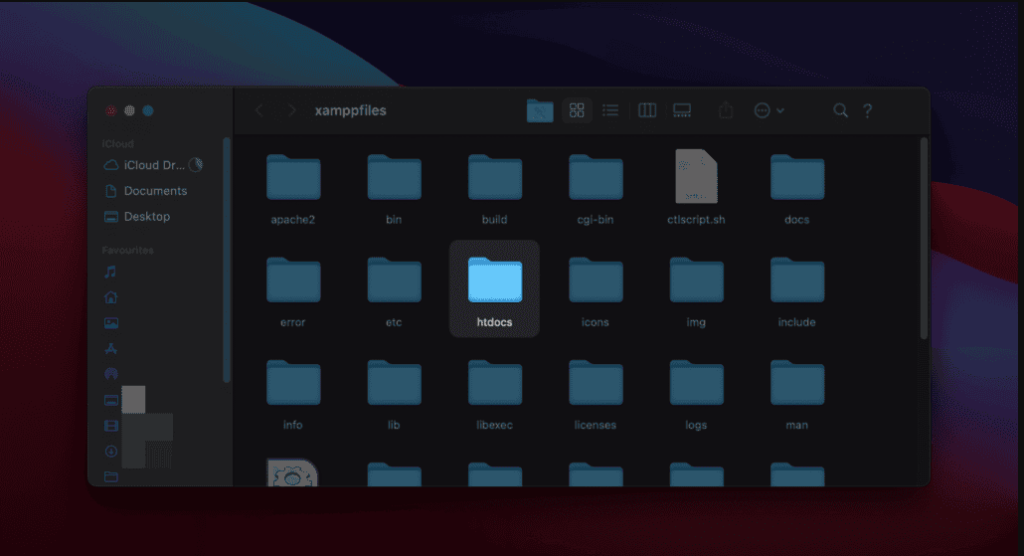
Once the download is completed, navigate to the folder where you installed XAMPP. From there, open the htdocs folder. Create the WordPress folder for your website in htdocs. The folder name will become the subname used to access your WordPress website.
Step 4: Creating a Database for WordPress
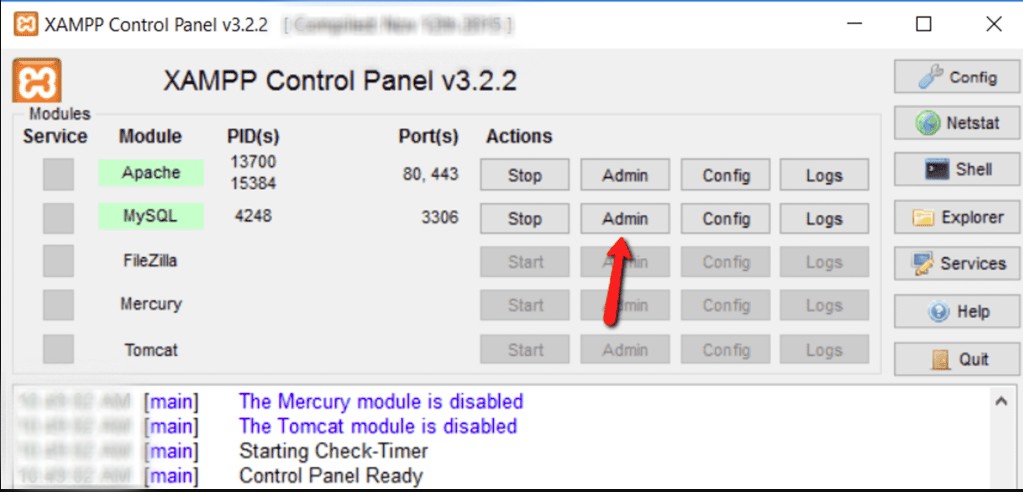
Start making the MySQL database to manage your local WordPress development. Start phpMyAdmin from the XAMPP control panel by pressing the Administration button beside MySQL.
The phpMyAdmin web tool opens its main window through your default internet browser. Starting a new database for your WordPress site only requires you to select the “New” option. Provide a title for your new database. Click “Collation” in the second drop-down menu. Now click “Create”. Set your name for the database while keeping the name in mind because you will use it in the next steps.
Step 5: Installing WordPress Locally
After installing XAMPP, copying WordPress files, and creating a database, navigating to http://localhost/newsite within the preferred browser should bring up the WordPress installation wizard.
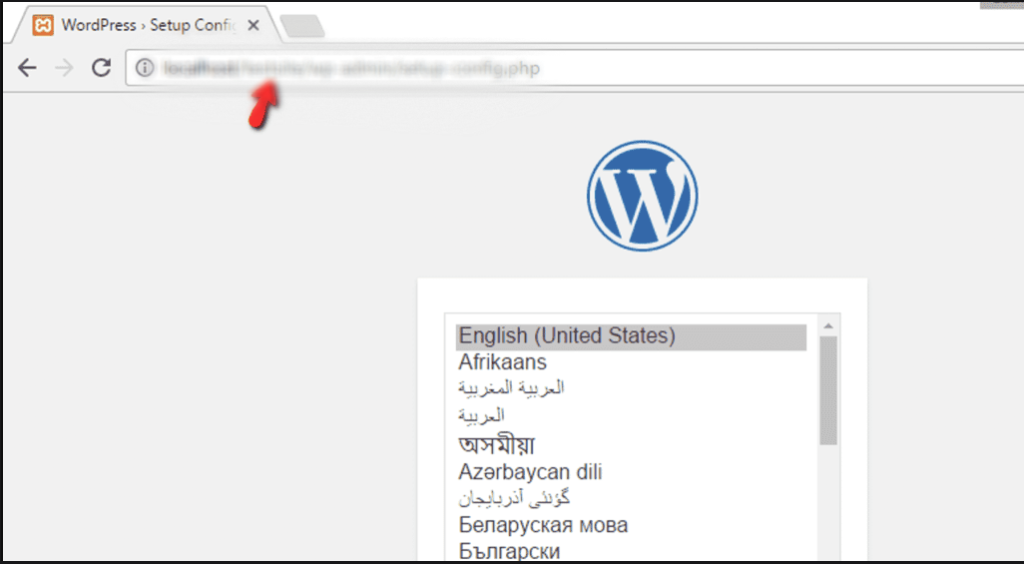
- Choose the right language.
- Choose the preferred language and click Continue.
The next screen will ask you to remember the database information you created earlier. Click the ‘Let’s go’ button to continue the setup.
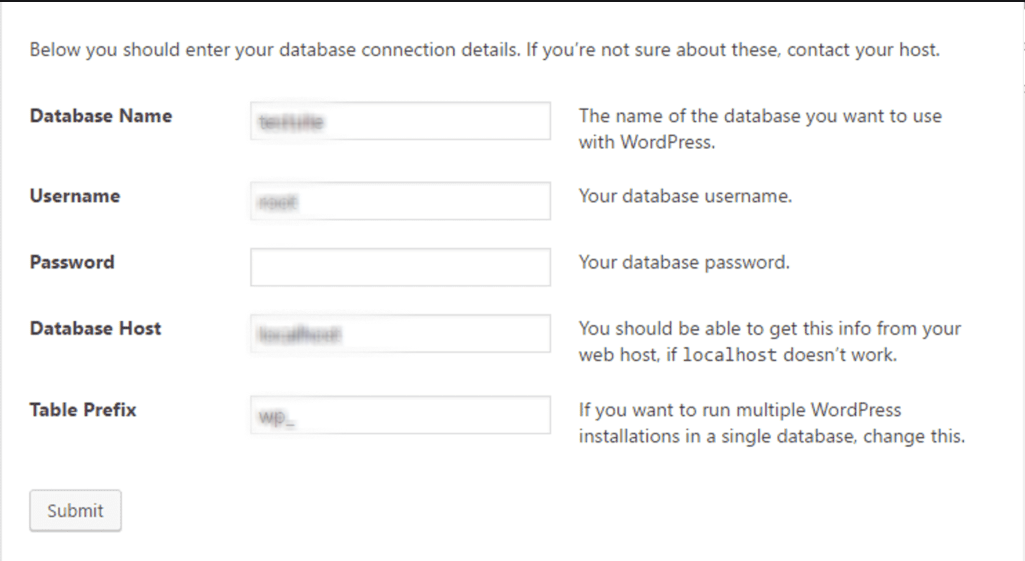
Next, you have to fill in the details like database name, username, and table prefix in the next window.
Installing WordPress on Windows might sound tricky, but it becomes a breeze with the right web hosting! If you want a seamless experience, WordPress hosting is the way to go. Instead of dealing with manual installations and configurations, a reliable web hosting provider like MilesWeb offers pre-installed WordPress, automatic updates, and optimized performance. This means you can focus on building your website while MilesWeb handles the technical aspects.
Those who prefer a hands-on approach can install WordPress on Windows using tools like XAMPP or WAMP. These processes require setting up a local server and handling database setups and security updates directly. However, MilesWeb handles everything with its managed WordPress hosting, so you can deploy your site quickly. They also provide continuous 24/7 website maintenance to keep your site functioning properly. Thus, you can get WordPress hosting from MilesWeb without facing complicated setup challenges.
FAQs
How do I configure the WordPress database connection during installation?
During installation, enter the database name, username, password, and host (mostly called “localhost”). It ensures MySQL is running and credentials are right. Alternatively, edit wp-config.php to set database details manually.
How do I troubleshoot common WordPress installation errors on Windows?
Check if MySQL and Apache services are running in XAMPP or WAMP. Verify database credentials, update PHP version, and enable required extensions. Review error.log for specific issues and ensure proper file permissions.
How do I create a backup of my WordPress installation on Windows?
Copy the entire WordPress folder from htdocs or www to a safe location. Export the database via phpMyAdmin and save the SQL file. Use plugins like UpdraftPlus for automated cloud backups.
How do you configure a firewall for a local WordPress installation on Windows?
Allow HTTP and HTTPS traffic in Windows Defender Firewall for local access. Ensure Apache and MySQL have firewall permissions and restrict wp-admin access. Use security plugins like Wordfence for added protection.


