As a control panel, DirectAdmin allows users to import and export MySQL databases via phpMyAdmin.
Let’s see the individual processes one-by-one.
To Import the MySQL Database
1. Log in to the DirectAdmin panel.
2. Go to the Extra Features section and click on phpMyAdmin.

3. The sign-in window will open. Log in to your phpMyAdmin account with your database’s username and password.
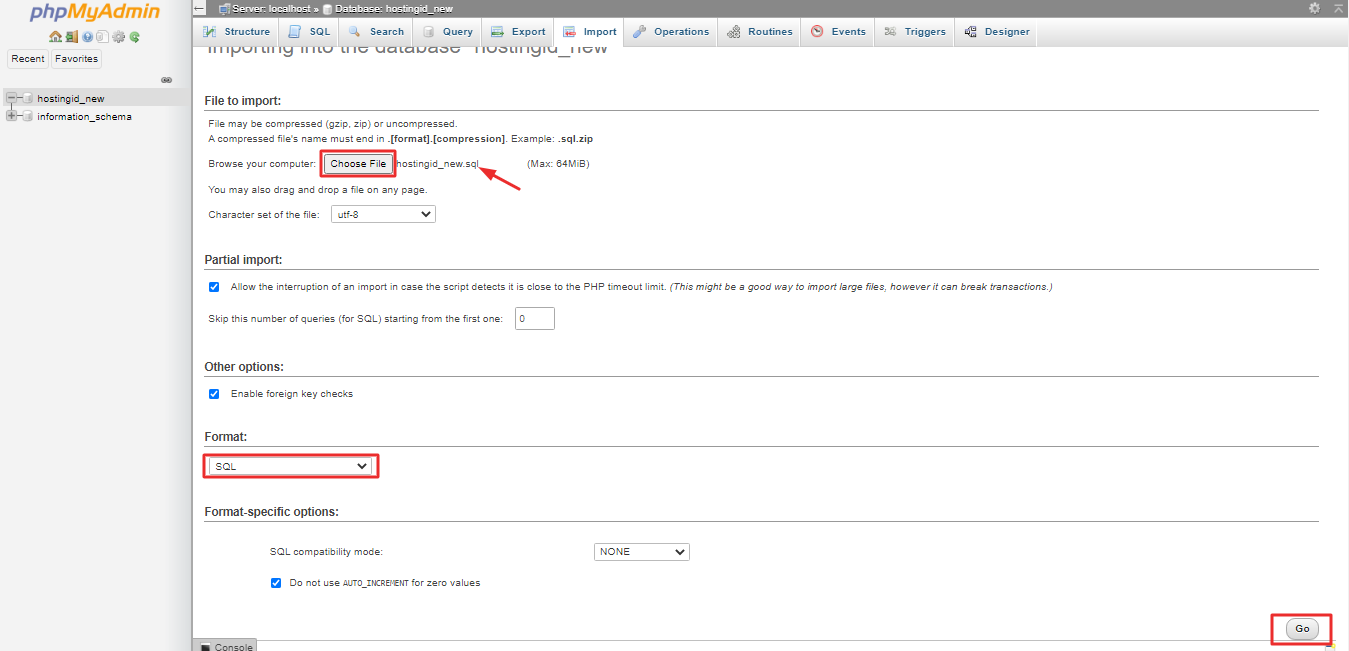
4. Select the database to store the tables you will import and, click on the Import tab.

5. Then, tap the Choose File button in the File to import section to select the database you want to import. Go to the Format section and select SQL.
Note: We recommend you don’t change the other settings unless you know what they do. Keeping default settings will be fine.
Click on Go when you are ready.

A success message is displayed as the system imports the database.
To Export the MySQL Database
1. Log in to your phpMyAdmin account with your database’s username and password.
Note: To log in to your phpMyAdmin account successfully, you must be logged in to your DirectAdmin account.
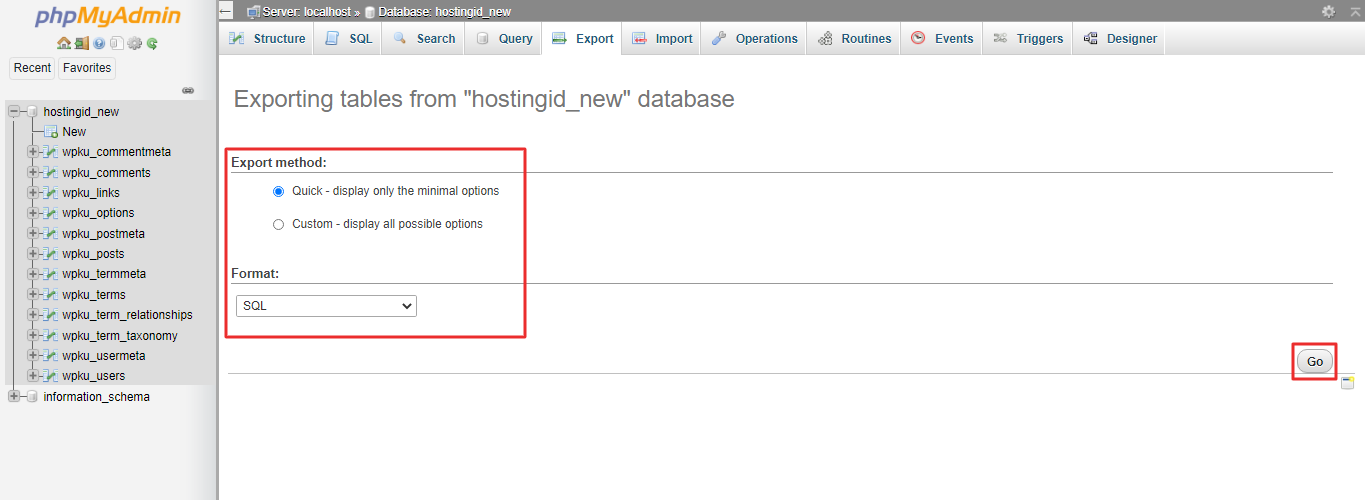
2. Select the database which you want to export and, click on the Export tab. Here, we have chosen the database hostingid_new to export.

3. Next, you have to choose the Export method.
We suggest you keep the default option Quick that displays only the minimal options, as we have. If you know all customizations and have an idea of what they do, you can opt for the Custom option.
4. Click the Go button when everything is set.

The system downloads the database on your machine.


