Ports are centers where the IP addresses and Internet Protocols with the destination or origination address start a communication session. Ports are part of the client-server model and have a 16-digit number for their identification. Needless to say, the CSF firewall needs configuration to open a port considering the security of the server.
If you are a user with a cPanel server, you can customize the port settings of the CSF firewall with WHM. If you want to install and make more customizations to the CSF firewall, please refer to How to Install CSF Firewall via WHM/cPanel?
To Open a Port in CSF Firewall
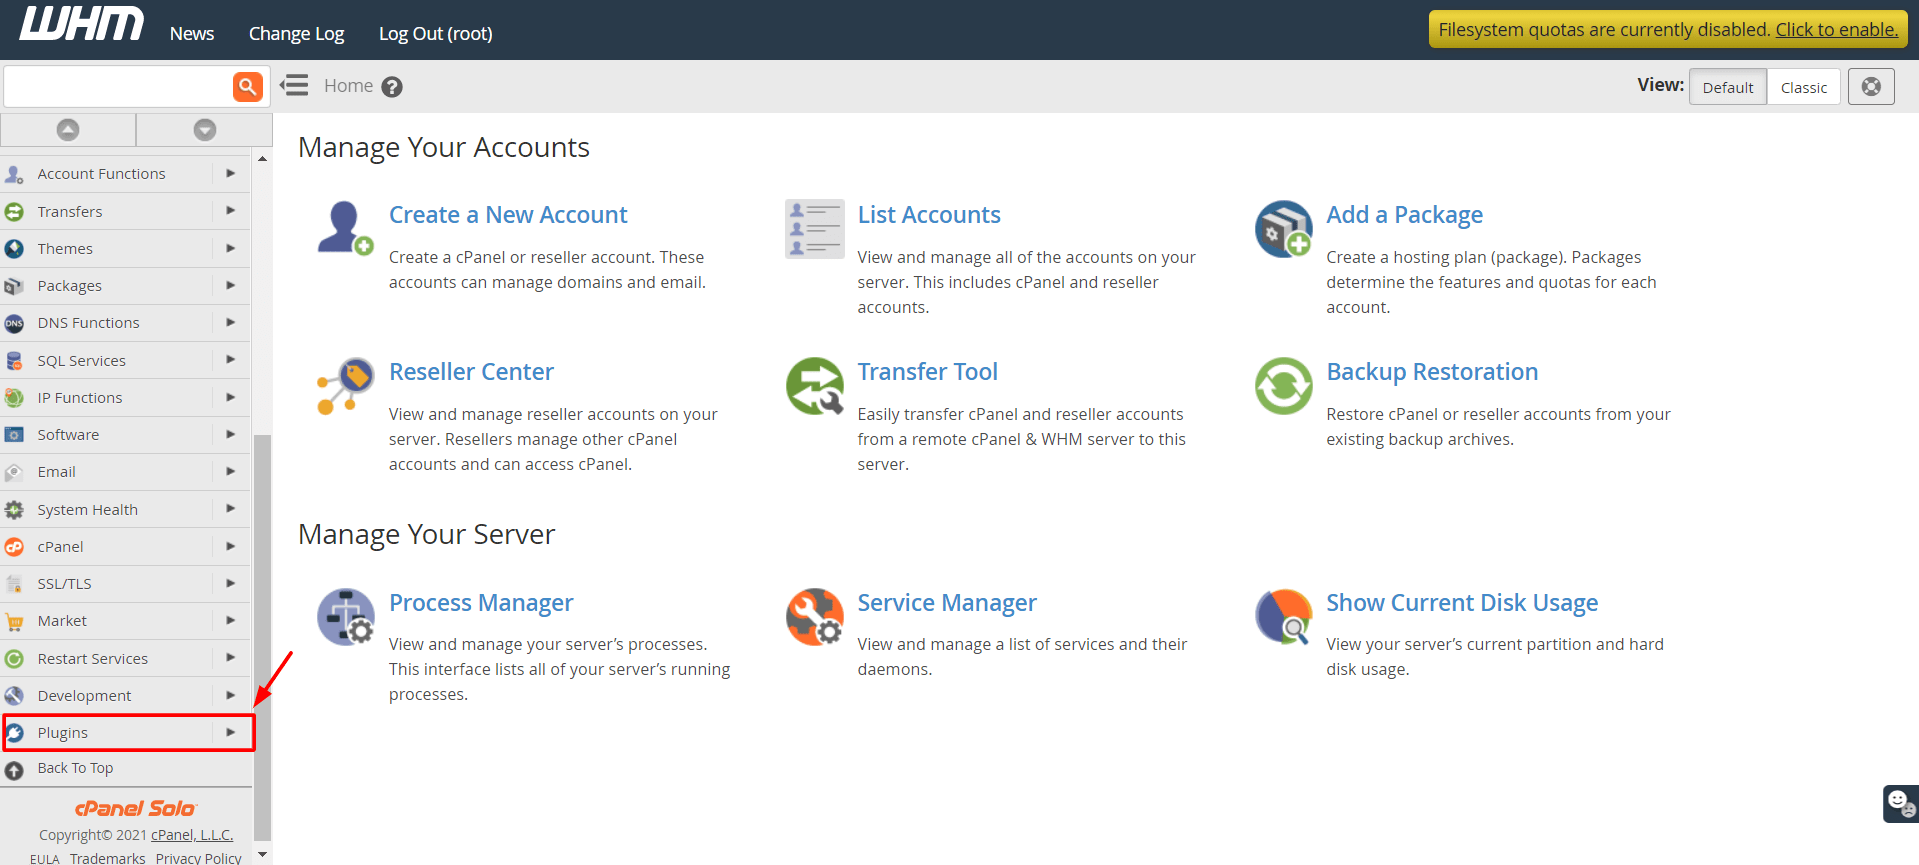
1. Log into WHM with your root account.
2. Select the Plugins option from the navigation menu.

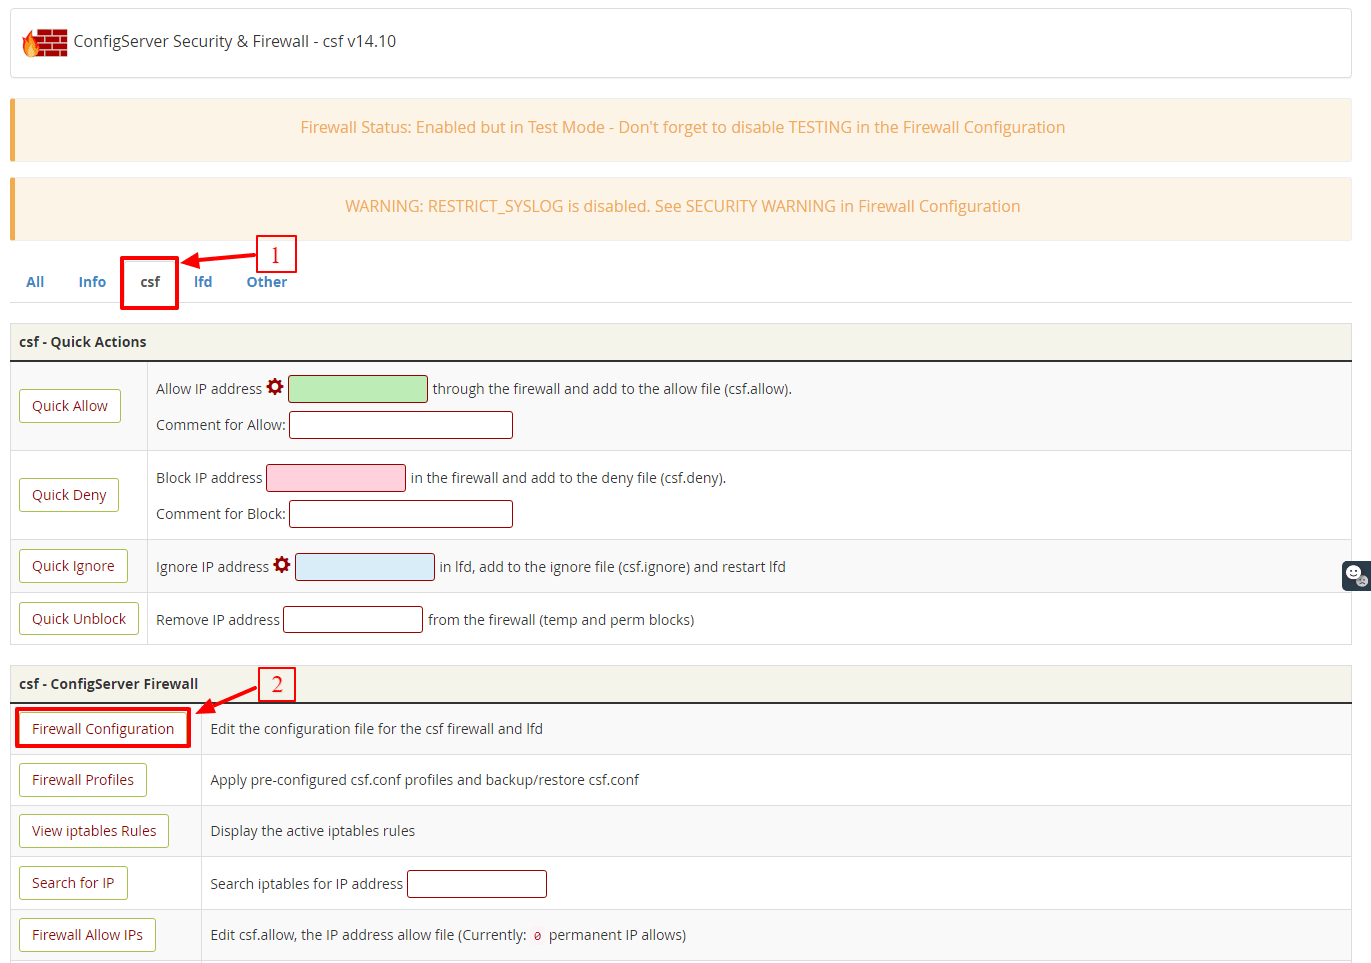
3. Click on ConfigServer Security & Firewall.
The ConfigServer Security & Firewall panel will appear.
4. Go to the csf tab and click on the Firewall Configuration button in the csf-ConfigServer Firewall section.

Various customization options for the firewall will appear.
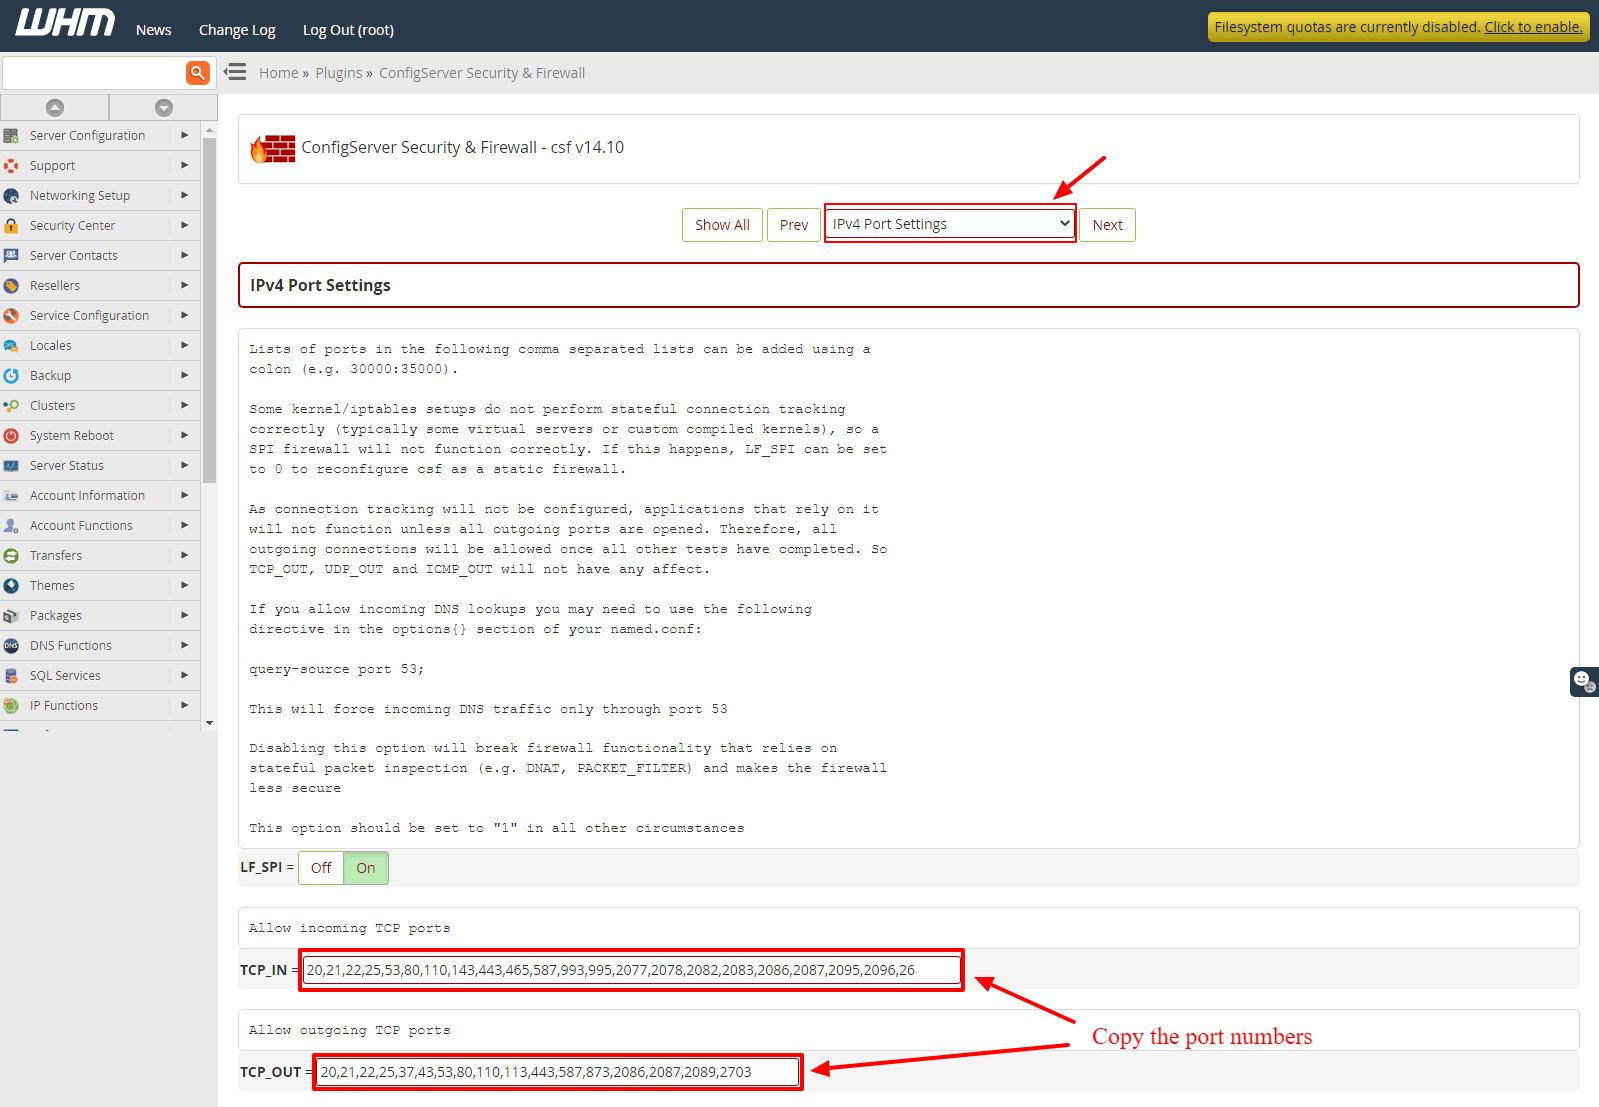
5. Select the IPV4 port Settings section from the dropdown list.
6. Copy/enter the following port numbers in the Allow incoming TCP ports and Allow outgoing TCP ports fields.
Allow incoming TCP ports:

20,21,22,25,53,80,110,143,443,465,587,993,995,2077,2078,2082,2083,2086,2087,2095,2096,26
Allow outgoing TCP ports:

20,21,22,25,37,43,53,80,110,113,443,587,873,2086,2087,2089,2703

Although we recommend these port numbers, you can enter other port numbers as per the requirement.
7. Click the Change button at the end.
It will save the changes you made to the firewall configuration.
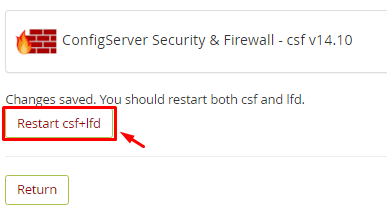
8. Click on Restart csf+lfd.  It will restart the csf firewall and apply the changes.


