Users with administrator login hold unchallenged authority over any server. Therefore, it is advisable to keep the details of the admin account as secure as possible. Speaking of security, Plesk can restrict the administrator access to a particular IP address. It makes hacking into the system from a remote location impossible.
To Restrict IP Address for Administrator Access
1. Log in to your administrator account of Plesk.
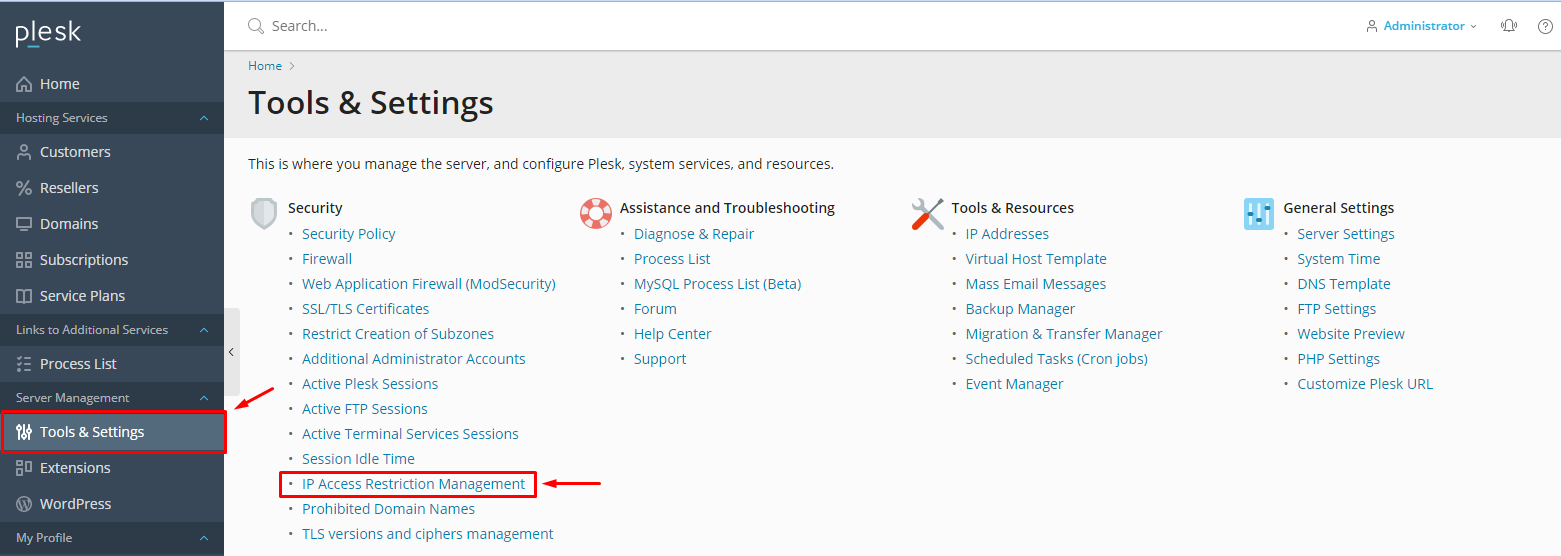
2. Select the Tools & Settings option from the side menu.
3. Click on the IP Access Restriction Management under the Security section.

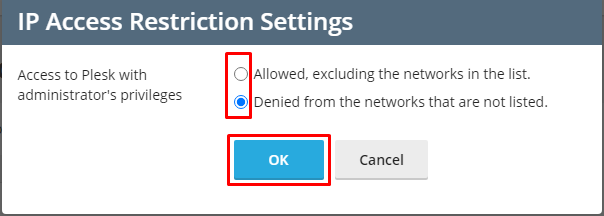
4. Click on Settings.

5. Choose between-
- Allowed, excluding the networks in the list: Makes the list of IP addresses from where the Administrator or Additional Plesk Administrator will not be able to log in to Plesk.
- Denied from the networks that are not listed: Only the restricted IP addresses in the list will be authorized to log in as Plesk Administrator or Additional Plesk Administrator.
6. Click OK.

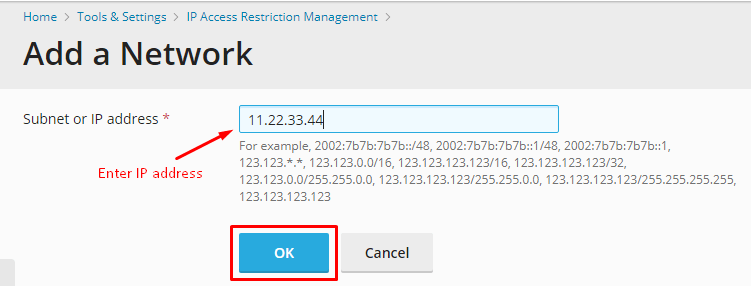
7. Click on Add Network to add a new restricted IP address.

8. Enter the Subnet or IP address to add to the list of restricted IP addresses and click OK.

This is how you can restrict an IP address for administrator access in Plesk.


