In this guide, we’ll get to know, how you can terminate the cPanel account in WHM.
Basically, before terminating the account, you need to make a note this process cannot be taken back. By no means, you can recover the account unless you have backup available. So, before terminating the account, you can take the backup and download it on your system.
Note: This guide is helpful for Resellers, and accounts with VPS or dedicated servers.
Steps to Terminate a cPanel Account in WHM:
Here are the steps to terminate a cPanel account in WHM.
Step 1: First you need to login to the WHM account.
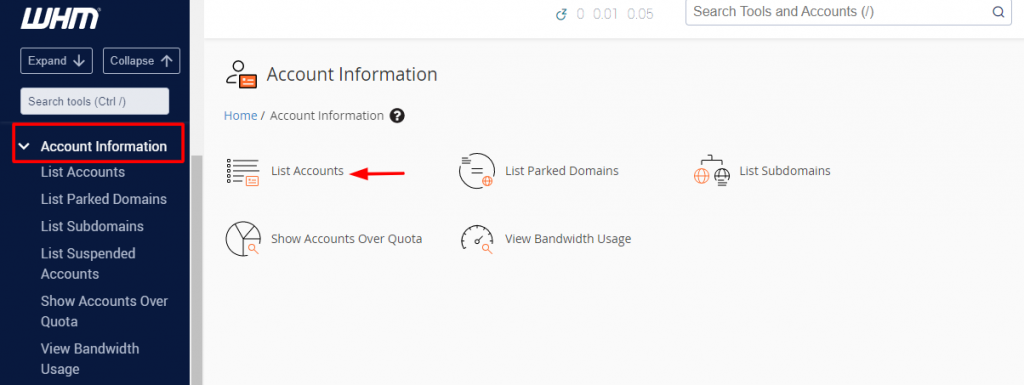
Step 2: On the left-hand side pane, navigate to the Account information section>> Then the List Accounts.

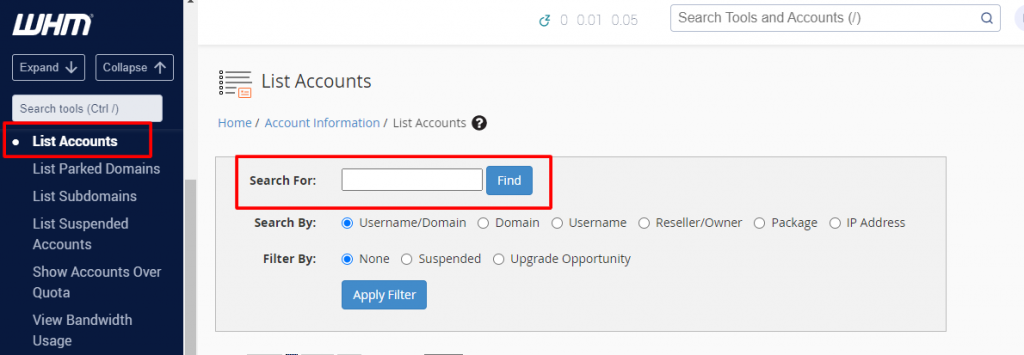
Step 3: When you click on the List Accounts, it will show you the list of the cPanel accounts that are created on your server. You can also search for the required cPanel account you want to terminate with the option given, “Search For”.

Step 4: Now besides the domain, you will notice a small “Square Box”. By clicking on this box, you will get to see the action panel for this cPanel account. You then have to click on the “Terminate Account” option to remove the account.

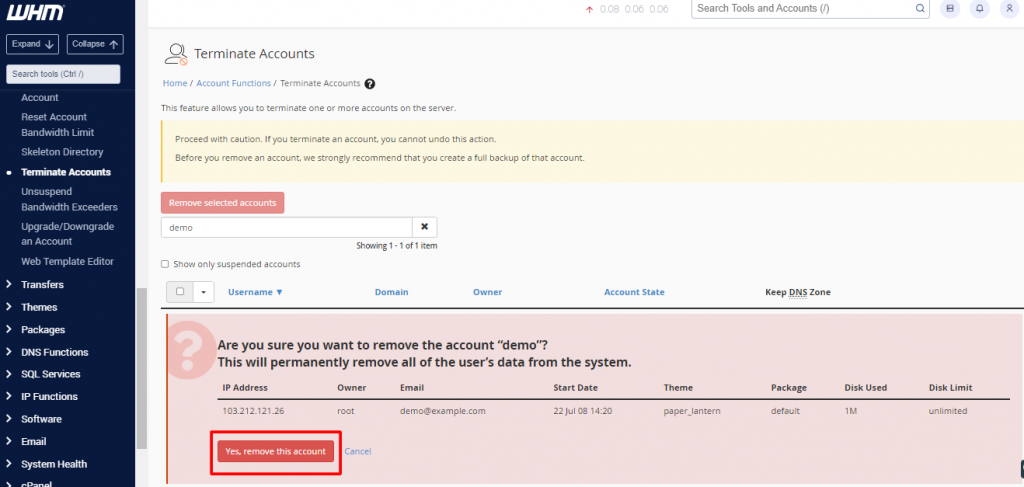
Step 5: After you click on the Terminate account option, it will ask you a question, “ Are you sure you want to remove the account (account name)? It also notifies, this will permanently remove all of the user’s data from the system.
Step 6: You need to then click on, “Yes, remove this account”.

This was the last step, and now your cPanel account will be terminated from the server. It may take time to do so, after all it all depends on your account size.
And that’s it! This is how you can terminate a cPanel account in WHM.


