Microsoft Windows Server 2016 is an operating system developed by Microsoft. It is mainly designed to run networked applications. And Windows 2019 is the latest Windows OS version and has advanced features to deliver improved performance over 2016. You can generally set up email accounts for Outlook.
In this guide, we’ll get to know how to set up an email account for Outlook 2016/2019 on Windows.
Let’s begin with the steps!
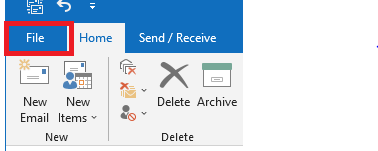
Step1: The first step, is open Outlook 2016 or 2019 from your start menu. Then, click File tab on the top left corner.
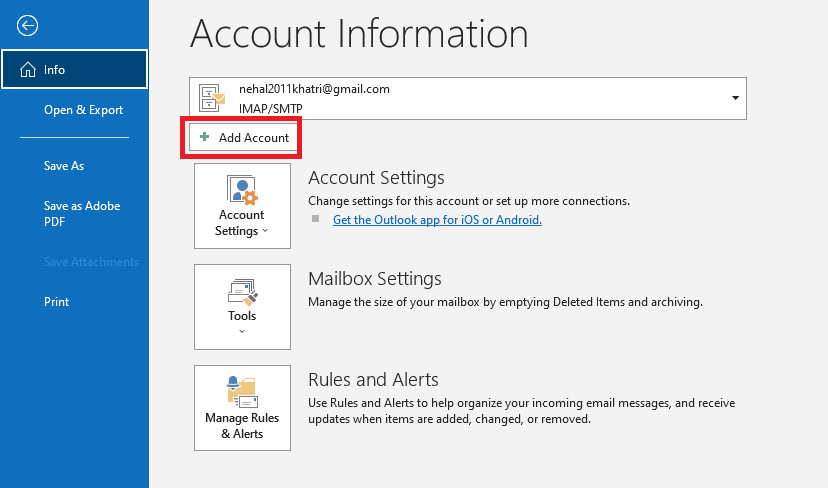
Step 2: Now, click on the Add Account to start the account setup process.
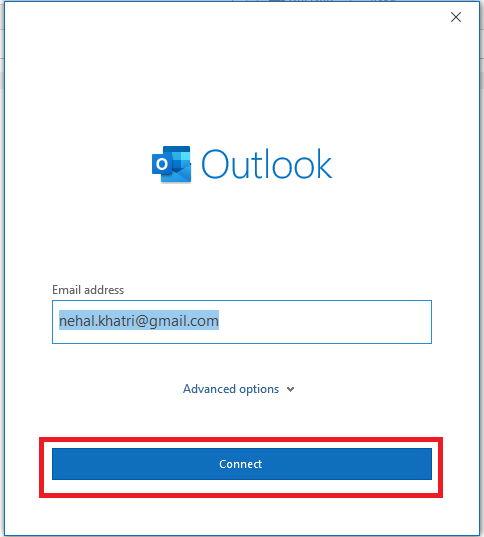
Step 3: Type in the email address that you want to add and then click on Connect.
Related: How to Setup Microsoft Outlook on Windows Operating System?
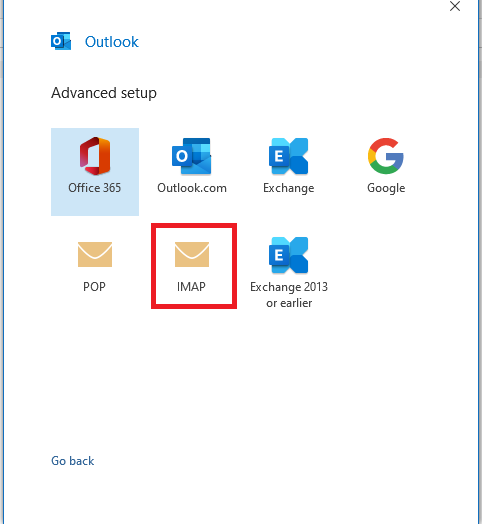
Step 4: Then, you will have to select the protocol. From the options, choose POP or IMAP all depending on the protocols you prefer. But generally. IMAP is preferred. And here, in this article, we have considered IMAP.
After, you select the IMAP, you will get to see the IMAP Account Settings. Here, you have to enter all the incoming and outgoing settings.
- Server: This is your server name. In the below example, we have used imap.gmail.com as the incoming server.
- Port: If you have selected IMAP, the port number is 993. While, for outgoing ports, use 465 or 587.
- Encryption: Is SSL/TLS
- And lastly, you can check the box: Require logon using Secure Password Authentication
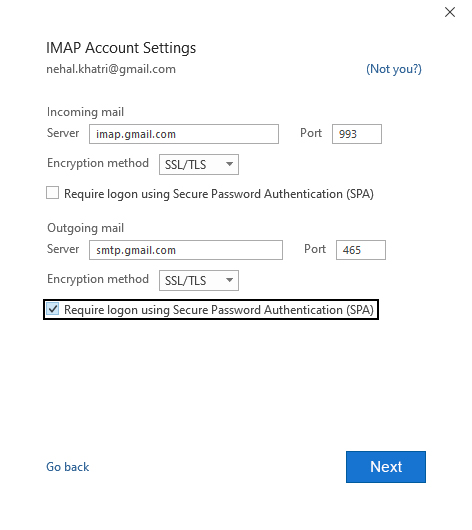
Just click on the Next, after you enter all the information. And then, you will have to enter the Password of your email account.
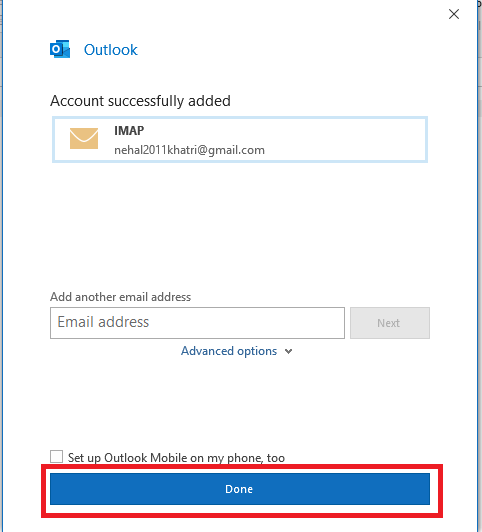
Your email account will be then configured successfully. Click on Done, and the process is complete.
You will get to see a confirmation if it was successfully set up.
And this is how you can setup Microsoft Outlook 2016 or 2019 on Windows.

