If your website is having availability issues, the starting point is to check out the web server logs. The new Plesk feature “Website Log Check” can help save your time and efforts. Website Log Check basically scans the web server logs for the frequent issues, and suggests the different ways to fix the issue.
In this article, we will get to know the steps the check the error logs of ASP.Net websites in Plesk panel.
1. Log in to the Plesk Panel.
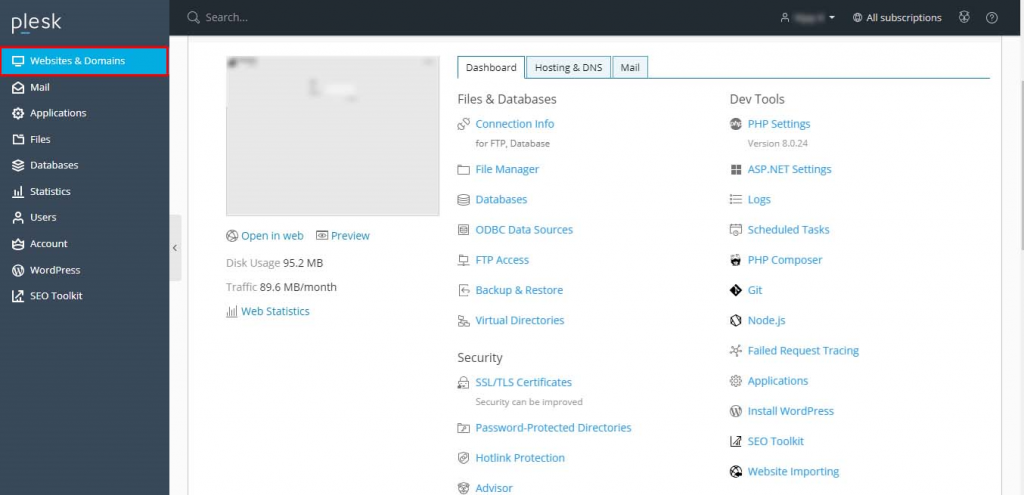
2. Now, on the left-hand side in the Plesk panel dashboard, choose Website & Domains option.
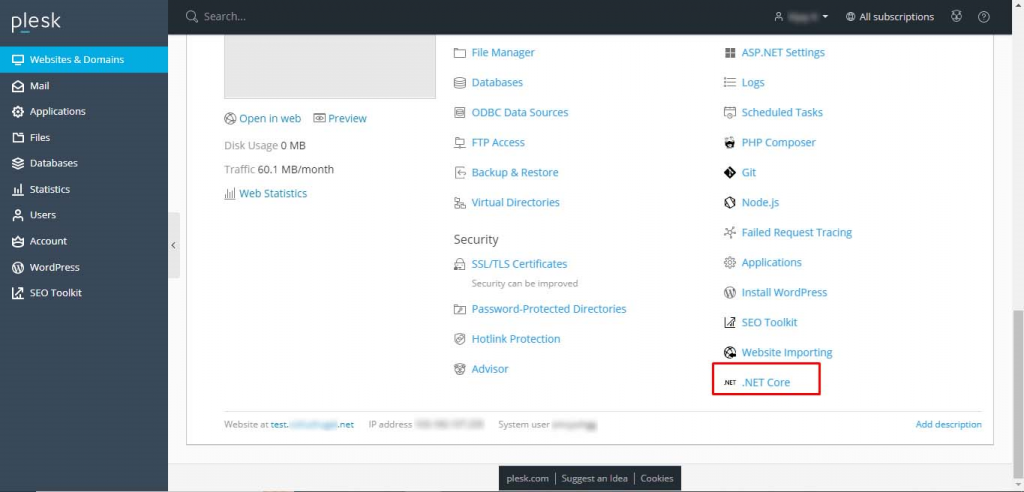
3. In the Website’s & Domain’s dashboard, scroll down and choose the new extension introduced by Plesk .NET Core extension.
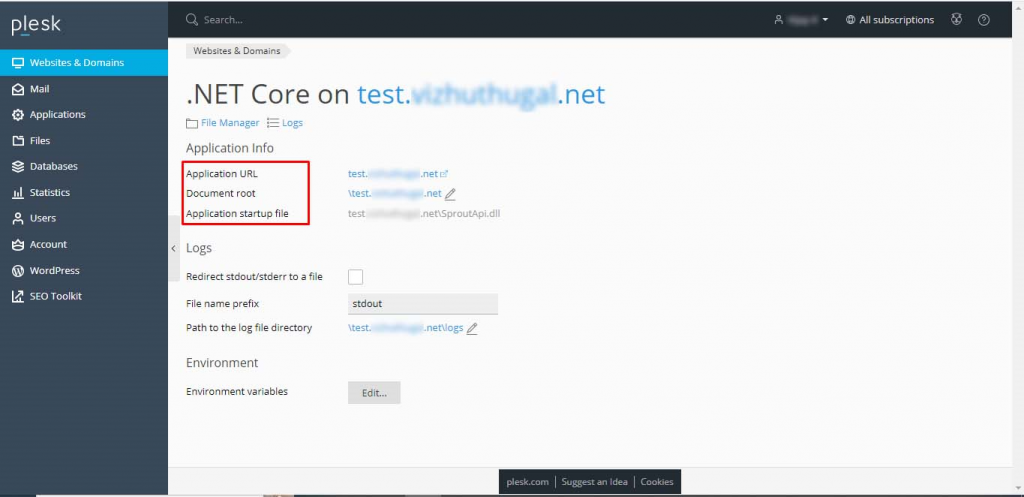
4. Here, you will get to see the Application Info like: Application URL, Document root, and Application startup file, etc.
5. Click on the Log Check box and you will get to see the path to log file directory.
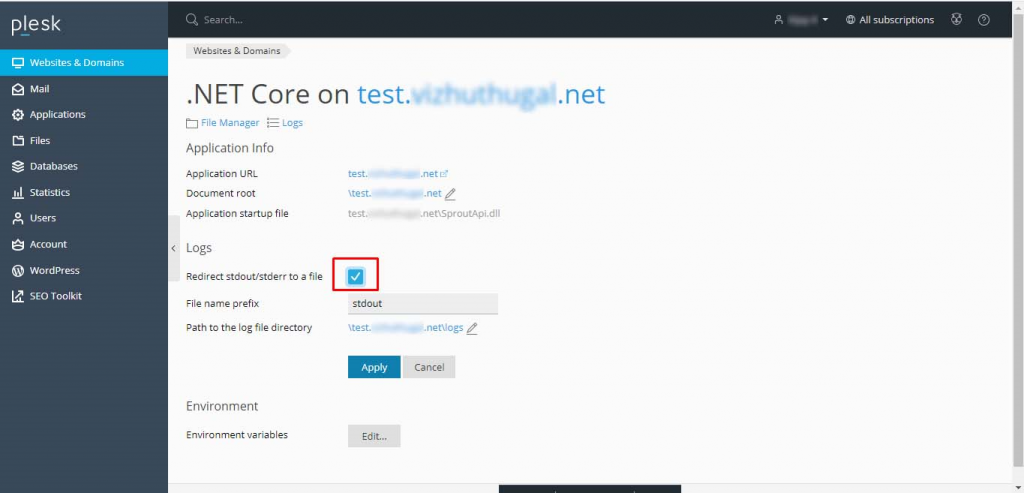
6. However, if a user has to shift the path of the log directories, they can choose another log path.
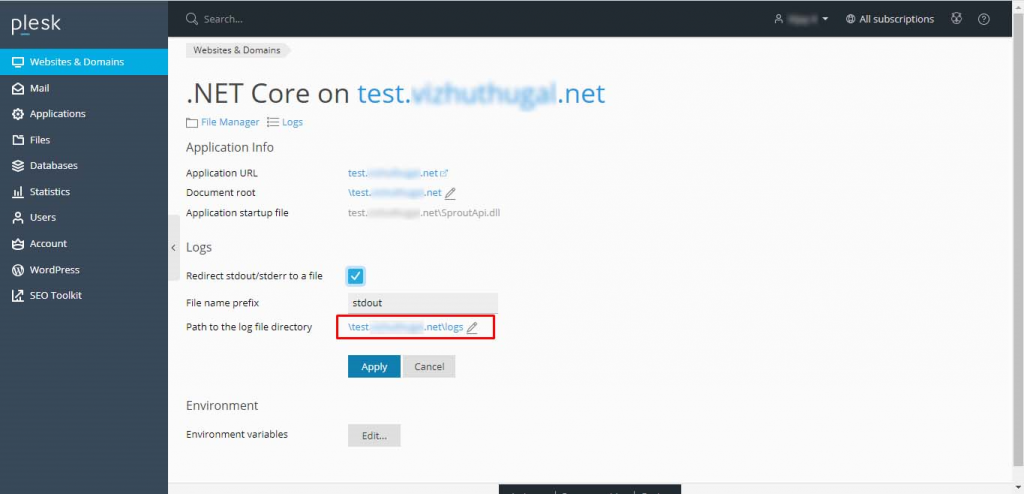
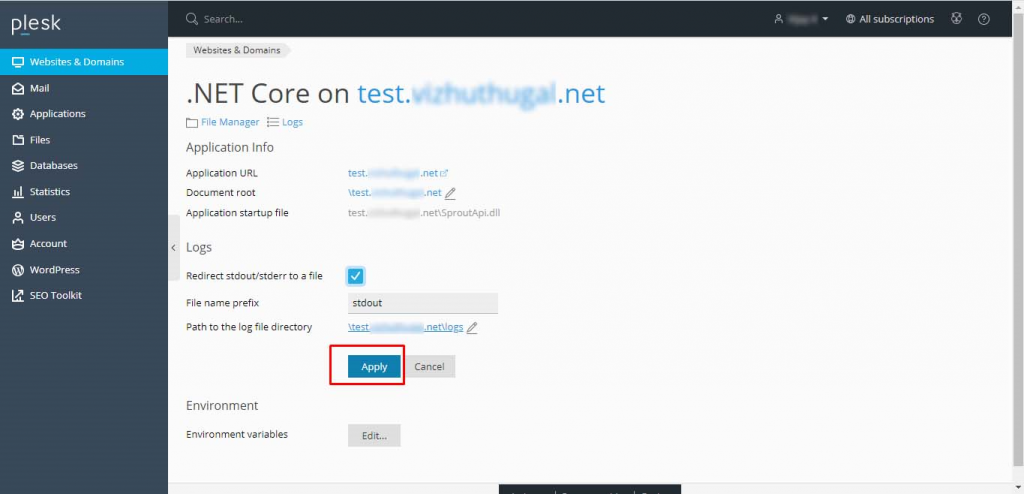
7. Click on Apply after path of the directory is final.
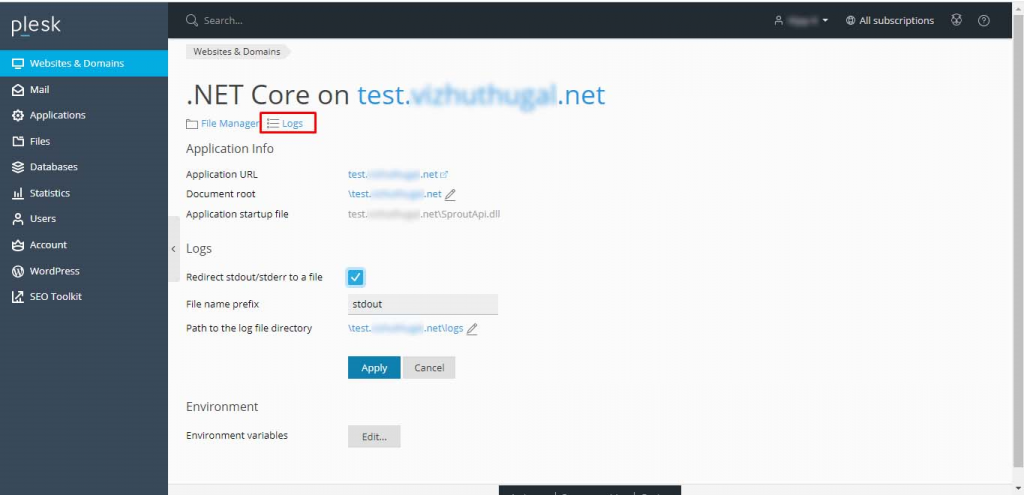
8. Now, to check whether all the logs are generated, click on Log List box.
9. Log errors will be visible now.
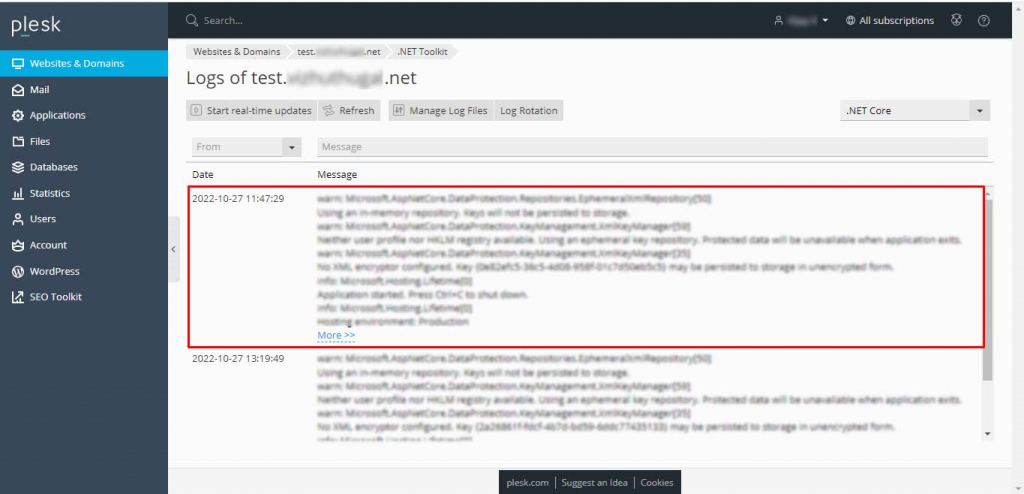
10. If this doesn’t work, and the logs are still not visible, you can start the real time updates.
11. Now, after some time, stop the real time updates.
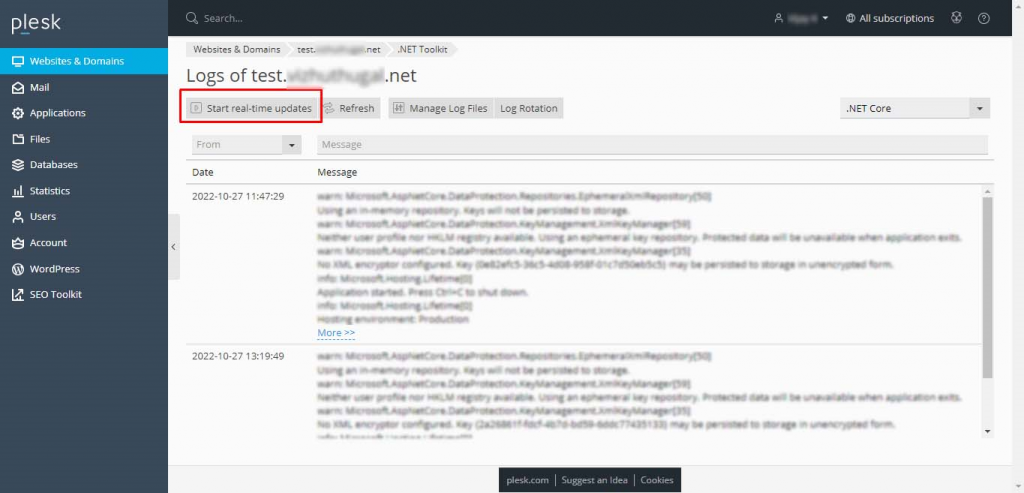
12. Refresh the page and you can check the logs of your ASP.Net website are visible.
13. If there are no errors, no error logs are visible to you, go to File Manager option you’re your domain’s dashboard.
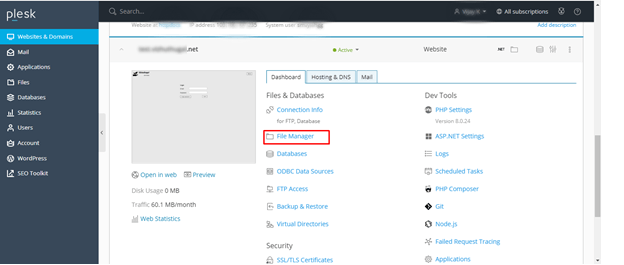
14. Choose the directory path folder
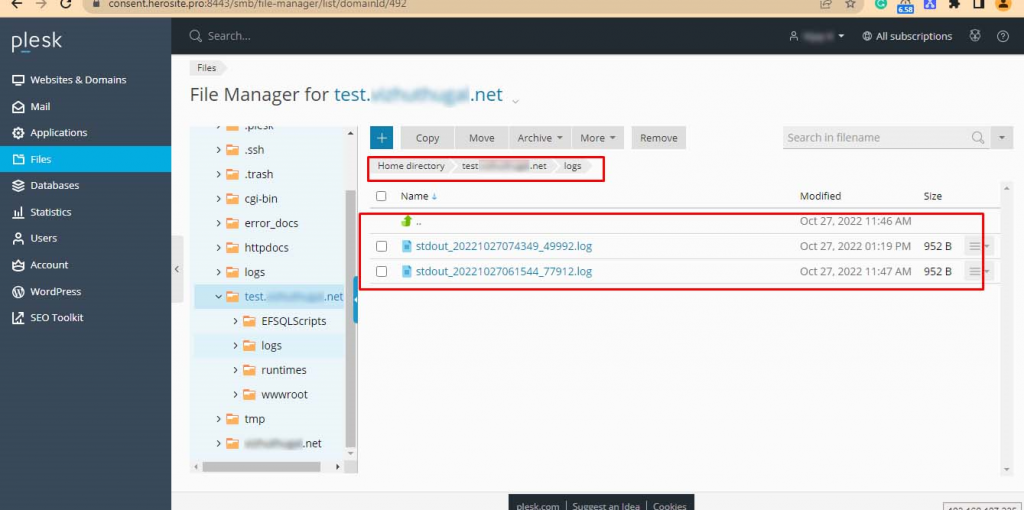
15. By following the above steps, you can now see the error logs of your website.
Hope this article was helpful!


