This post depicts a step-by-step process for configuring email on Outlook 2013 for Windows. This process can also be implemented for the other versions of Outlook; however, there might be some differences in some steps and some screens.
Adding A New Account
- Select the ‘File’ menu
- Select ‘Info’
- Click on ‘Add Function’ button
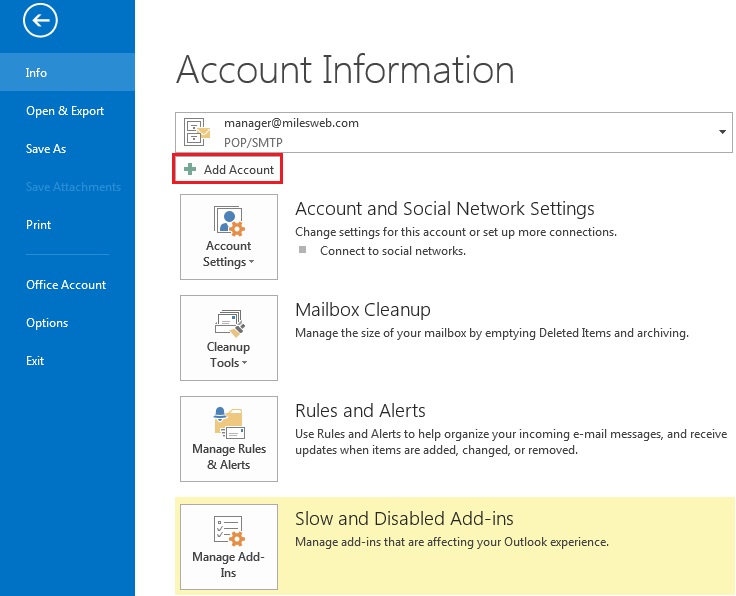
- Select ‘Manually setup or additional server types’
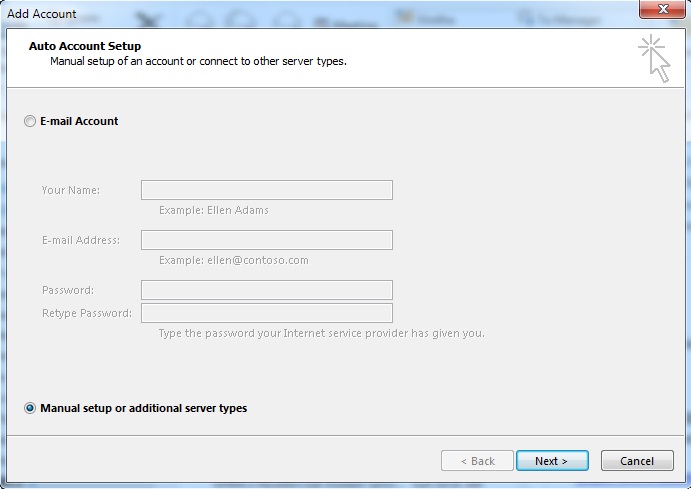
- Click on Next
- Select ‘POP or IMAP’
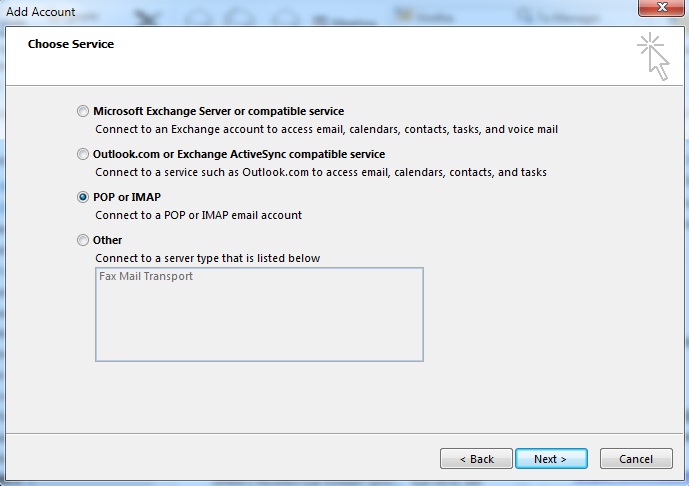
- Click on Next
Configuring Account Settings
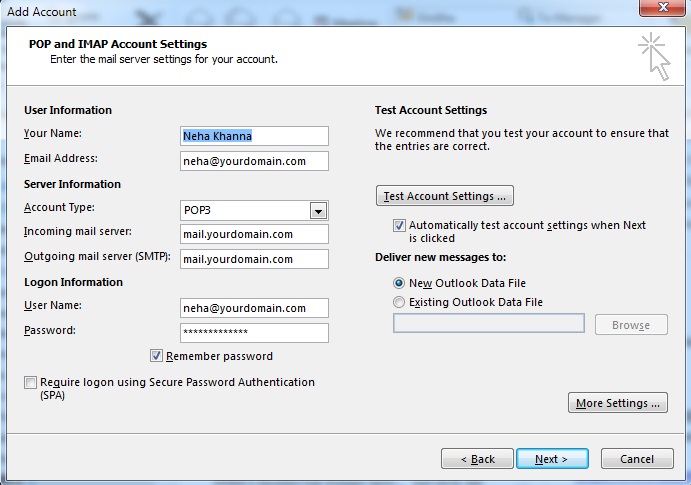
- Enter your name as you want it to be displayed on your outbound emails
- Enter your complete email address
- Enter your complete email address as the User Name as well
- Enter your email password
- Your mail server is – mail.YourDomain.com (YourDomain.com is your domain name)
- The outgoing mail server is the same as your incoming mail server
More Settings
- Click on the ‘More Settings’ button
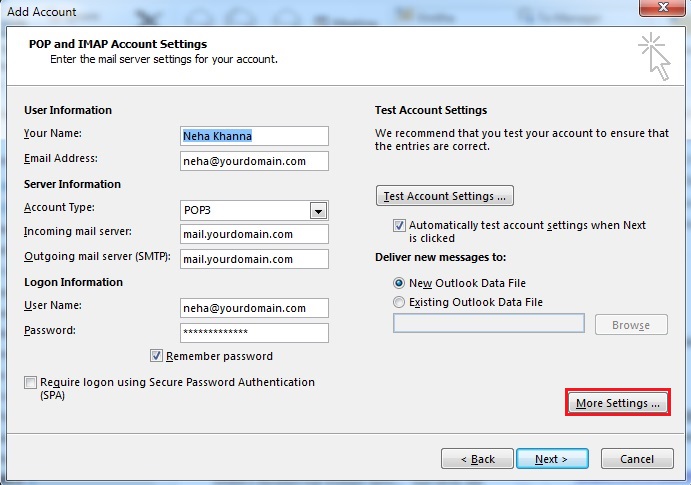
- Click on ‘Outgoing Server’ tab
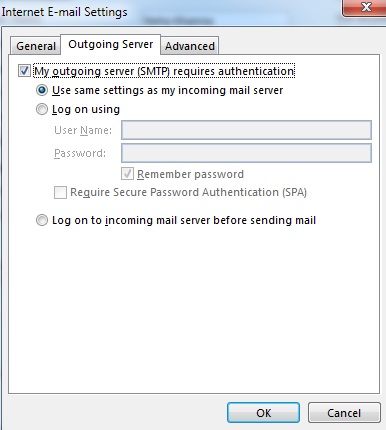
- Check the box that says ‘My outgoing server (SMTP) requires authentication’
- Check ‘use the same settings as my incoming mail server’
- Click on the ‘Advanced’ tab
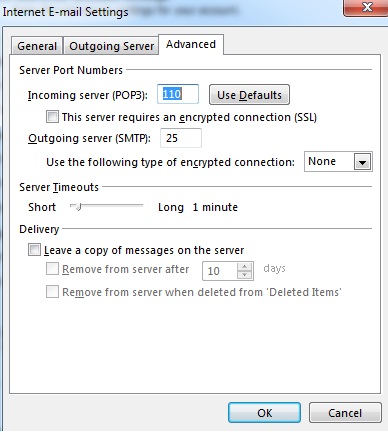
- If you are using POP3 with SSL, check the checkbox and enter 995 as the port, otherwise leave the default port at 110
- If you are using POP3, you may define when messages are removed from the server
- If you are using IMAP with SSL, click the checkbox and enter 993 as the port, otherwise leave the default post at 143
- If you are using SMTP with SSL, click the checkbox and enter 465 as the port, otherwise change the non-default post to 25
- Now click on the ‘OK’ button
Testing Settings
- While you are on the email accounts screen, click on the ‘Test Account Settings’ button
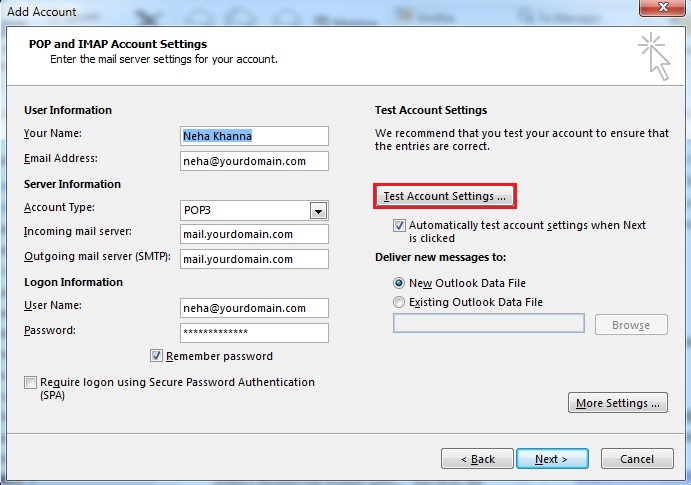
- This will check your settings and send a test email to yourself to confirm that everything is working fine. In case you receive any errors, please check your configuration
- Click on the ‘Close’ button present on the Test Account Settings window
- Click ‘Next’ on email accounts window
- Click on the ‘Finish’ button
Outlook 2013 / 2010 is now perfectly configured for sending and receiving emails.
Check out MilesWeb’s Zimbra based email hosting plans that can be easily configured in Outlook 2013 & 2010.


