Migrating your website to another web host is similar to moving your house from one location to other. There would be a bit of preparation and work to be done. No don’t get scared because you will need to move several parts and that too in a particular order.
Did you know! MilesWeb will do free website migration to reduce your technical burden. However. if you want to do it self, below are the steps to set up your site on your new hosting service. So, let’s start.
- Before you begin
- A few rules of thumb
- Migrating your site – cPanel to cPanel
- Migrating your site – Manual Migration
- Migrating MySQL Databases
- Migrating Emails
- Testing your Website (optional)
- Going Live – DNS and Nameservers
Before you begin
- The information published here is a general guide only. It might include variables which won’t match your specific needs which can’t be accounted here.
- We can’t help you with performing or troubleshooting a self migration
- If you are not sure, it would be better to take an advice from your web developer or allow us to do the migration for you.
- We can guide you in putting your website data on our hosting, but we can’t give you instructions for getting that data from your existing host. You need to contact your existing host provider for this.
- If there are differences between your previous host and MilesWeb may mean that your website won’t work accurately just after you migrate. There may be some changes to website or configuration in your cPanel account prior to getting your website work properly.
- If you have already installed an SSL Certificate, it is obligatory that you provide us your Certificate, Private Key and Intermediate Certificate for installing it on the server.
A few rules of thumb
- Installation is exactly the reverse process of removal. So, if you can’t get something from your existing host, follow the inverse action of the migration steps.
- It is very easy to keep your old as well as new hosting active concurrently. This way you can migrate your website with minimal downtime.
- Several modern websites are based on a CMS such as WordPress. These CMS are just raw files and utilize databases too with MySQL being the universal choice. You will need to consider this while evaluating your needs and performing any migration.
- We would suggest you to migrate your site after business hours i.e. overnight or weekends would be a sensible time for avoiding downtime and email availability.
- Changes on DNS take time to activate – in simple words the “cutover” from the old server to the new. These changes don’t happen instantly and yes the web host provider isn’t responsible for this – it’s just dependent on the Internet working.
- You can drop your TTL values in advance which might help in speeding up the propagation process.
- You need to move your email data in both cases – either you are using IMAP or POP. When you migrate email data, you don’t need to create email accounts again.
- If you change any specific details, for example, Nameservers, DNS records, Database names, etc. it is better to note down the existing values prior to changing them. This will prevent you from getting stuck, if you require reverting such changes or referring to these details later or something goes wrong.
Migrating your site – cPanel to cPanel
Basically, our servers run cPanel and there is a possibility that your existing host does too. If this is the case, both we as well as your existing host will provide you with login details to login to a particular URL as below:
http://www.your.domain/cpanel
https://www.your.domain:2083
https://server123.your-web.host:2083
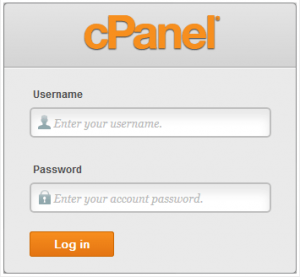
- Start with logging to your previous server’s cPanel using the URL provided by your host.
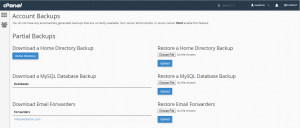
- After logging in, go to the Backups section.
- Click on the Download button below the Home Folder under the title Partial Backups.
- A file with the extension .tar.gz will be downloaded to your computer. Note the name and location of this file.
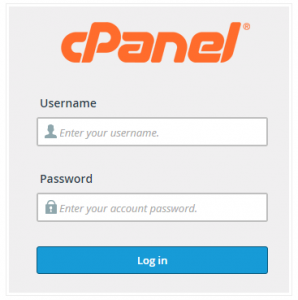
- After this, login to your new cPanel account on your MilesWeb service with the temporary cPanel URL and login details provided in your welcome email. If you are a reseller, you will be able to login with the cPanel details that you create in WHM.
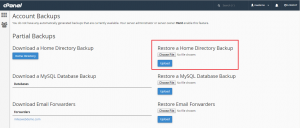
- Next, access the Backups page as before.
- Finally, click on the Restore options on the right hand side and locate the .tar.gz file downloaded to your machine. Then click on Upload. This will upload the Home Directory backup and restore all the files.
- You will notice that cPanel permits you to save separate backups for MySQL Databases, email filters and email forwarders. If want to migrate this data too, repeat the same steps for each relevant backup.
Migrating your site – Manual Migration
If you are migrating your website from a non-cPanel server, or if there are large amount of data of your website, you might need to migrate your website manually.
The steps below assume that the website files are already on your computer.
There are several folders within your cPanel account where all types of data is stored. The web root or document root should contain your website files. This folder is named as /public_html/.
There are two methods to upload files to this folder:
- cPanel’s File Manager
- Using FTP
Copying Files – cPanel’s File Manager
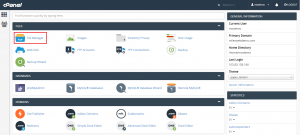
Login to cPanel and access File Manager under the title Files:
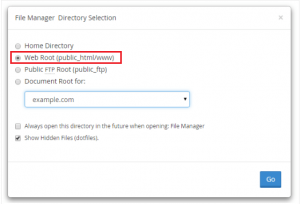
A pop-up will appear where you need to select Web Root and click Go.
File Manage enables you to browse various folders and also offers you tools for uploading your files. All the buttons itself give you the idea about each tool.
Copying Files – FTP
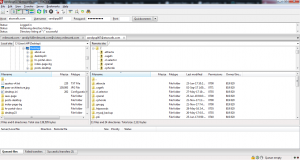
If you are using FTP, you will need an FTP Client. FileZilla is the most popular FTP client used but you can choose your favorite. After downloading and installing your choice of FTP client, configure it for connecting to the hosting server or the IP given in the welcome email along with your cPanel login details.
Next use FTP to locate files on your computer and upload them to the server. Again, you will need to move the website files to the /public_html/ folder.
Migrating MySQL Databases
You might use Backup / Restore functionality for moving from one cPanel server to another. If you are migrating a database, you should export or “dump” the database from your existing server (it should be exported as a .sql file) then create a database on the new server and import the data.
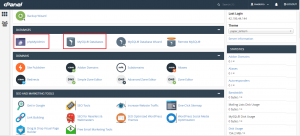
Your cPanel on the new server contains two areas – MySQL Databases and phpMyAdmin.
Create a database and database users with the help of the MySQL Databases page and then give those users access and permissions to those databases.
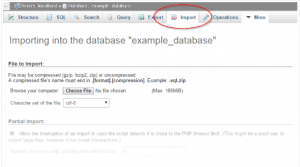
When this is completed, use phpMyAdmin to import the data from the Import tab.
It is important that the database names should be prefixed with cPanel username. This might indicate that you won’t be able to setup databases with the same names used that are used on your old server. If this is the case, you will require using a new database name and then edit your website configuration with the new database details.
Migrating Emails
If you are migrating from cPanel to cPanel, your email accounts and data will automatically get copied while backing up and restoring your home folder. But, this won’t always be assured as it depend on the potential differences between the old and the new server.
Manual email data migration is a too lengthy process. Also, we don’t perform email migration for you if we are doing a paid manual migration for you. This type of migration is needed only when emails are accessed via IMAP.
If you have your email hosted on a different server to your website, such as a cloud service like Office 365, Google Apps, or a on-premises mail server such as Kerio or Exchange, this won’t be changing while moving your website to MilesWeb. It would be better to involve your Mail administrator with the migration process for ensuring your email service is setup accurately and functioning properly.
Testing your Website (optional)
After migrating your website, you may want to test the website optionally.
If you want to test your website optionally, you will need to modify your hosts file. This informs your computer about accessing your site from the new server instead of the existing one. This will help you to understand that everything works fine prior to making your site live.
The Product Welcome email that is received after purchasing your hosting service will contain the IP address to use.
When it’s done, it is recommended to delete the modifications done to your hosts file, as they should be temporary only.
Going Live – DNS and Nameservers
When your website migration is complete, the final step involves configuration of your domain to point to your new server which is controlled by DNS.
The nameservers can be chosen from us or use the ‘external’ nameservers from third party. In case you are using existing host’s nameservers or if you aren’t sure, you might use the former one only.
After updating the required details, visitors must be able to access your website on the new server. Note that the DNS propagation might take long time – from hours to a day or two. Therefore, it is best to change DNS at a time when traffic is low such as overnight.
Using MilesWeb’s Nameservers
If you are using MilesWeb’s nameservers, you will need to access your account with your Domain Registrar – this would be MilesWeb or another registrar.
When you login into your account with your registrar, access the details for the domain and then update the nameservers to those described in this article: https://www.milesweb.co.uk/hosting-faqs/how-to-update-my-name-servers/
Please note MilesWeb has multiple sets of nameservers for different products. Linux reseller and shared as well as Windows have same nameservers while VPS and Hybrid should have their own private Name servers. So, please check the type of product you purchase for ensuring you have used the correct ones. Moreover, you will also have the correct nameservers to use in the Product Welcome email you receive upon purchase of your hosting service.
Once our nameservers are configured, you can administer your DNS records through the Simple or Advanced Zone Editors within cPanel.
Using External Nameservers
In case you are using external nameservers, and/or you use a CDN service such as Cloudflare, you probably won’t be using our nameservers. Rather, you set the nameservers to those provided by your DNS host. It might be that you have already set up these and so, there won’t be any changes to be done to your domain itself.
Then, you manage your records/zone through the DNS host’s website.
We supply the IP address of the server on which your website is hosted in your Product Welcome email. You will need to update the relevant records (@, www., etc.) by accessing your DNS records with your DNS host with the new IP. If you require any help, contact your DNS host.
When you are using external nameservers, changes made in the Simple/Advanced Zone Editors inside cPanel won’t be applicable for anyone on the Internet and so, it’s not actually needed to access these areas of cPanel.
But there are certain exceptions to the rule:
You will need to change the MX Entry (there is a page in cPanel for this under the title Mail) to check, if it matches the MX records that you have configured on your DNS host. With this it is assured that any forms on your website will be capable of delivering emails to you.
In case you have created subdomains, those need to be configured in cPanel as well as on your DNS host with your server IP.
So, you have now got a clear idea about migrating your website manually to MilesWeb by yourself.

