Mailing is the best way to maintain a strong rapport with your customers. This list must contain all your loyal customers so that it becomes easy for you to let them know about your upcoming discounts, offers, new products, and services, etc. that may benefit them in one or the other way. Such a mailing list can be created by using cPanel.
What is a mailing list?
cPanel allows you to create, modify and delete mailing lists for your website. A mailing list allows you to send one message to multiple recipients at the same time. For example, you might create an ‘allsubscribers@xyz.com’ mailing list that you wish to send to all your subscribers in one go.
The mailing list in cPanel provides many configuration options. You are allowed to specify the e-mail address in a list, define a welcome message for new subscribers, define a birthday message to be sent on your customer’s birthday, and more. Mailman list manager is used by cPanel to provide this functionality.
How to create a mailing list?
Perform the following steps to create a mailing list in cPanel :
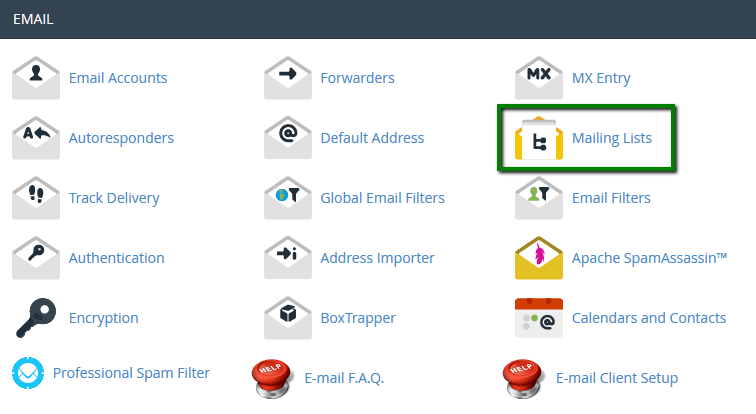
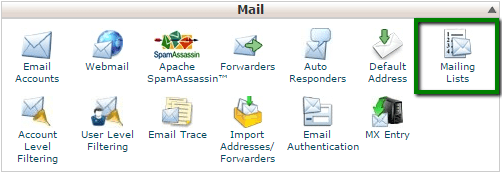
1. On the cPanel home screen, go to the Email section and click on Mailing Lists.
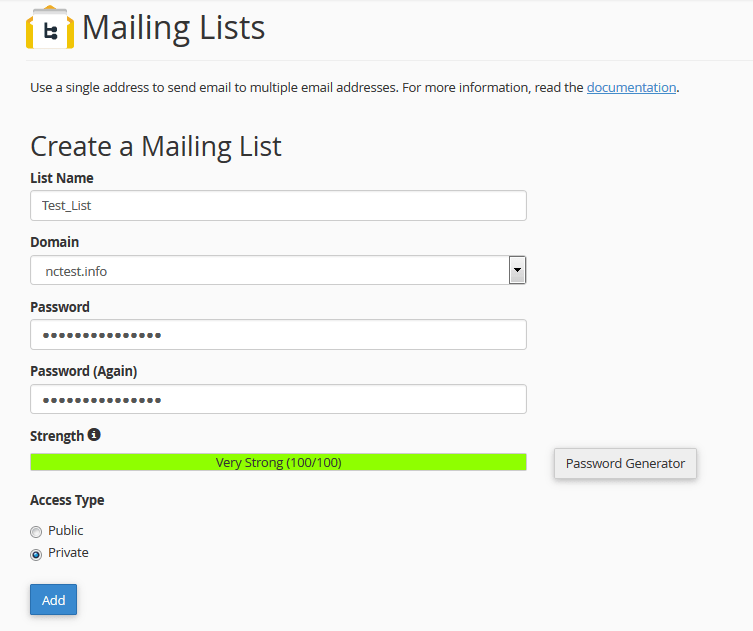
2. In the List Name text box, type the mailing list name as per your choice.
3. In the Password text box, type the mailing list password that you will be able to remember.
4. In the Password (Again) text box, retype the password for the mailing list.
Tip: To get a strong password, you can click on Password Generator and cPanel will generate a random and strong password for you.
5. Go to Access Type, under it select Public or Private.
• Public Mailing List has public archives that mean anyone can subscribe to this list, and it is advertised on the Mailman page.
• Private Mailing List has private archives that means an administrator must approve subscribers, and the list is not advertised on the Mailman page.
6. Now click Add.
Note: Most of the mailing list is private, not public. This helps in maintaining confidential information safe.
How to administrate a mailing list?
You can administer your mailing list, once you create it as explained above. To administer the mailing list perform the following steps :
1. On the cPanel home screen go to the Email section and click on Mailing Lists.
2. Go to Current Lists, and under it locate the mailing list that you want to manage, and then click on one of the following options available :
• Change password: If you want to change your current mailing password, then select this option.
• Manage: If you want to access the Mailman administration page, then select this option.
• Delegation: If you want other users to administer the mailing list, then select this option.
After selecting delegation, go to Available Users, and under it double click on the user or users that you want to have the administrative privilege for the list. Move the selected list to the List Administrator field on the right, and then click on Save. Similarly, to revoke the administrative privilege of the mailing list for a user, go to List Administrators and under it double-click the user/users, and move them to the Available User field on the left, and then click on Save.
If you don’t require any particular mailing list you can delete it.
How to delete mailing list?
You might create a mailing list for the announcement of special offer, special occasion, etc for a time being. After that you may wish to delete such mailing list, so to do so, follow these steps :
1. On the cPanel home screen, go to the Email section and click on Mailing Lists.
2. Go to Current Lists and under it, locate the mailing list that you want to delete and then click on Delete.
3. Click on Delete Mailing List to confirm your deletion.
These are simple steps to manage your mailing list in cPanel.
Also Read :


