
This article helps you to learn the usage of the PuTTY SSH terminal for connecting to your hosting account or a VPS server. You will be able to connect to your server remotely via SSH terminal with this software and run various commands via the command line.
Pre-requisites
You’ll need the below things:
• A computer running Windows operating system
• PuTTY SSH client
• SSH connection details
Downloading the PuTTY SSH Client
Download the latest version of the PuTTY SSH client from here. Then install it on your computer.
Gathering SSH Access Information
After you install the PuTTY client on your system, find the details required to make your SSH connection.
Finding the SSH Details for Shared Hosting
In case you have a shared web hosting account, you will find the SSH connection details in your control panel’s SSH Access section under the Advanced category.
You will find all the required details here, such as SSH IP, SSH Port, and SSH Username with SSH Password. Note that the password used for the SSH connection is the same as that for FTP. If you forget or don’t know it, you can reset it via your control panel’s FTP Access section.
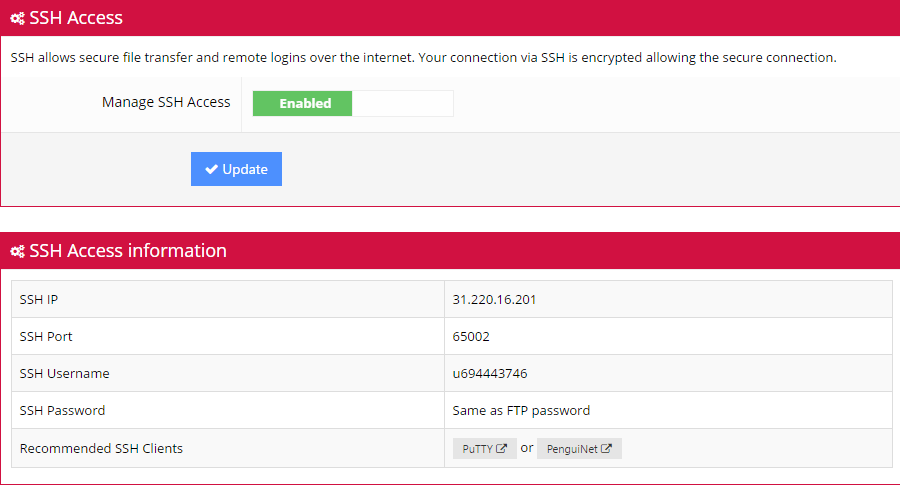
If the SSH access is set to Disabled, turn it on and press Update. After this a confirmation screen will appear as below:

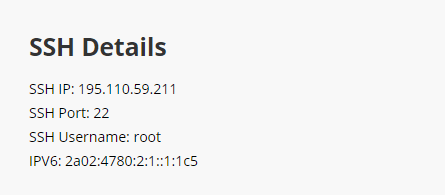
Finding the SSH Details for Virtual Private Servers (VPS)
For connecting to a Virtual Private Server (VPS), you may place all the required details in the Servers section at the top of your control panel.

From the drop-down list, select your VPS to open its information.
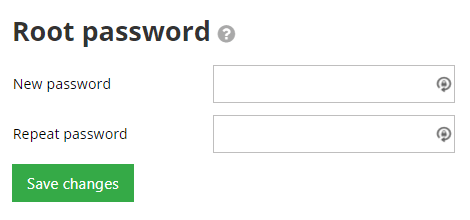
If you aren’t sure about the root password of your VPS, you can reset it via the Root Password section below.
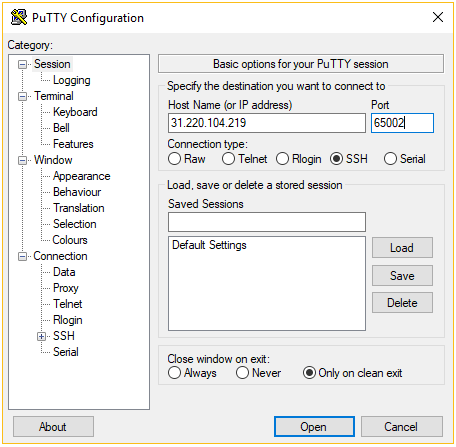
Steps to Connect to your server via PuTTY SSH
Now since we have collected all the required details to make a connection, open up your PuTTY SSH client. First enter your hostname/server IP and port and then press the Open button to proceed.
A “login as:” message will appear, where you need to enter your SSH username. For VPS users, the username is usually root but for shared hosting users this value is different. In this example, we have used u721233450. After entering your username, press the Enter button on your keyboard. Next, enter your SSH password and press Enter again. Remember that no letters will appear on your screen at this stage.

That’s it! Your account connection using PuTTY SSH client is successfully done. On a shared hosting account, you may find the list of available SSH commands by running help via terminal.
Conclusion
By going through this guide, you will be able to connect to your VPS server or hosting account by using PuTTY SSH client. With this, you will be able to manage your server remotely and run various commands.


