This knowledgebase explains how to use Plesk to stage websites.
Website Staging
A staging website is actually an independent clone of your live website that visitors can see. This website has the same software, hardware and same settings as your live website. Thus the staging website is useful when you make the changes on the code and content of your website. Just by performing some of the easy steps Plesk enables you to easily configure a testing environment for your website.
How to Set up the Website Staging Environment?
By creating a new domain or subdomain, you can host the staging environment in your current webspace on Plesk. For example: To use a testing environment for your primary domain ‘example.com’ you can create a staging.example.com subdomain.
# Steps to Copy The Website
Once you configure the staging environment, you need to copy everything from the existing production environment to the new staging environment. Perform the following steps to do so :
1. Log in to Plesk.
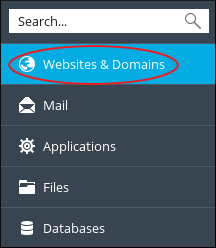
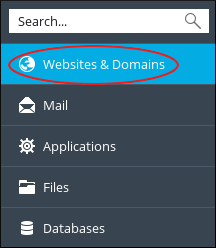
2. On the left sidebar of the Plesk panel, click on Websites & Domains.
3. Identify and locate the website that you want to copy and then click on Website Copying.
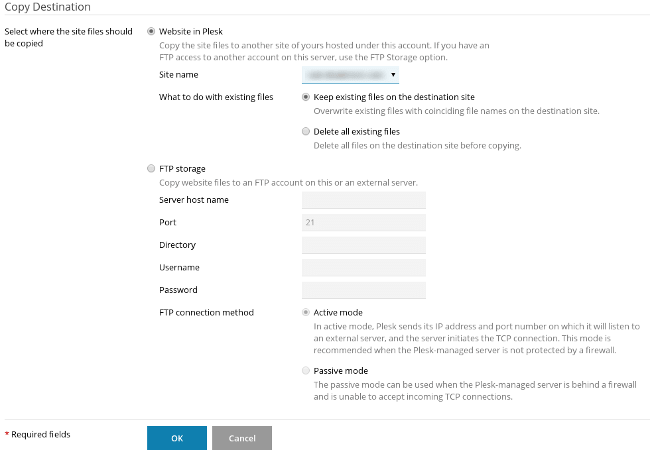
4. Under the Copy Destination section, select Website in Plesk.
5. In the drop-down list of the Site name, select the destination domain.
6. In the section for What to do with existing files, select what you want to perform with any files that may already exist on the destination domain.
7. Now click on the OK button. Plesk will copy the site to the destination domain.
#Steps to Copy Databases
If your website uses databases (or databases), then you must copy them all to the staging environment also. Perform the following steps to do so :
1. Log in to Plesk.
2. In the left sidebar for Plesk panel, click on Databases.
3. Identify and locate the database that you want to copy, and then click on the Copy button.
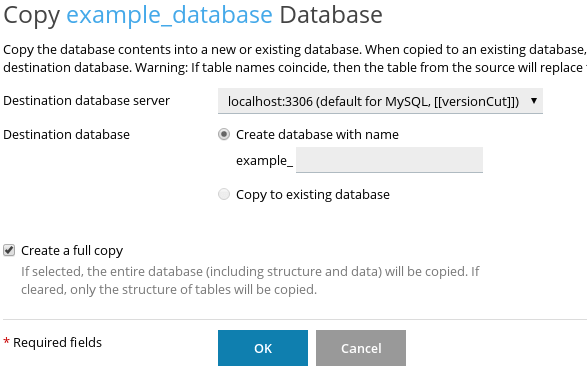
4. In the drop-down list box for the Destination database server, select localhost:3306.
5. In the section for Destination database, click on Create database with name, and then enter the name for the new database.
6. Select the checkbox for Create a full copy.
7. Click on OK. Plesk will copy the database.
# Steps to Publish the site
Once the testing of the staging environment is done, you can go live and publish your website. Perform the following steps to do so :
1. Log in to Plesk.
2. In the left sidebar for Plesk panel, click on Websites & Domains.
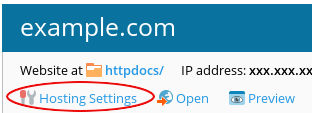
3. In the list of domains, identify and locate your production site, and then click on Hosting Settings:
4. In the text box for Document root, enter the directory for the staging site environment.
5. Click on OK button.
That’s it, you are done!
Also Read :

