- Log in to your cPanel account.
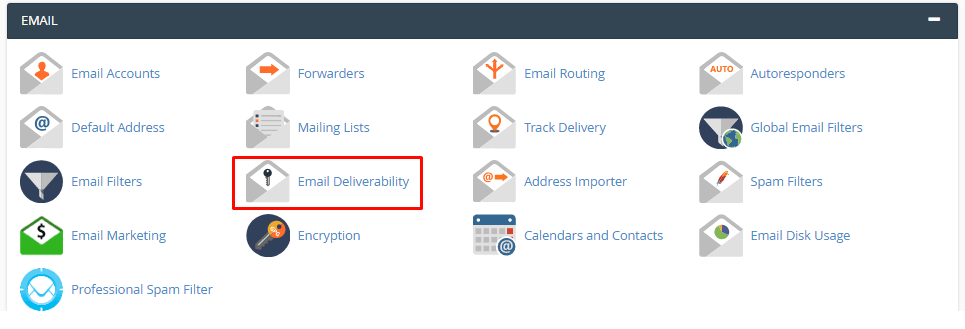
- Go to the “Email Deliverability” icon, under the Email section.

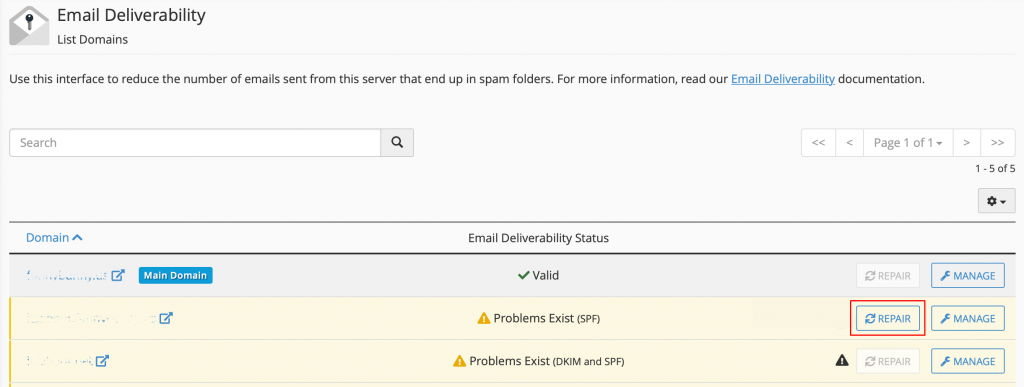
- If you see a “Problems Exist” warning, click on the “REPAIR” or “MANAGE” buttons. When you click on “REPAIR”, you will have to follow the settings step by step. If you click on “MANAGE” you will see all the controls on one page, used for manual configuration or copying values to your DNS zone file.
- In this tutorial, for authenticating your emails we will use the “REPAIR” button.

Note: You won’t see the “REPAIR” button if your DNS does not point to the MilesWeb server.
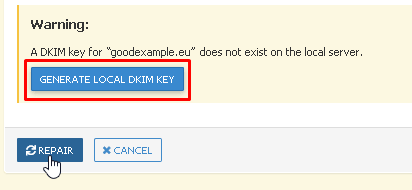
- In case you haven’t set up any email authentication, when you click on the “REPAIR” button, you will see “A DKIM key for ‘ggexample.com’ does not exist on the local server.”
- After this, click on the “GENERATE LOCAL DKIM KEY” button.

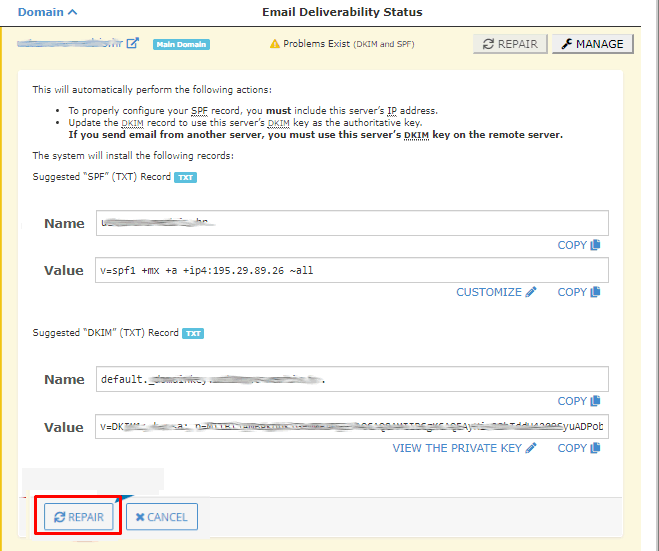
- Both the “Suggested ‘SPF’ (TXT) Record” and “Suggested ‘DKIM’ (TXT) Record” fields will already contain the system’s recommendations. In case there are no existing records, you can’t edit the recommendations and they can only be accepted).
- To add records to the DNS zone of the domain, click on the “REPAIR” button.

- After going back to the main Email Deliverability page, you should see a “Valid” status (wait for a minute or two for the records to be checked).
In this way, you can authenticate emails using cPanel.
Also Read: Learn to manage Mailing lists in cPanel
Also Read: How To Create Email Accounts From cPanel?


