System admin can easily perform the task of adding a user and granting that user root privileges. Once the user gets added and assigned a root privilege then he will be able to login to your Ubuntu 18.04 and perform important functions that upkeep the system. Afterward, the user can use sudo before commands to perform elevated tasks.
This article will explain to you how to add a user and grant root permissions.
Point to Remember :These instructions are specially used for adding a user on Ubuntu 18.04 LTS.
Perform the following steps :
1. Add Username
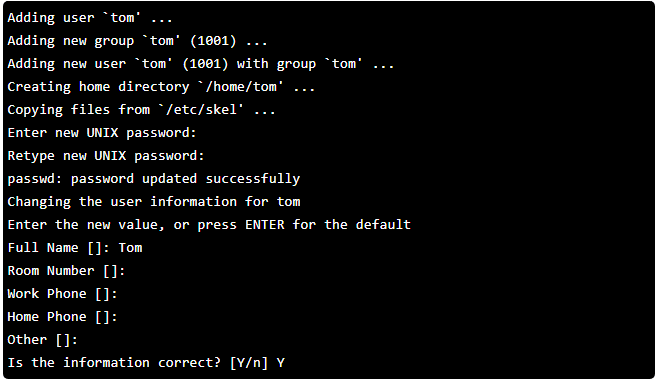
In this example we will take a random username, Tom using the adduser command. You can replace Tom with your desired username. During this session, the system will also ask a user about my details. You can skip these details simply by pressing enter and eventually it will confirm that the information is correct, leading us to add a new user.
![]()
Output :
2. Grant Root Privileges to the User
By entering the above command, we will be redirected to /etc/sudoers.tmp file, where we will be able to view the following code :
After the root user line, you will have to add a new user using the same format for us to grant admin privileges.
![]()
Once you have added the permission, save and exit the file using: wq and then enter.
3. Verify that User Has Privileges
If all the instructions are followed correctly, then you will be able to run some commands like update, suing the sudo
These are easy commands that you can perform.


