Before installing PrestaShop, you need to perform the following steps.
- Download a PrestaShop engine from the official website of https://www.prestashop.com/en.
You can see two buttons for Create my store, click on any one of them.

- After that, you will be taken to the next page, where you have to mention your mail address and click on both the check-boxes.

- Click on Download.
- After downloading, extract the engine files into a folder on your computer.
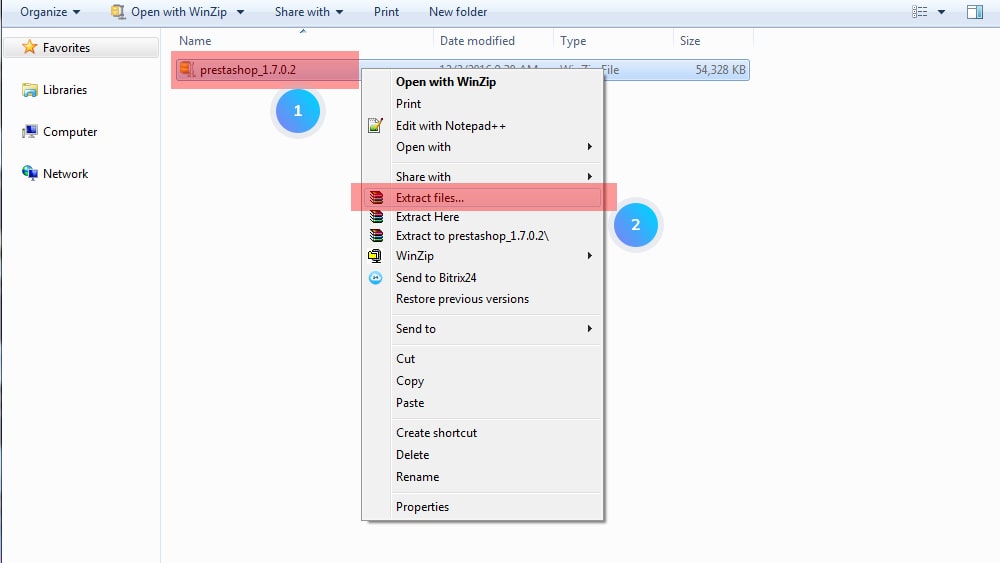
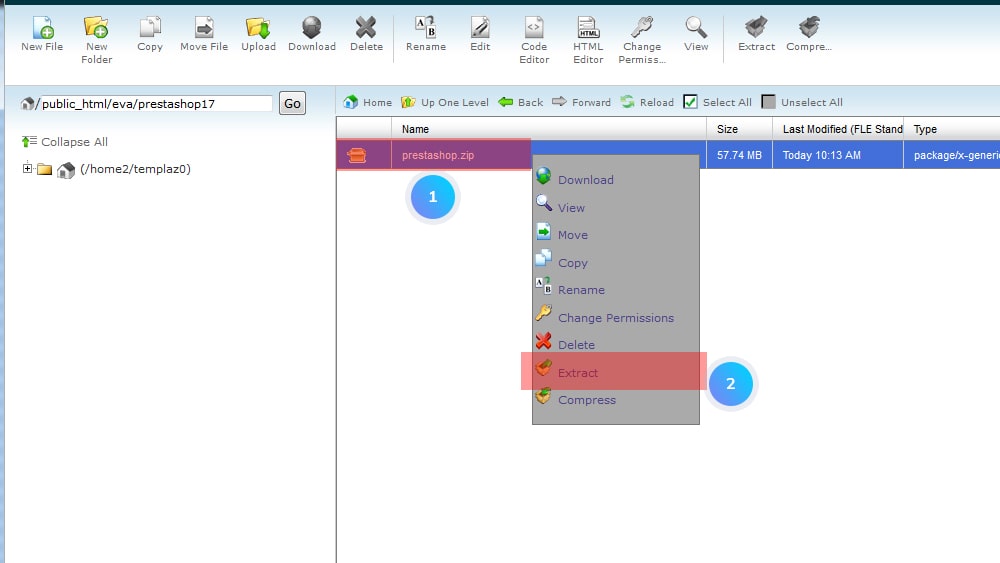
- Now open the PrestaShop engine that includes prestashop.zip file. Upload this file on your server. After uploading, extract the file there :
- After that create a database and save the database name, username, and password. You will need these while installing the PrestaShop engine.
# Steps to install PrestaShop engine :
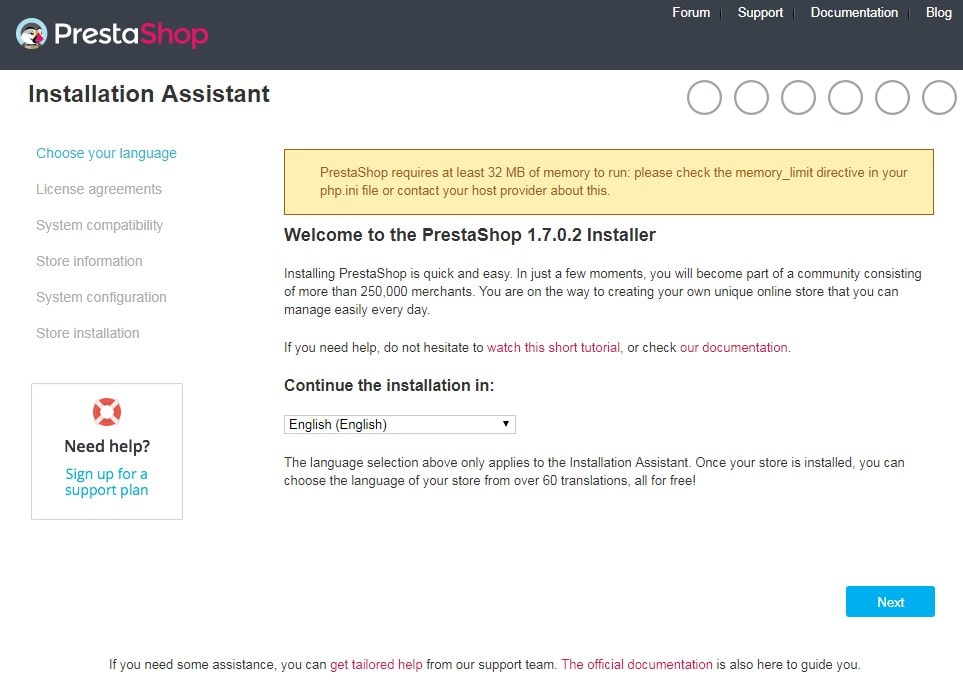
- After downloading and performing all the above steps, you will be taken to the Welcome page. This page contains a quick introduction to the installation process. Select the language for the installer and click on the Next button.
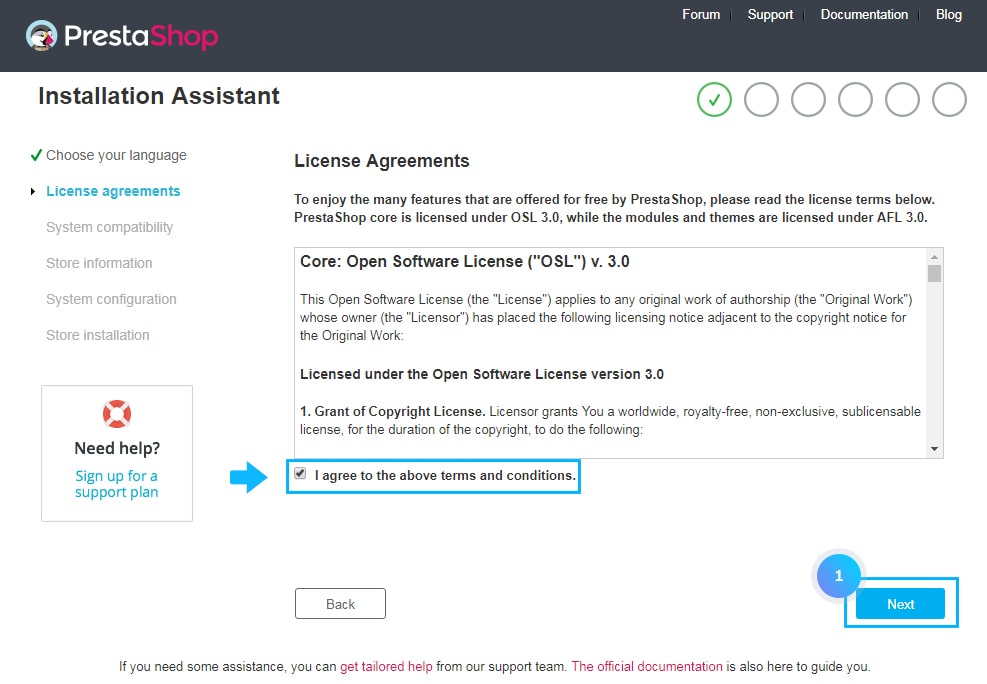
- Next is the PrestaShop licenses. PrestaShop is free software and is distributed under a certain set of open-source licenses. Click on the check-box for ‘I agree to the above terms and conditions’, to proceed. After that click on the Next button :
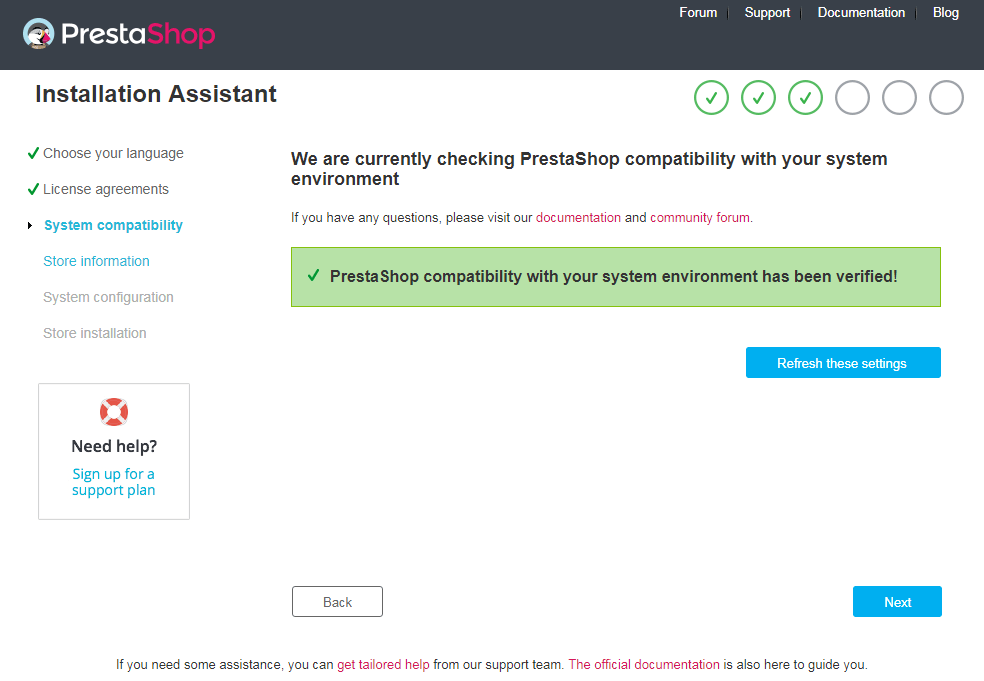
- Next is the System compatibility page. It quickly checks all the server parameters of your host. If everything’s good, you will be taken to the next page :
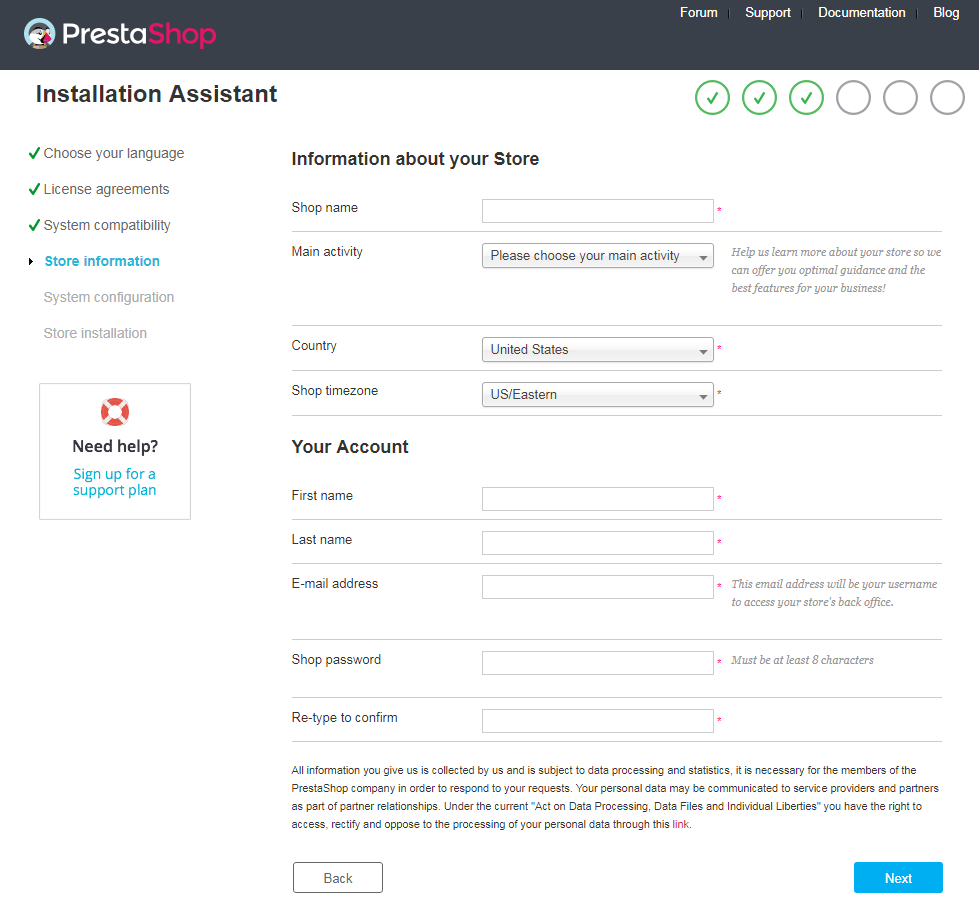
- Store information is the next page. On this page you can customize your store: specify the store’s name, indicate main activity and fill in the personal information for your account :
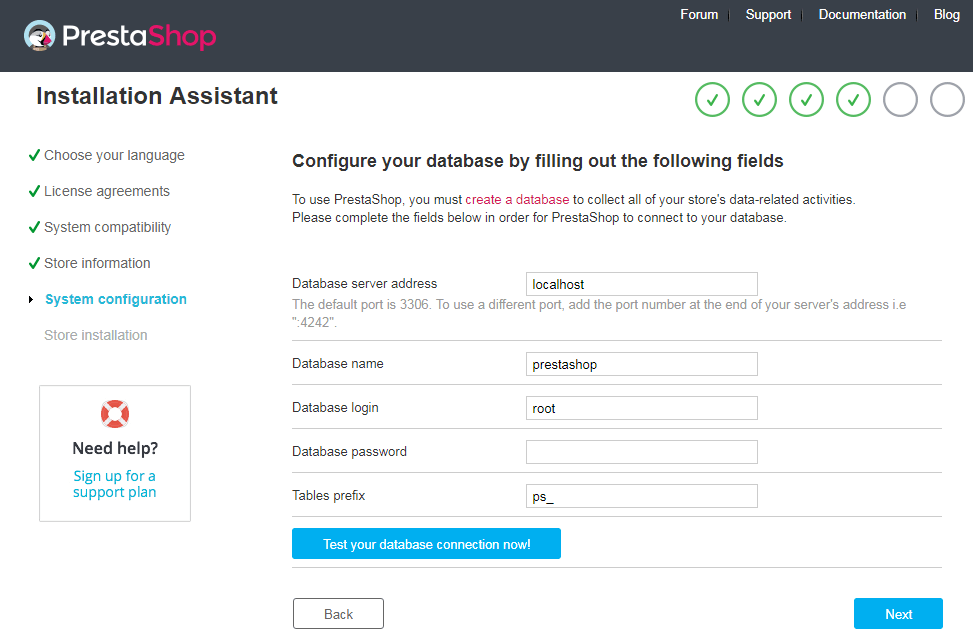
- System configuration is the next page. Fill in all the fields with the database connection information: Database server address, Database name, Database login, Database password, Tables prefix :
In case you don’t have database access details, contact your hosting provider and get it from them.
- Click on Test your database connection now! button, to check whether you have entered the correct server information.
- Click on the Next button. The PrestaShop installation process will start configuring your shop, creating and populating the database tables, etc.
- Once installation gets completed, you need to delete or rename the “install” folder in your PrestaShop installation directory in order to improve your PrestaShop store security.
This was a short tutorial on how to install PrestaShop.
Also Read :


