What is Leech Protection?
When any user publically posts their username and password on the restricted area of your site, then any unauthorized visitor can use this credential to access secure areas of your website. This practice is called leeching.
Leeching can cause a threat to your website’s security and thus you can restrict that user from doing it by enabling leech protection. Additionally, it also protects a user who tries to access another’s account using the correct username and multiple combinations of passwords by just guessing them randomly. This also prevents a user from trying multiple login attempts in a short period. The protection will redirect and suspend the compromised accounts to a specific URL.
Leech Protect is one of the Standard Security features offered by cPanel. In it, the default time is set to 2 hours, so that you can define the maximum number of logins for users within 2hours. You can use this security feature for your domain.
# Steps to setup Leech protect in cPanel for a domain name
1) Log in to your cPanel account.
2) Scroll down to the Security section and click on Leech Protect.
3) After clicking on Leech Protect, a new window gets open, on which you need to select a folder that you wish to protect.
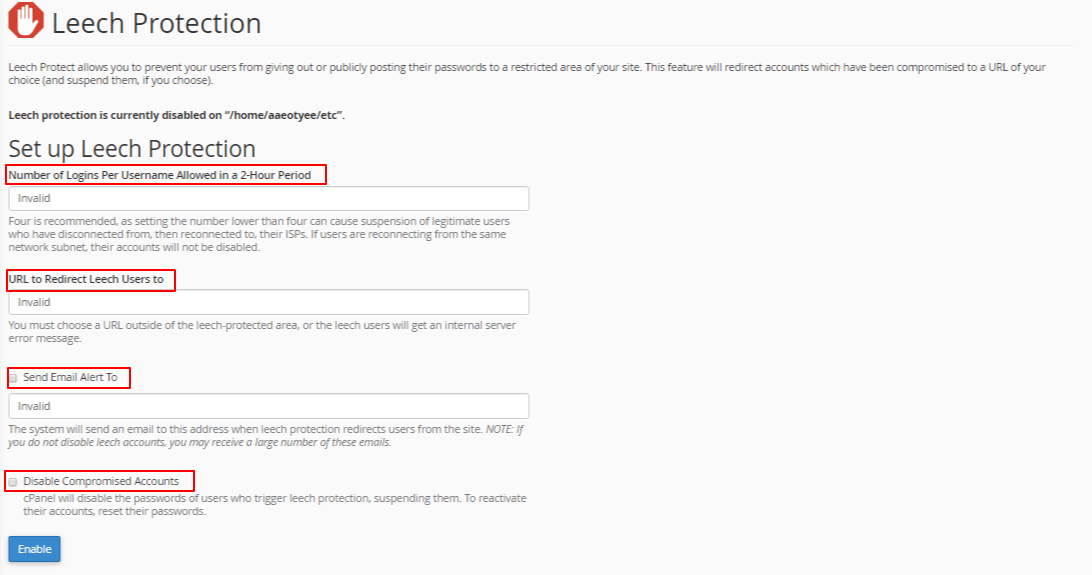
4) After selecting a particular directory a new window gets open where you need to set up the required permission.
• In the section for Number of Logins per username allowed within 2 hours period: Set the number of login attempts that can be made within 2 hours by any user. Users won’t be able to again multiple times within your allocated limit.
• In the section for URL to Redirect Leech Users: Enter the URL to which you wish to redirect the leech user to a specific URL if they exceed the maximum number of login attempts.
• Select Send Email Alert: To send an email to the same user’s email account.
• By selecting Disable Compromised Account: You will be able to suspend the account and it will also disable the user’s password. To enable the account you can reset the password of the user account.
• By clicking Disable Protection: You can deactivate the Leech Protection.
That’s it!
Also Read :


