An MX record is an email exchange record. It is an important part of the Domain Name System (DNS) that signifies the mail server that is responsible for accepting the email messages. You can easily add the MX record through cPanel’s Zone Editor option. Here are the steps:
- Login to your cPanel account.
- Go to the ‘Domains’ section and there click on the ‘Zone Editor’ option.

- Under the ‘Domains’ section, you will see that there are many options available below the word ‘Action’.
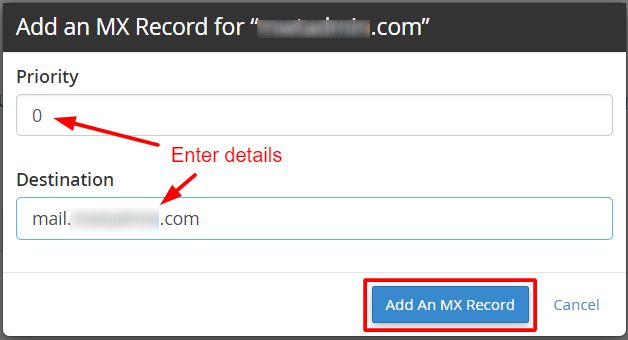
- Click on the ‘MX Record’ option and a small window will be displayed, enter the necessary information in it.

- Set Priority: The MX Record that you utilize for routing the emails should preferably have the lowest preference number, usually 0. You can use the 10 priority for the record validating that you own the domain name.
- Destination: Enter the domain name through which the email exchange is done. If you work through an external email server, enter the domain name of that server. On the other hand, if you use a local mail server, type in your local domain name.
- Click on the option – ‘Add an MX Record’.

If the record gets successfully added, a success message will be displayed. The complete process of DNS prorogation might require anywhere between 12 – 24 hours for reflecting the changes worldwide.


