If you want to filter out unwanted messages/spams, you need to activate the Spam Filters anti-spam tool from cPanel.
1. Log into cPanel.
2. Go to the Email section and click on Spam Filters.

Because by default, Spam Filters will be disabled, you will need to enable it. For this enable Process New Emails and Mark them as Spam option.

Go to the Filters section and enable the Automatically Delete New Spam (Auto-Delete) option. This will help in automatically deleting those messages that Spam Filters marks as spam. i.e., with a Spam score of “5” or higher than it will be deleted. The spam score can be set from the Spam Threshold Score. Remember the default and recommended spam score is “5”.
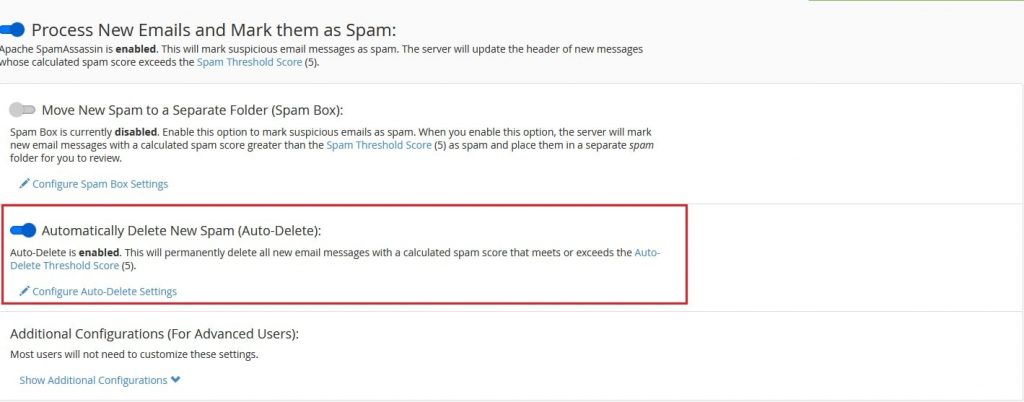
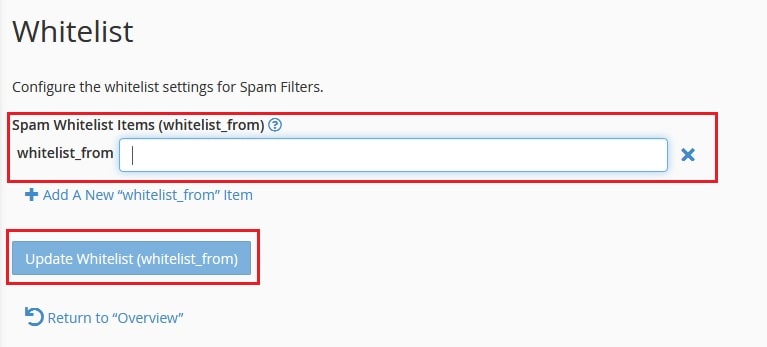
Then click on the Show Additional Configurations option under Additional Configurations (For Advanced Users) to Whitelist/Blacklist any of the Email accounts in cPanel Spam Filter.

Steps to Whitelist an Email account in cPanel using Spam Filter
1. Click on the link Edit Spam Whitelist Setting. Next click on the link Add a new whitelist_from item.
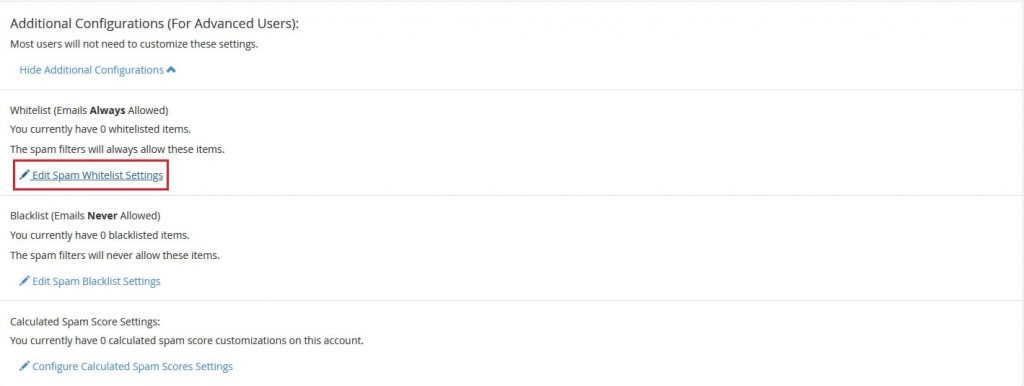
2. Enter the below email accounts in whitelist_from:
- user@yourdomain.com – The email account that you want to whitelist.
- *@yourdomain.com – Use star(*) if you want to whitelist all the email accounts of any domain.
3. Next, click on Update Whitelist (whitelist_from) button to save the settings.
Steps to Blacklist an Email account in cPanel using Spam Filter
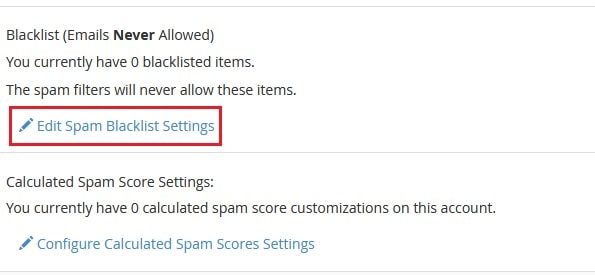
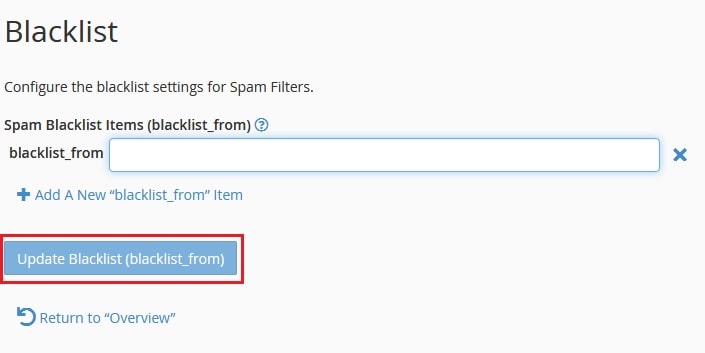
1. Click on the link Edit Spam Blacklist Setting. Then click on Add a new blacklist_from item.
2. Enter the below email accounts in blacklist_from:
- user@yourdomain.com – The email account that you want to blacklist.
- *@yourdomain.com – Use star(*) if you want to blacklist all the email accounts of any domain.
3. Click on Update Blacklist (blacklist_from) to save the settings.
In this way, you can enable Spam Filters from cPanel to reduce incoming spam.


