Have you installed SSL certificate on your website? If no, it’s not too late to install the SSL certificate on your website.
An SSL not only helps in securing your website but also secures the vital data such as credit/debit card information, personal information, bank details, etc. shared by your customers.
Additionally, it also helps in improving your website rankings in Google and boosts the performance via the use of HTTP/2.
Check the below steps to install SSL certificate on your website using cPanel:
Prior to moving to the steps, you need to have a private key, a CSR and SSL installed on your account.
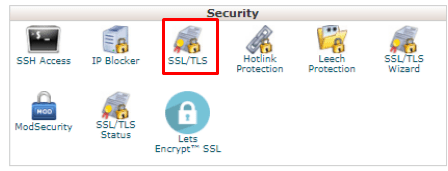
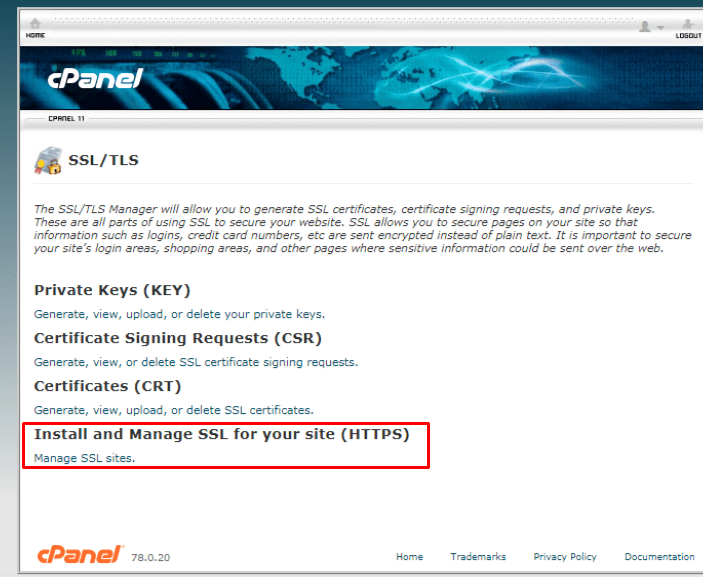
Step 1: Go to the cPanel SSL/TLS Manager. Click on the title Install and Manage SSL for your site (HTTPS).
Step 2: Navigate to Domain and from the drop-down menu, select the domain on which you want to install an SSL certificate and click on Autofill by Domain.
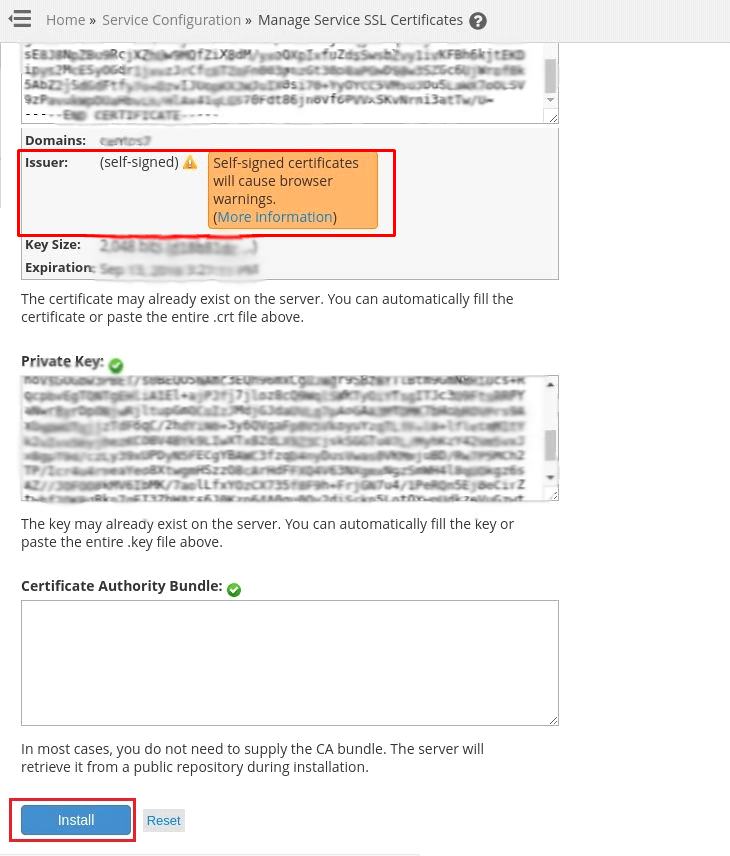
Step 3: In this case, you will see a warning saying that the Issuer is self-signed. But don’t worry about it. If you have installed a 3rd party verified certificate you won’t see this warning.
Now, click on Install Certificate.
You will get a message confirming the installation of SSL certificate. So, it’s very easy to activate SSL certificate using cPanel.


