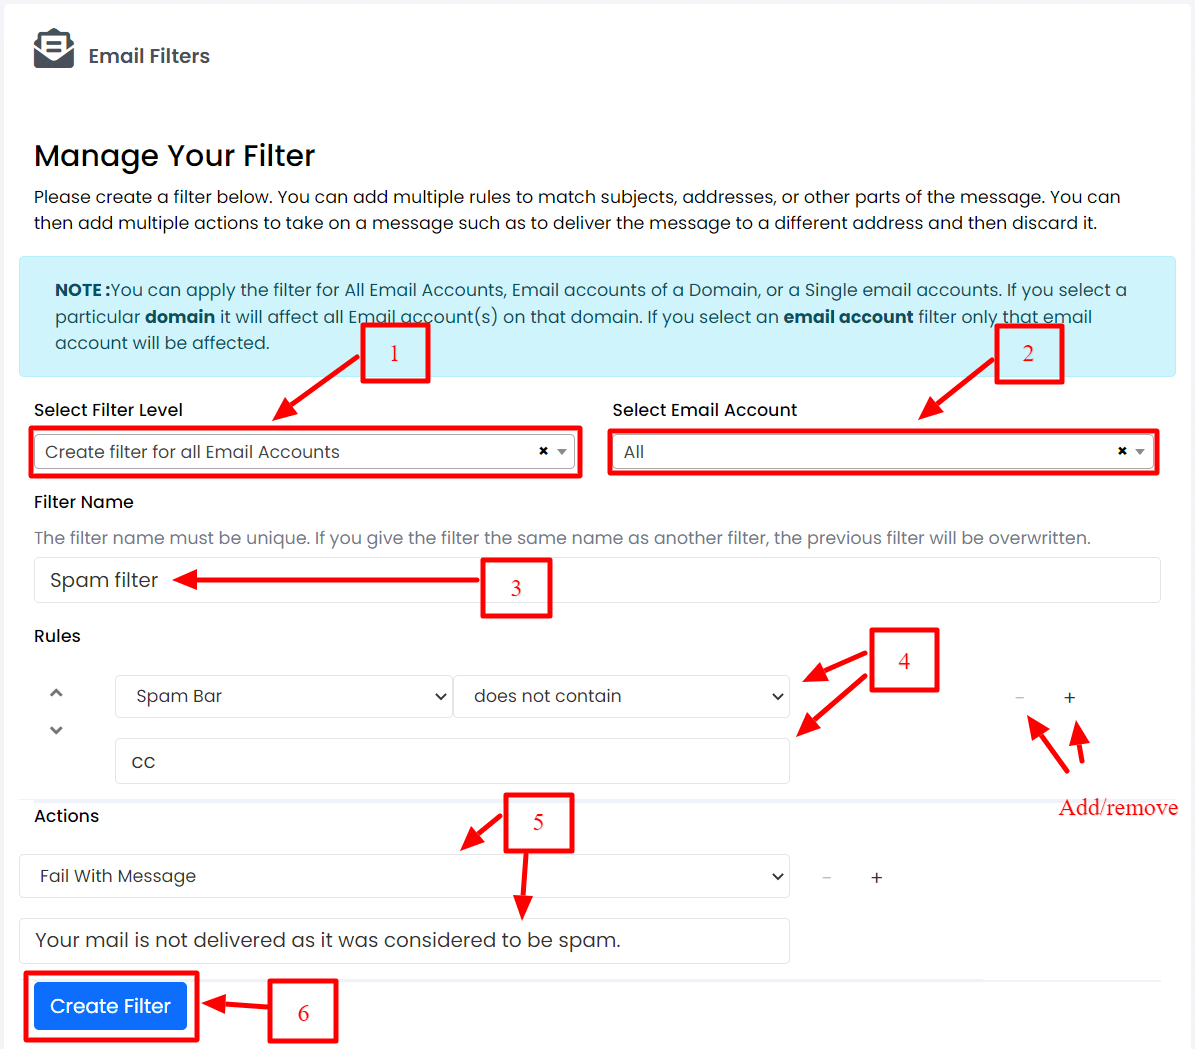
As a user, you can block emails addressed to your email address. Webuzo offers a tool to add email filters for the email accounts on your hosting.
To Add Email Filters
1. Log in to your user account of Webuzo.
2. Go to the Email section and click on Email Filters.

3. Click on the Create New Filter button.

The Manage Your Filter panel will appear.
4. Here, you have to configure the settings and enter the details for the filter to function.
- Select Filter Level: Choose whether to apply the filter to a domain or the entire hosting.
- Select Email Account: Choose to apply the filter to a single email account or all accounts under the hosting.
- Filter Name: Enter a unique name for the filter.
- Rules: Specify the rules to identify the emails to be filtered.
- Actions: Choose what to do with the filtered email messages.
Note: You can add more than one Rules or Actions by clicking on the + icon. You can remove them by clicking the – icon. In case of multiple Rules or Actions, you can also choose to apply the conditions together by choosing ‘and.‘ If you want to apply one of the conditions, choose ‘or.‘

5. Once you have made all the configurations, click on Create Filter.
It will create the filter that will deal with the email messages as you have set it.
You can use the same procedure to add more email filters for your Webuzo user account.


