Watch this video for a step by step process on how to add and modify DNS records in DirectAdmin
DirectAdmin enables you to change the DNS Zones. You can manage the different types of records within the DNS Zone. You can modify any sort of MX records or also, add that new subdomain to point towards sub-site that isn’t hosted on the server without disturbing the rest of your website.
In this guide, you will learn to access this area of DirectAdmin and make adjustments and add new records as necessary.
Steps to Create a New Record
1. Login to your DirectAdmin account.
2. Go to Account Manager and click on DNS Management. Here you will see all the records for you domain.

3. To add a new record, click on the Add Record button in the left-hand side corner.

4. A pop-up for Add Record will appear.
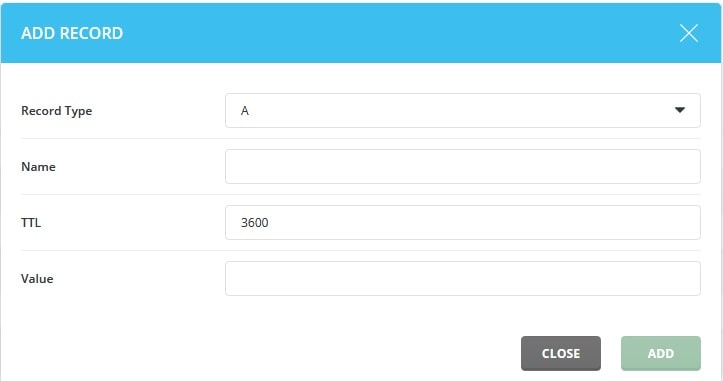
5. From the drop-down for Record Type, you can select the type of record you want to add from the below records:
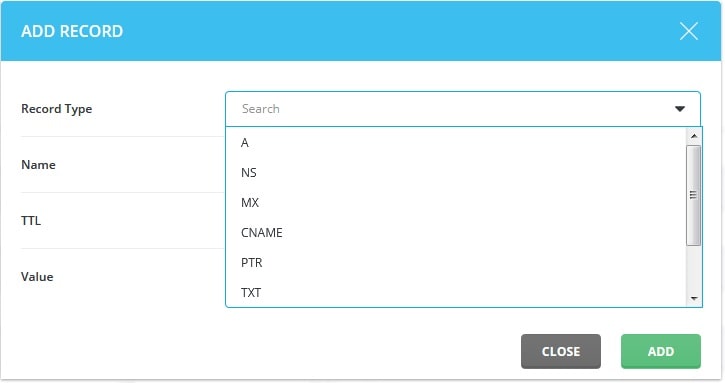
- A Record – It is used to point an IP to a particular location
- NS Record – It is used to point a domain to find its DNS information.
- MX Record – It is used to point a domain on which you want to deliver incoming mail.
- CNAME Record – It is used to point a domain to another domain.
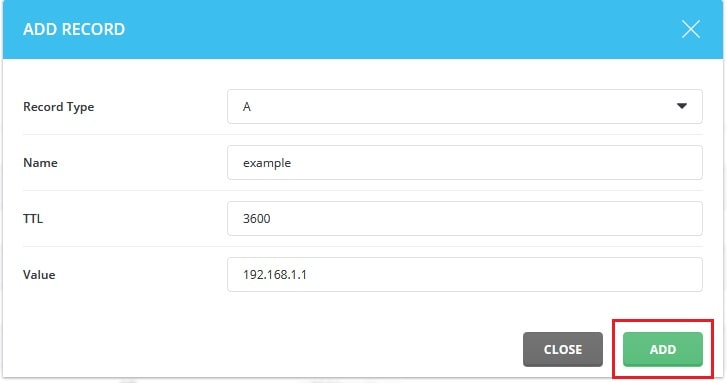
6. Here we will add the A Record for our domain.
7. Then type the name for the record in the Name field. Immediately, the result will be displayed as below:

8. In the Value field, enter the IP address and then click on the Add button.
9. You will then get a success message for the record and it will be displayed in the list of records in the DNS Management dashboard.
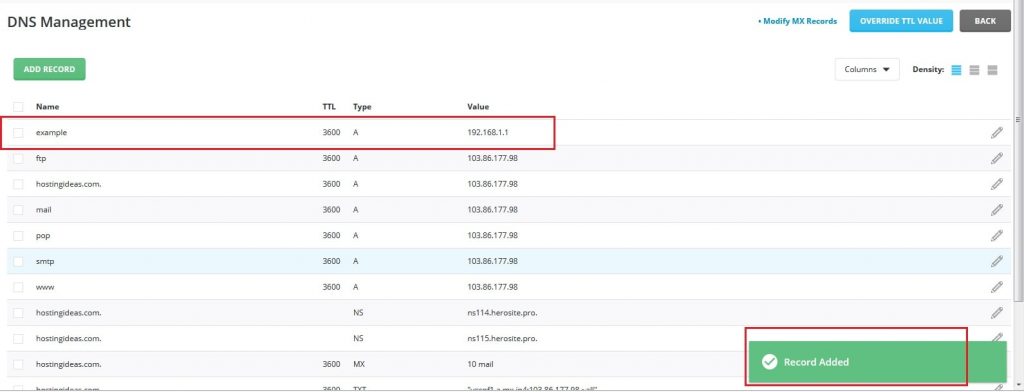
In this way, you can create a new record for your domain in DirectAdmin.
Steps to Modify the Existing Record
1. Login to your DirectAdmin account.
2. Go to Account Manager and click on DNS Management. Here you will see all the records for you domain.

3. Select the record that you want to modify and click on pencil icon in the same row right-corner.
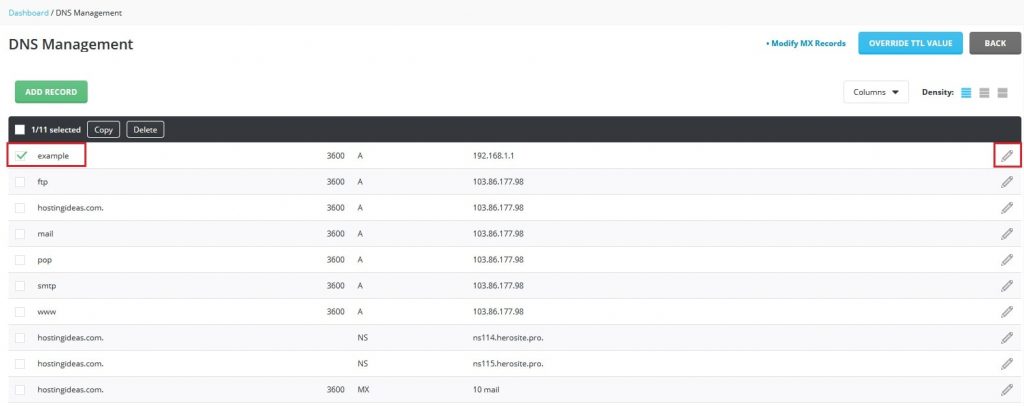
4. The Edit Record pop-up will get displayed. Here you can edit the record as per your preference. For example, we will change the record name to “example1” from “example”.
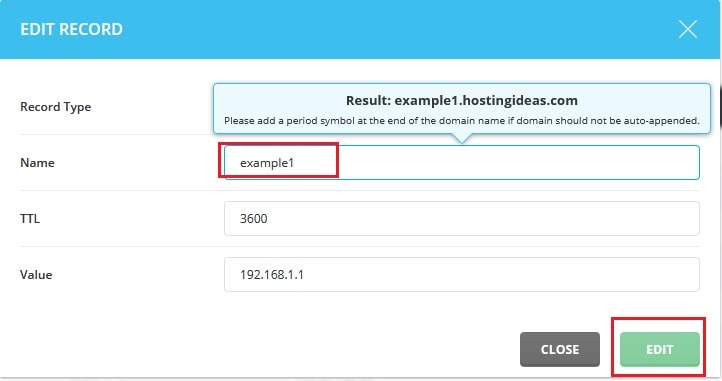
5. Next, click on the Edit button.
6. You will get a success message on the record is edited and you will see the changes in the DNS Management dashboard as below:
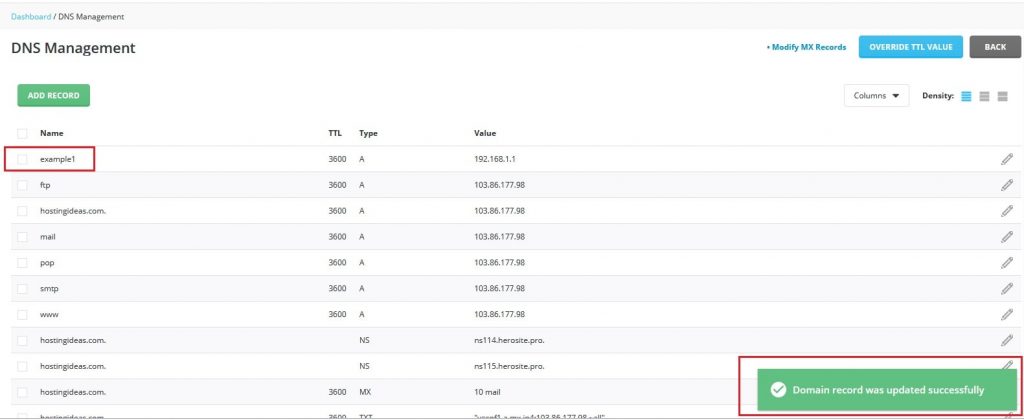
In this way, you can modify the existing record.


