This guide is created to help you with deploying a Tomcat application on a cPanel server using Podman. It’s that easy for someone who’s never touched either Podman or cPanel to follow and deploy his own application. So, let’s begin!
Introduction
When you have an application that needs to be deployed on a cPanel server, you will have to perform several configurations and setups. While there are many container management tools available, Podman makes it easy to use containers without the need for a daemon. This guide will demonstrate how you can use Podman to deploy a Tomcat application on a cPanel server so that everything is set up to work effortlessly for your clients.
Step-by-Step Deployment Guide
Step 1: Install Tomcat Using Podman
First, open the Terminal from cPanel to create a new Tomcat application by running the following command:
/scripts/ea-podman install ea-tomcat101
This command will create a folder named similar to ea-tomcat101.cpanelusername.02 in the ea-podman.d directory.
Step 2: Upload Your WAR File
Navigate to the folder /home/cpanelusername/ea-podman.d/ea-tomcat101.cpanelusername.02 and upload your .war file into the webapps directory. Ensure that your .war file is named ROOT.war.
Step 3: Configure Tomcat
Next, go to the directory /home/cpanelusername/ea-podman.d/ea-tomcat101.cpanelusername.02/conf and edit the server.xml file. Locate the following line at line 123:
<Host name="localhost" appBase="webapps" unpackWARs="false" autoDeploy="false" deployOnStartup="false" deployXML="false">Replace false with true in this line, so it reads:
<Host name="localhost" appBase="webapps" unpackWARs="true" autoDeploy="true" deployOnStartup="true" deployXML="true">Save the file and exit the editor.
Step 4: Restart the Tomcat Service
Restart the Tomcat service to apply the changes by running the following command:
/scripts/ea-podman restart ea-tomcat101.cpanelusername.02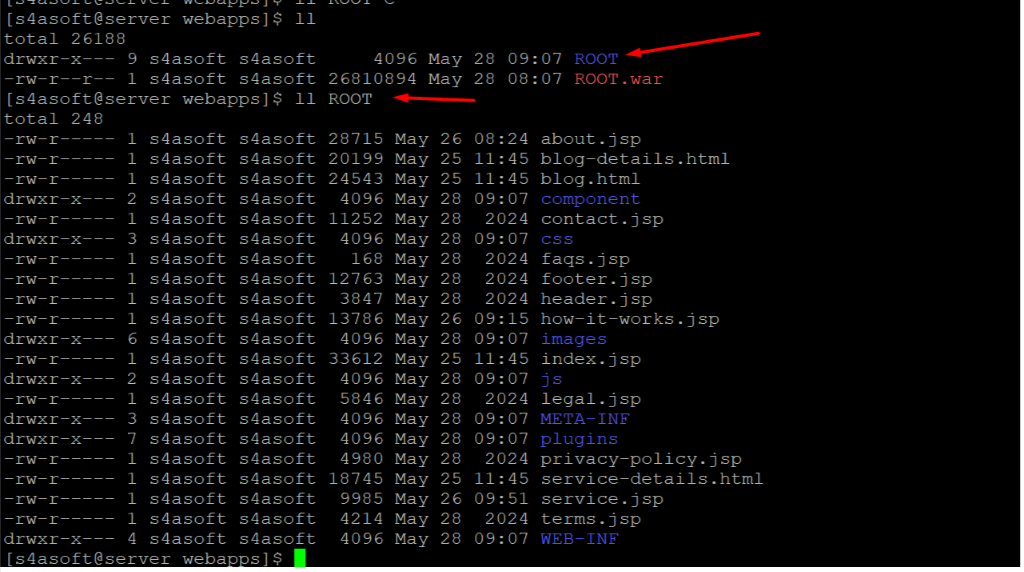
Upon restarting, your .war file will be deployed in the webapps folder, and a directory named ROOT will be created.
Step 5: Edit Apache Configuration
Log in to SSH as the root user and edit the Apache configuration file located at /usr/local/apache/conf/httpd.conf. Search for the domain dhanrishtacredit.com and uncomment the following lines in the virtual host entries for ports 81 and 444:
Include "/etc/apache2/conf.d/userdata/std/2_4/cpanelusername/dhanrishtacredit.com.cpanelusername.com/*.conf"Include "/etc/apache2/conf.d/userdata/ssl/2_4/cpanelusername/dhanrishtacredit.com.cpanelusername.com/*.conf"Save the file after making these changes.
Step 6: Create Required Directories
Create the following directories as the root user:
mkdir -p /etc/apache2/conf.d/userdata/std/2_4/cpanelusername/dhanrishtacredit.com.cpanelusername.commkdir -p /etc/apache2/conf.d/userdata/ssl/2_4/cpanelusername/dhanrishtacredit.com.cpanelusername.comStep 7: Create Proxy Configuration
In both newly created directories, create a file named proxy.conf and add the following code:
<IfModule proxy_ajp_module> ProxyPass "/" "ajp://127.0.0.1:10009/"</IfModule>You can determine the port by running the following command:
podman ps
Step 8: Restart Apache
Finally, restart the Apache server to apply the changes.
systemctl restart httpdThat’s it! Your Tomcat application should now be accessible.
When you take these steps, it’s easy to deploy a cPanel server Tomcat application through Podman, a container specification. It is imperative that Tomcat and Apache are configured properly in order to enable the software application run smoothly on your website. We trust that this guide has helped you understand more on how to achieve it but incase of any hiccups do not hesitate ping any of our techies at MilesWeb who are always on chat round clock.


