With phpMyAdmin, users can make alterations to their MySQL and MariaDB databases. This tool is available on cPanel, Plesk and DirectAdmin as well. You can even delete columns from a database via phpMyAdmin.
To Drop Columns from a Database Table via phpMyAdmin
Note: Before beginning, we recommend you create a backup for the database as the following actions will result in the permanent loss of some data.
1. Log in to your control panel(cPanel, DirectAdmin or Plesk) account.
2. Browse and click on phpMyAdmin.
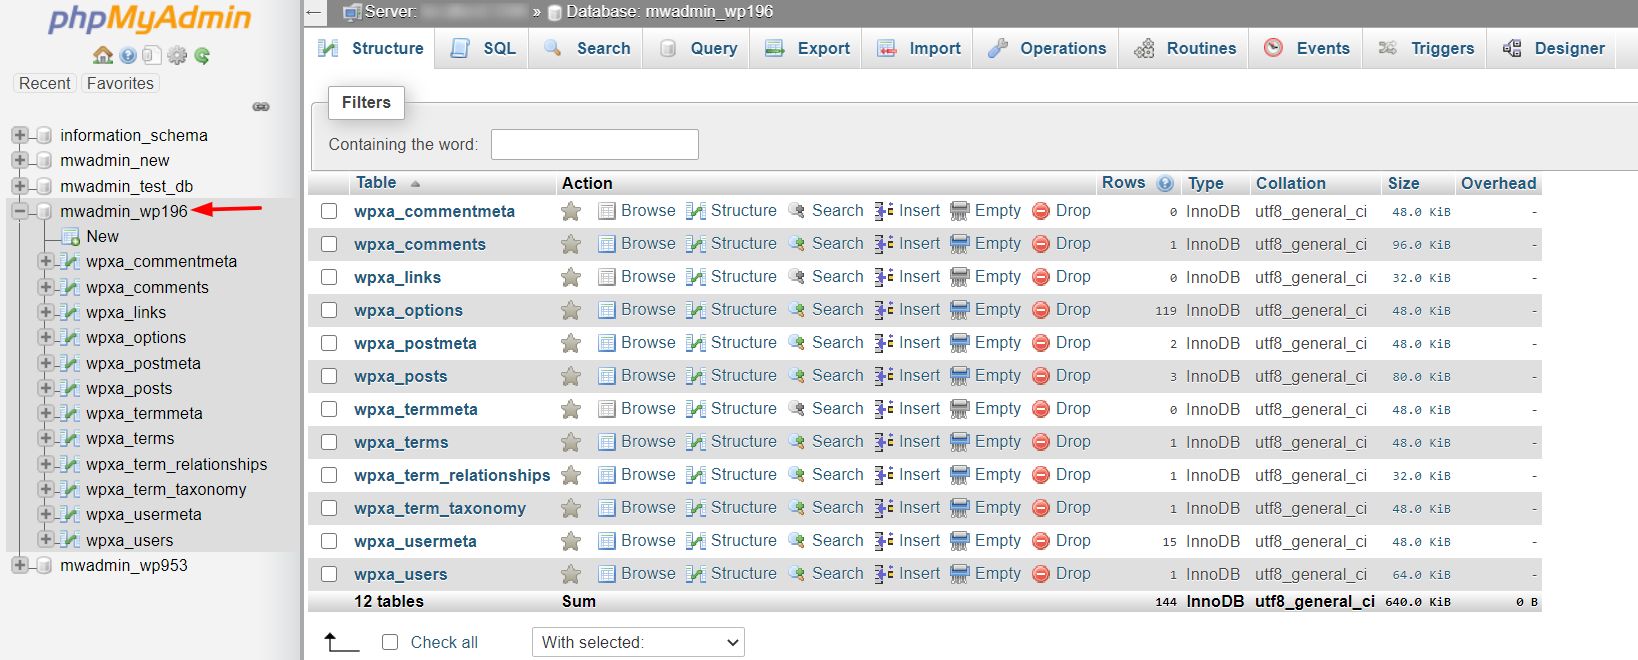
3. The phpMyAdmin window will open. Select a database from the list.

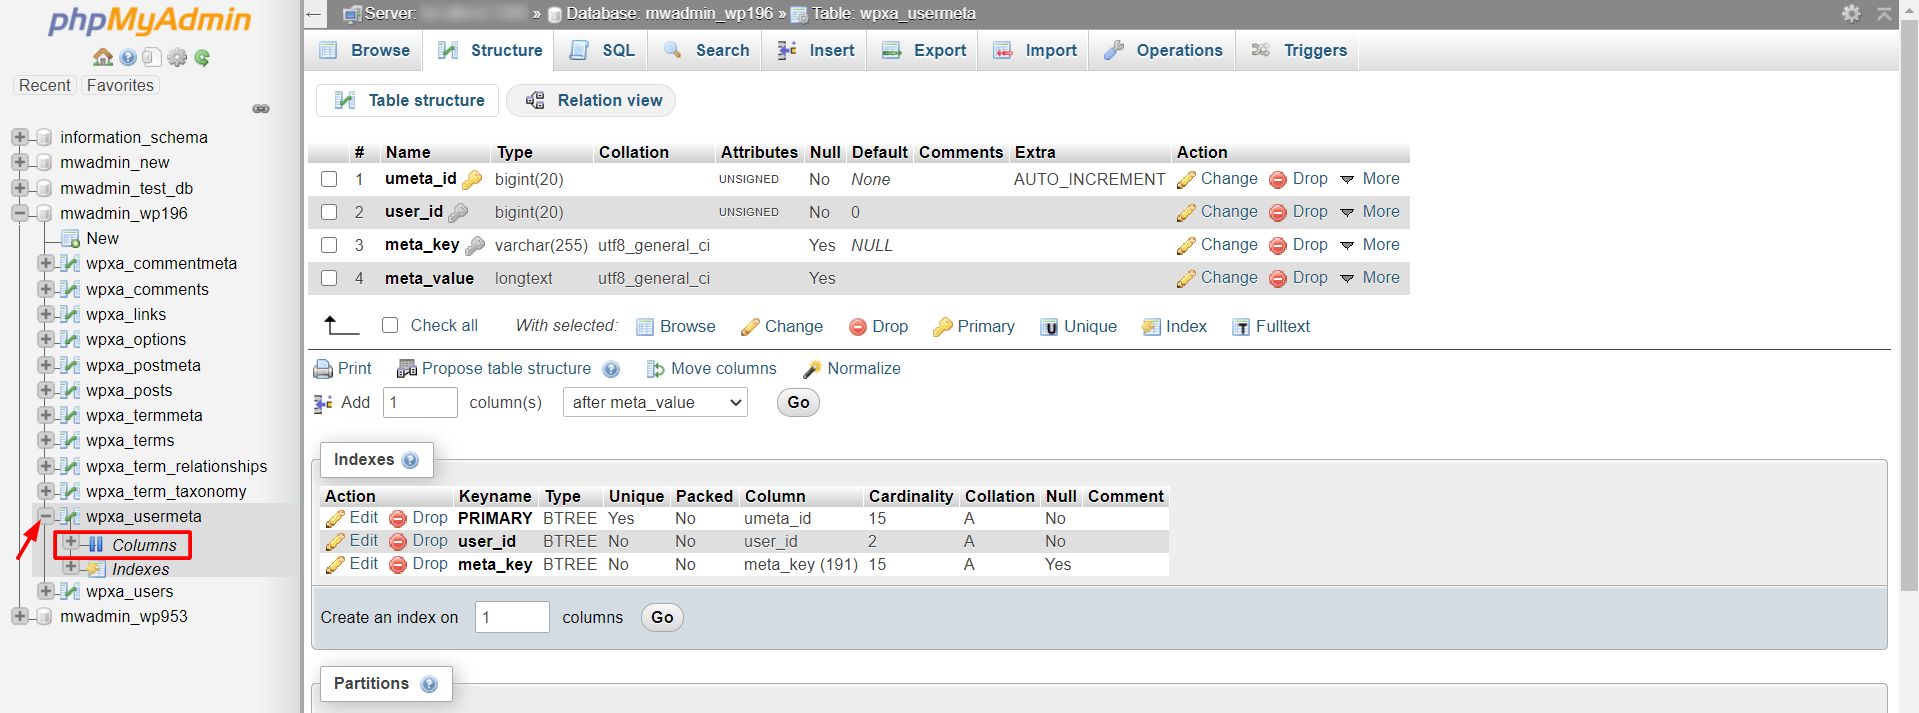
4. Click on the ‘+’ icon beside the table whose columns you wish to drop.
5. Click on Columns. A panel showing the list of columns and functions will appear.
 6. Tick beside the column you want to delete/drop and then click Drop.

Note: The Drop function permanently deletes the column and all its data from your database. You have to be sure that this action will not affect your database later as the data would be beyond recovery.
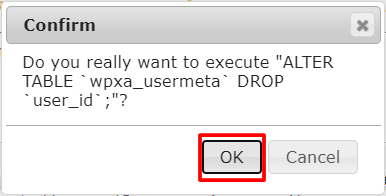
7. A pop-up window will display the details of the column that is to be dropped. After confirming the details, Click OK.

phpMyAdmin will delete the column from the table permanently.


