Prior to learning to enable SSH access let’s understand what is SSH? The SSH protocol (also called as Secure Shell) is a method to secure remote login from one computer to another. With SSH, you get several alternative options for strong authentication, and it uses strong encryption for the communications security and integrity.
Steps to Enable SSH for a New cPanel Account
In case of multiple cPanels that require SSH, you can activate them all within root WHM.
1. Log into your root account of WHM.
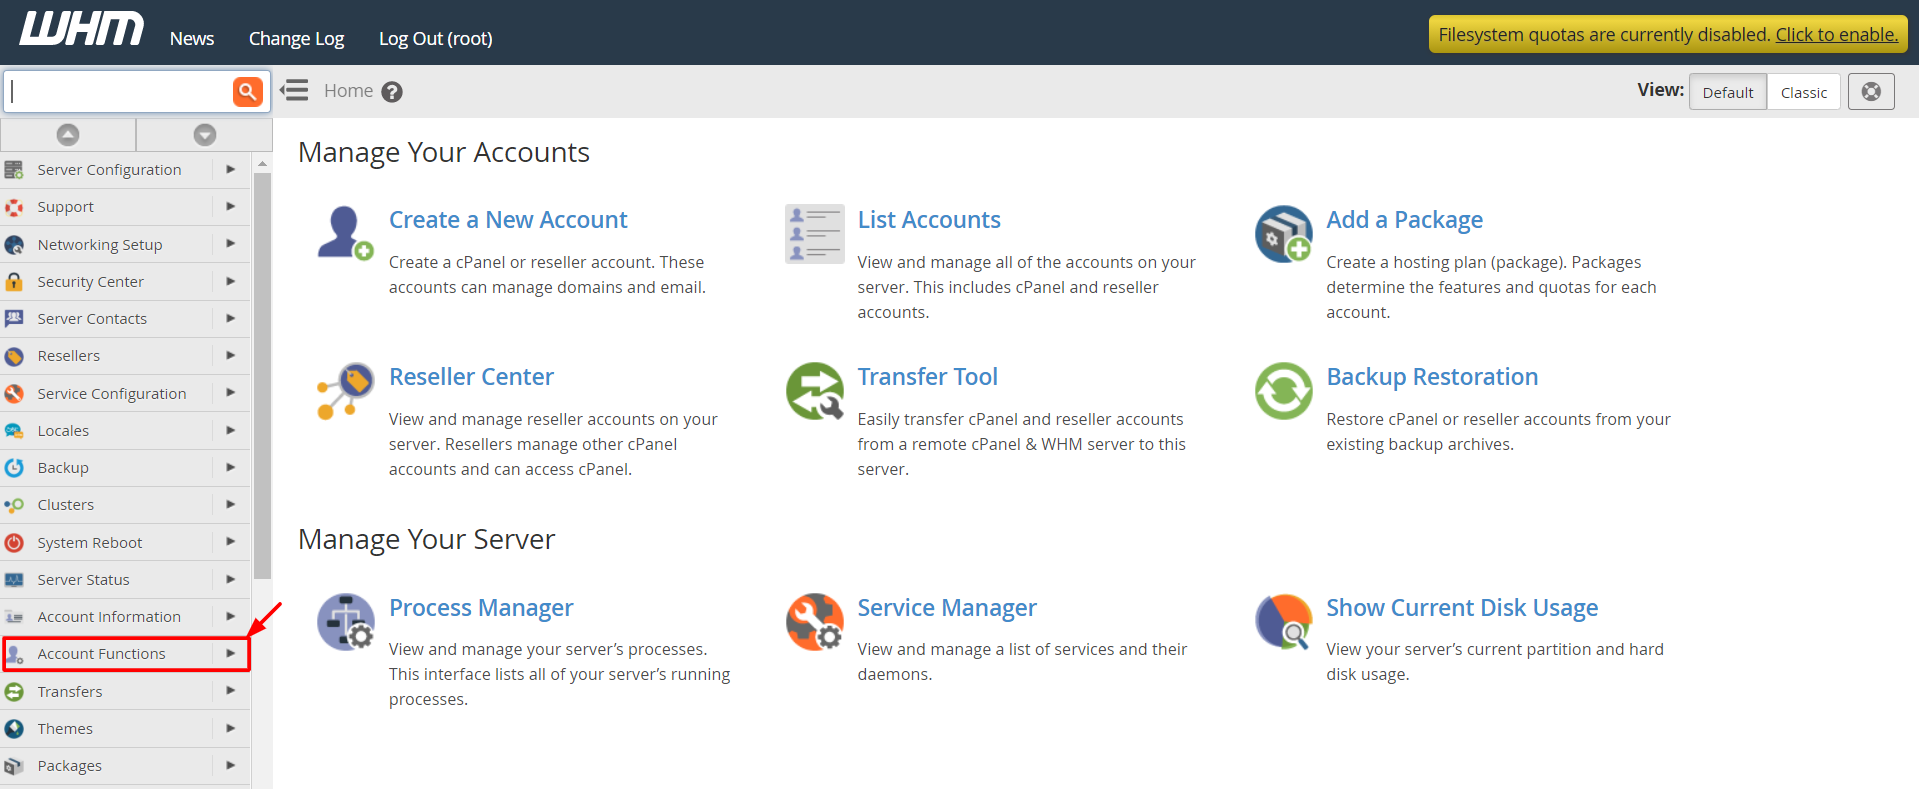
2. Go to the left navigation menu and click Account Functions.
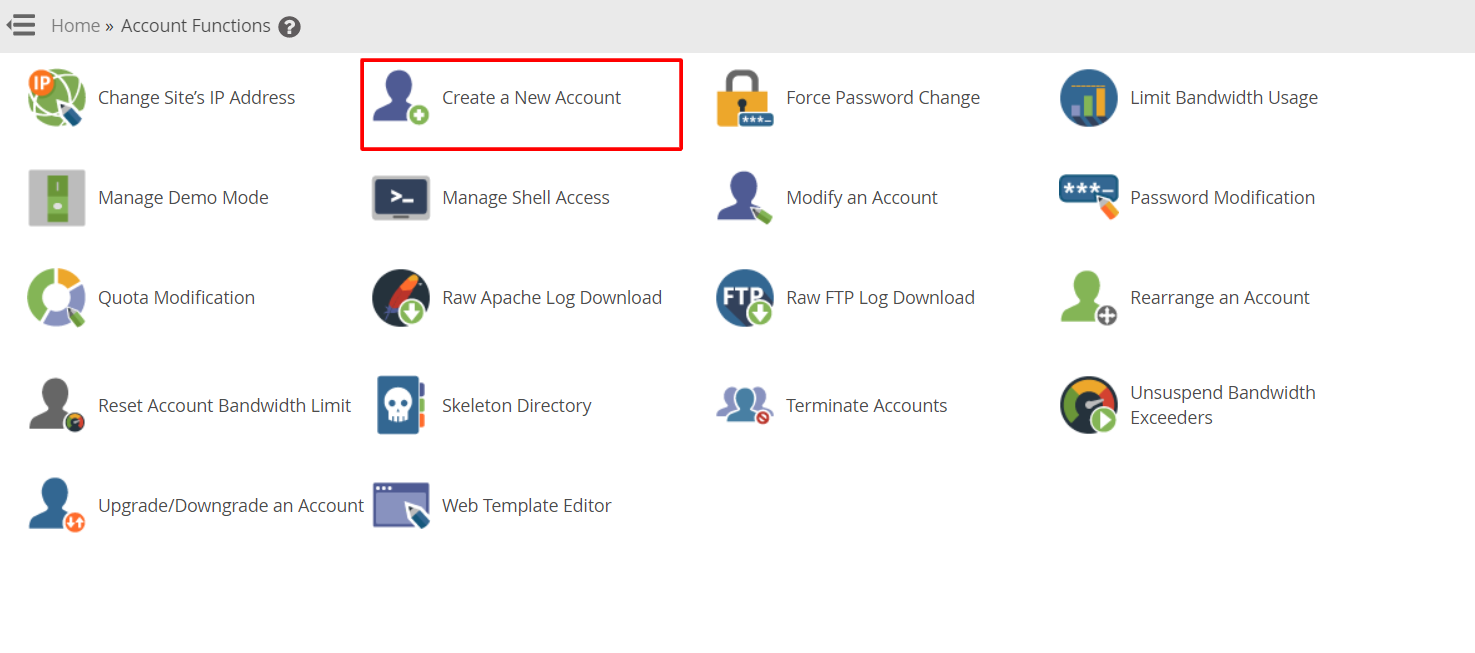
3. Click on Create A New Account.
Here create a new account with all the details asked.
4. Tick the Select Options Manually box in the Package section.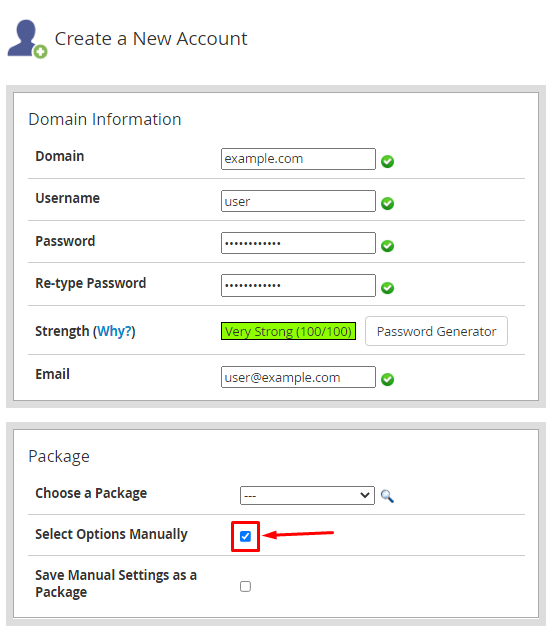 Due to this, you will be able to choose between normal shell, jailed shell or disabled shell.
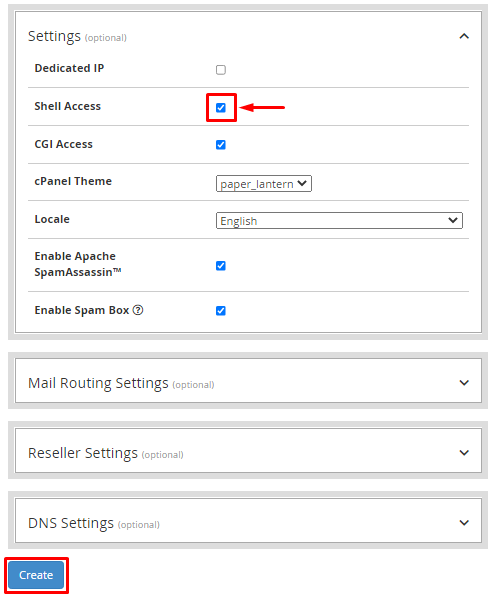
5. Go to Settings and click the SSH Access box.
6. Then click on Create at the bottom of the page.
Steps to Enable SSH for an Existing cPanel Account
To enable SSH for an existing cPanel account, follow the below steps:
1. Log into your root account of WHM.
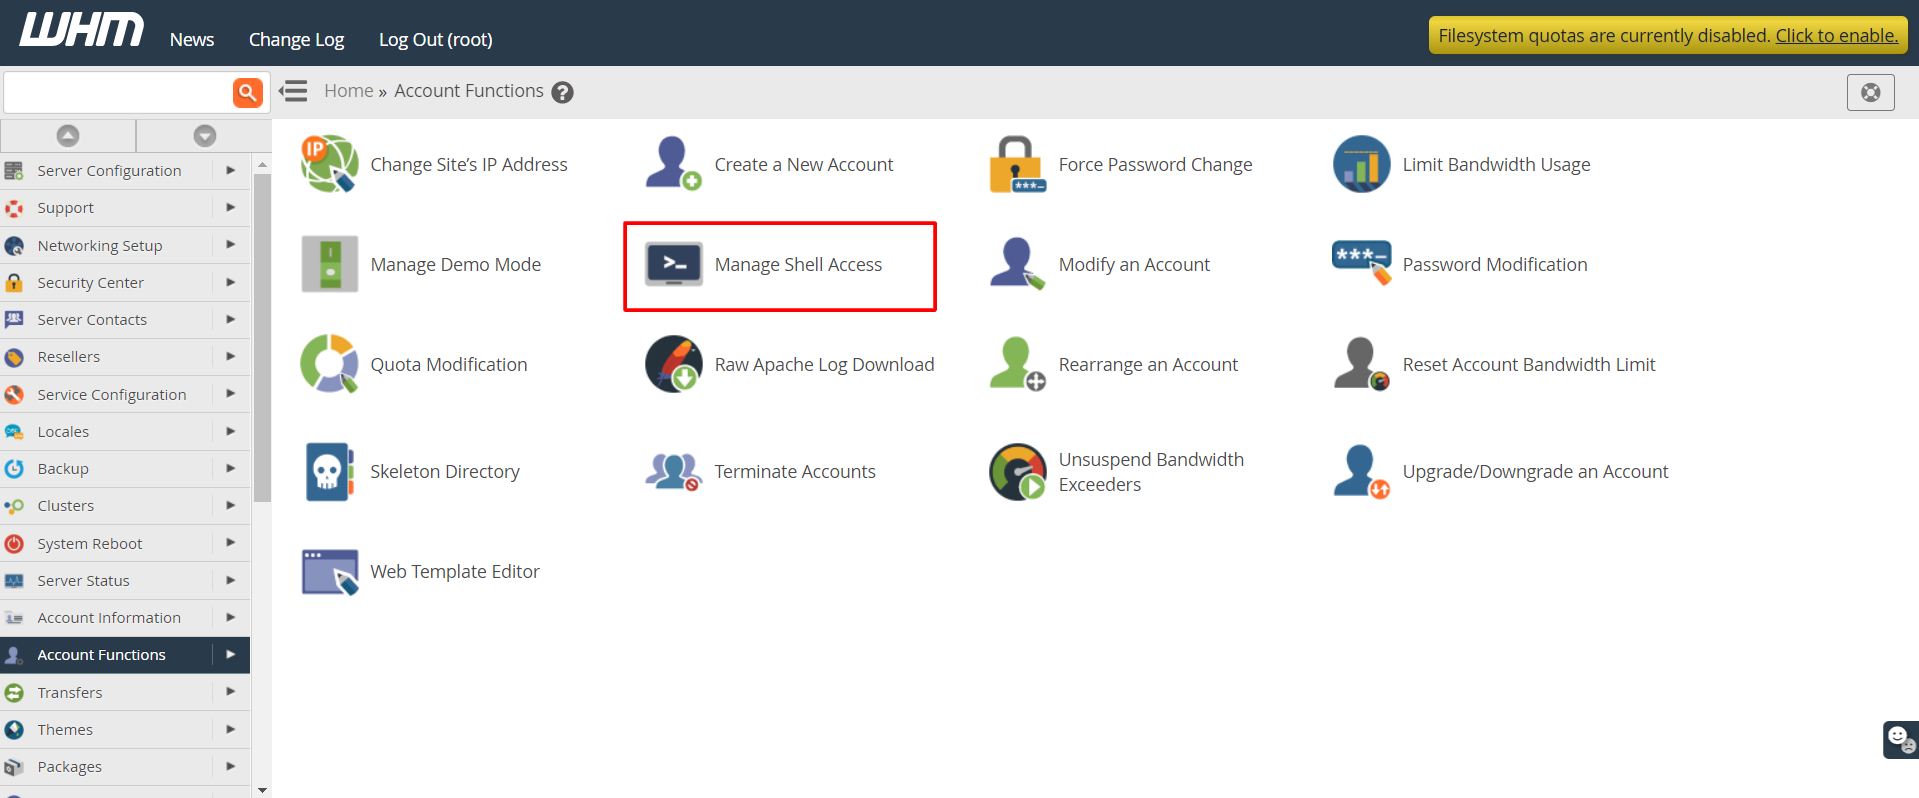
2. Go to the left navigation menu, click on Account Functions.

3. Click on Manage Shell Access.
4. Now, select the account you want to modify, then select the type of SSH access that you want to apply (either normal shell or jailed shell).
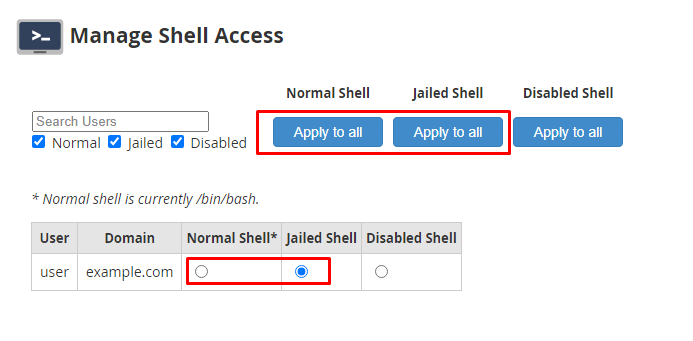
After the selection is done, WHM will automatically save the changes.
In this way, you can enable SSH for a new as well as an existing cPanel account.
Also Read:
What is SSH Root access or RDP access?
How Do I Enable The SSH / Shell Access in cPanel On VPS?


