This article explains how to create a self-signed SSL certificate for a domain of your choice using cPanel.
cPanel
# Steps for generating a self-signed SSL certificate as a cPanel user.
Perform the following process if you are logged in to cPanel and not WHM as the root user :
Before starting, make sure you have the SSL/TLS feature enabled for your cPanel account. In case you have purchased a cPanel account from a reseller, then they will need to enable this feature for you.
You can verify if this feature is enabled if you are able to access cPanel -> Security -> SSL/TLS.
1) Login to your cPanel account.
2) On the cPanel dashboard, scroll down to Security and click on SSL/TLS.

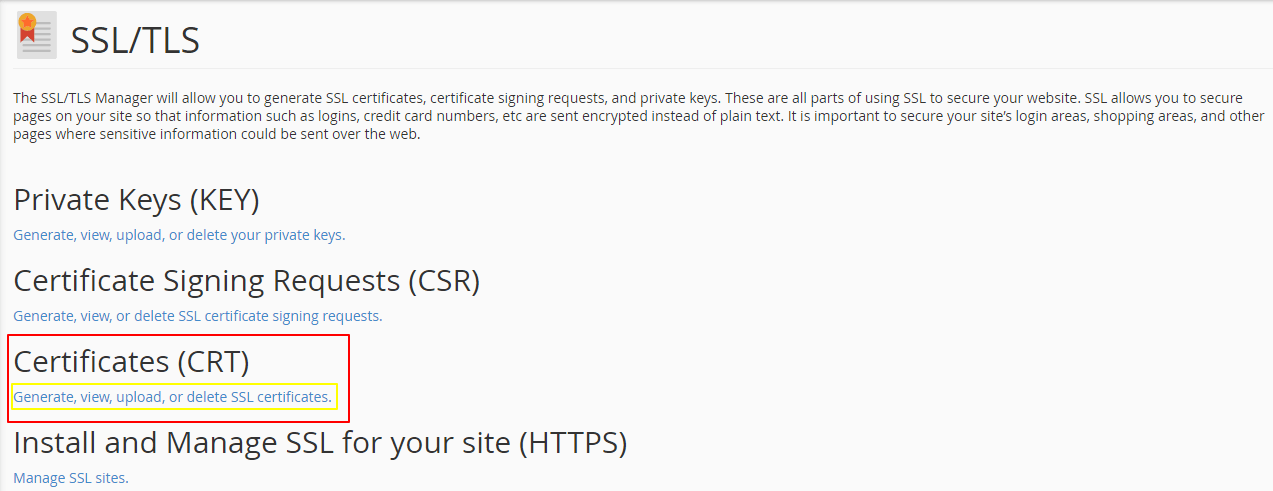
3) On the SSL/TLS page, click on the Certificates (CRT) i.e on the hyperlink for Generate, view, upload, or delete SSL certificates.
4) On the next page, you will see various fields, related to your SSL certificate. Validated SSL certificates are mostly issued with some additional information that is used to identify a domain’s registrant. This information needs to match the WHOIS information for the domain you wish to create an SSL certificate for.
5) You need to fill the fields that are highlighted in the below image, in order to successfully generate SSL.
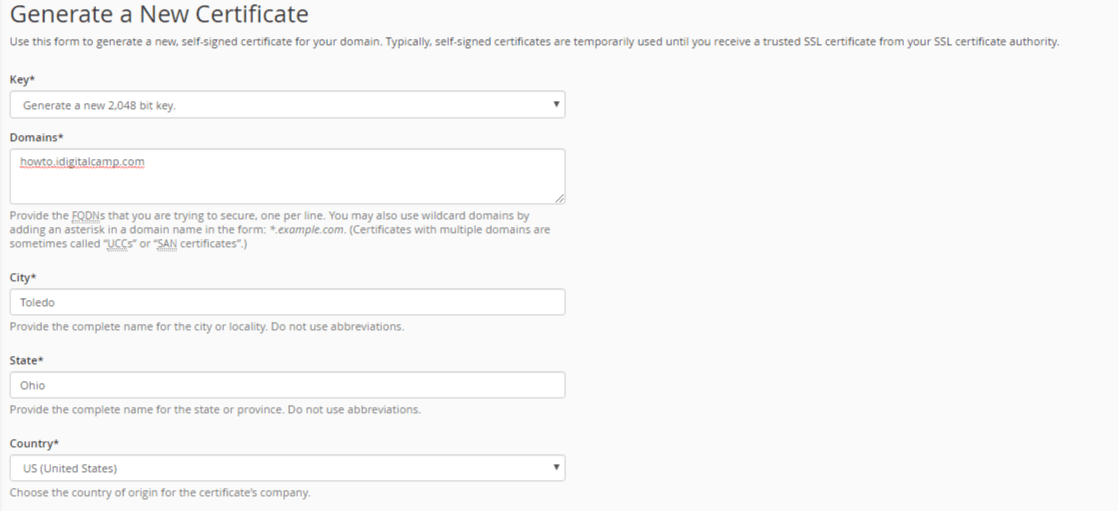
6) After filling all the required fields, click on the Generate button to generate the self-signed SSL certificate.

7) The next page, will display the result that a self-signed SSL certificate has been generated based on your preferences.
cPanel automatically stores the SSL information that it generates (you can view it in cPanel -> Security -> SSL/TLS -> Generate, view, upload, or delete SSL certificates), but still you are recommended to copy this information and save it to a local device for record-keeping.

WHM
# Steps to generate a self-signed SSL certificate as the root user.
Follow the process if you are logged in to WHM only as the root user.
1) Log in to your WHM.
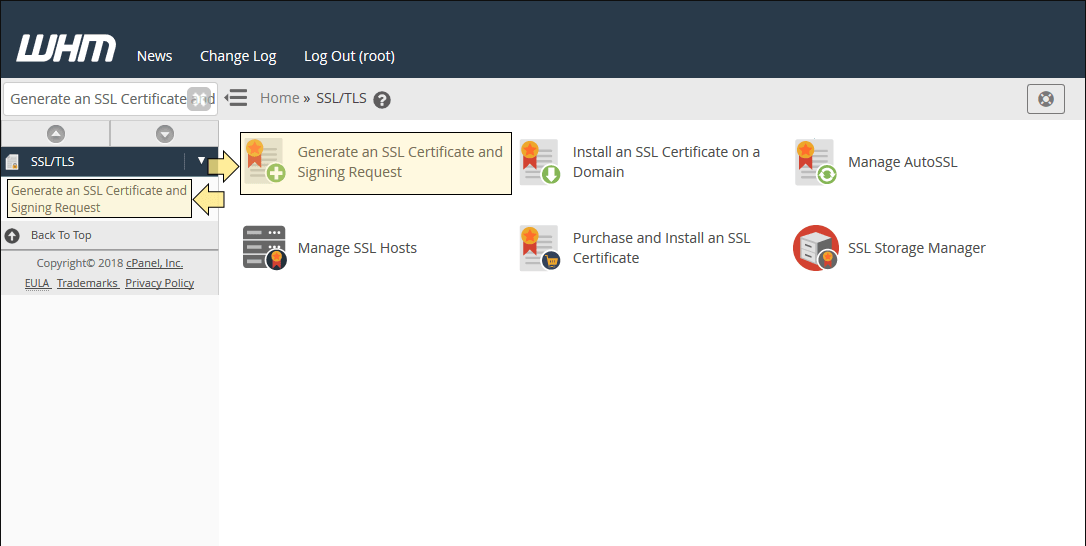
2) On the WHM dashboard, in the left-hand side section, under the SSL/TLS tab, click on the option Generate an SSL Certificate and Signing Request.
3) On the next page, you will see various fields, related to your SSL certificate. Validated SSL certificates are mostly issued with some additional information that is used to identify a domain’s registrant. This information needs to match the WHOIS information for the domain you wish to create an SSL certificate for.
In the below image, the fields that are commonly applicable to a CSR submission to a valid certificate authority are filled.
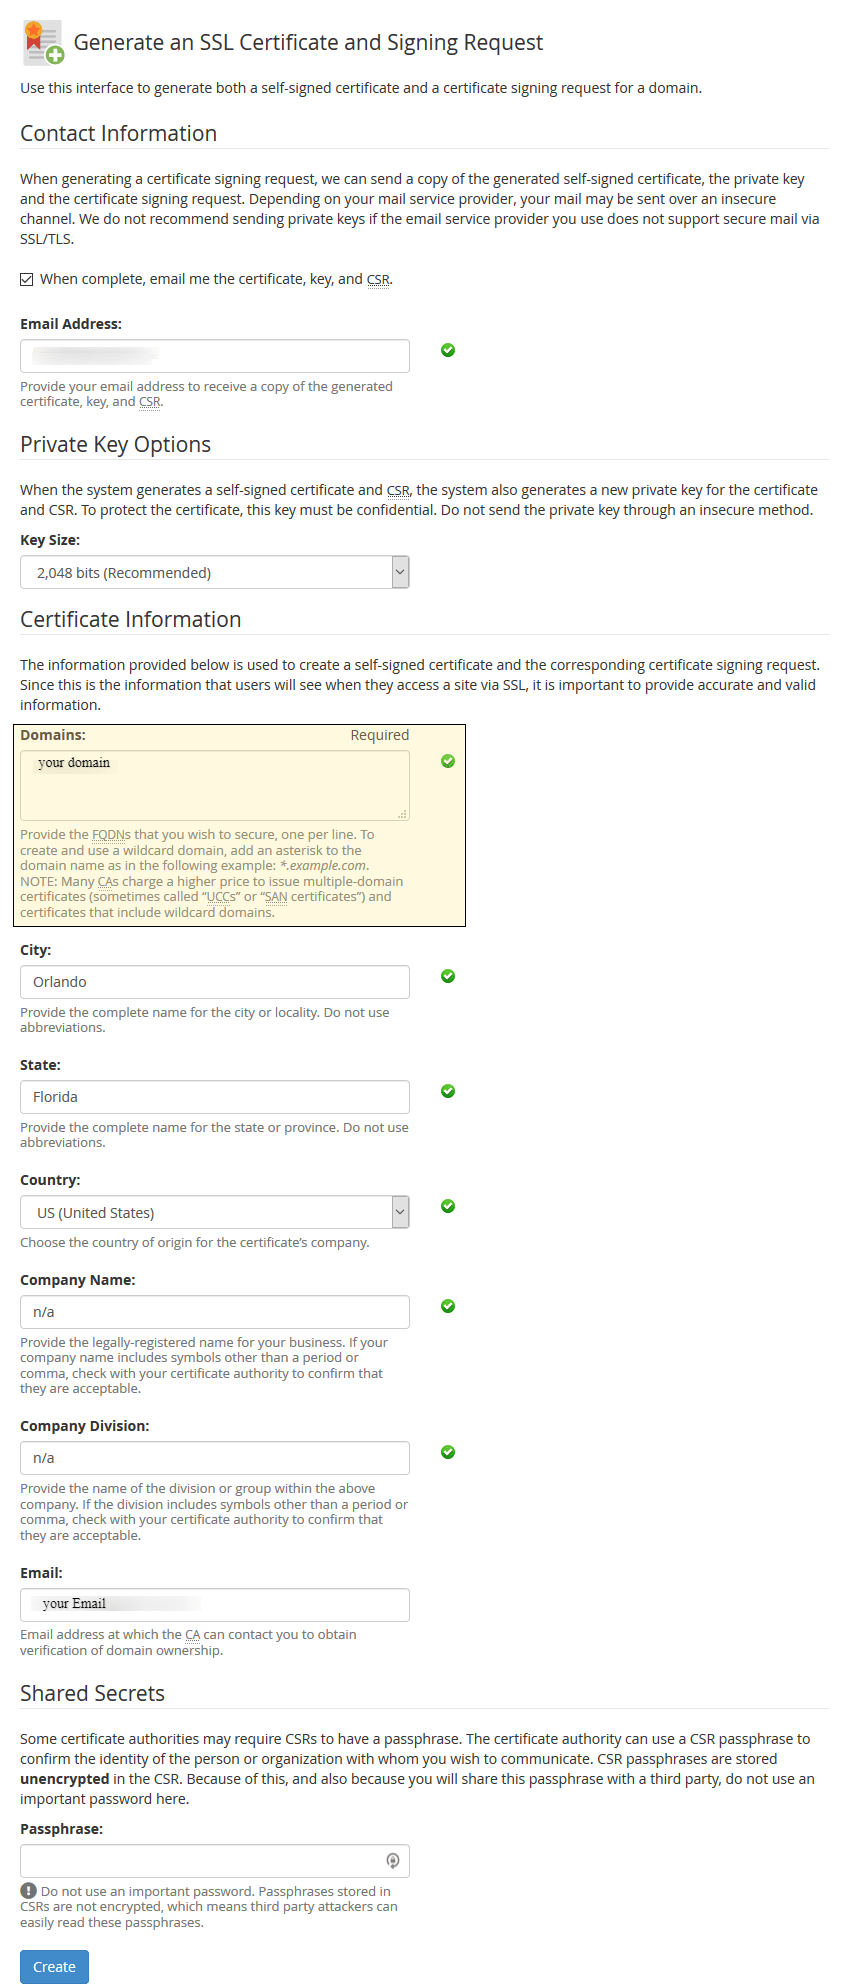
4) After filling out the required fields, click on the Create button to generate the self-signed SSL certificate.
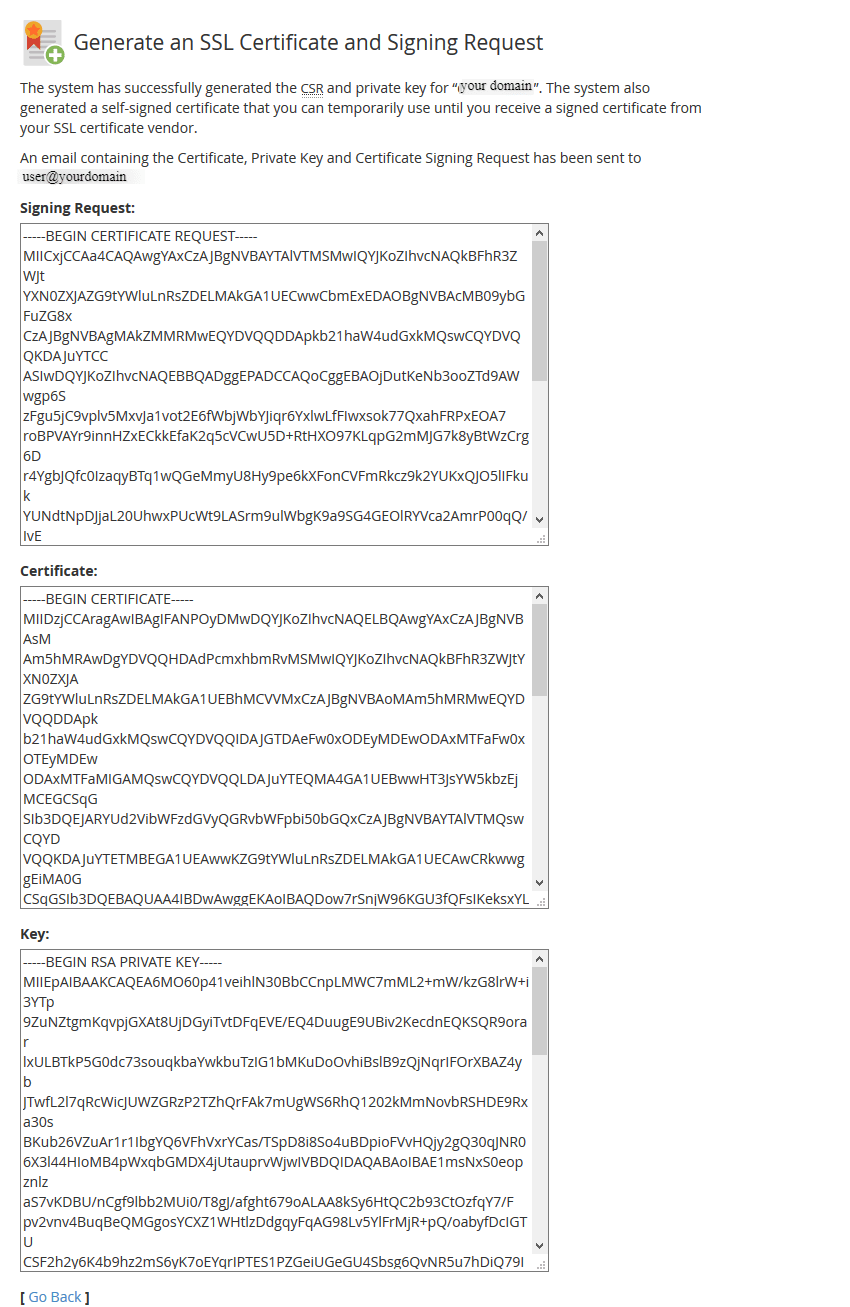
5) The next page will display the result that a self-signed SSL certificate has been generated based on your preferences.
cPanel automatically stores the SSL information that it generates (you can view it in cPanel -> Security -> SSL/TLS -> Generate, view, upload, or delete SSL certificates), but still you are recommended to copy this information and save it to a local device for record-keeping.
That’s it.
SSL certificate can be installed for any domain on the server itself. It can also be installed for a service outside of the cPanel server if needed.
Also Read :
1) How to Add and Delete CNAME Records in cPanel and WHM?
2) (Leech Protect) – What is it and How to Set It Up in cPanel?
3) Learn to setup Two-Factor Authentication for Reseller in WHM


