In the website world, ensuring data security is paramount. Several web hosting plans include the free SSL certificate as a security layer for the website. It encrypts all kinds of sensitive information between the website and its visitors. This is available for Linux and Windows OS servers.
However, when it comes to using Windows VPS servers or the normal Windows server with IIS (Internet Information Services), you might need to install a .pfx file. It is a common format for SSL certificates. Do you know how to install it? This is the guide to sharing information.
Scenario
IIS in the Windows server needs to be configured with an SSL certificate contained in the .pfx file.
Prerequisites
- Virtual Server Machine (In my case Windows Server 2022 Standard)
- IIS (I have used IIS Version: 10)
- .pfx file
Installation Steps
1. Kindly follow the steps to install a certificate on IIS with .pfx file already configured in your system.
2. Navigate to the folder where you have the .pfx file.
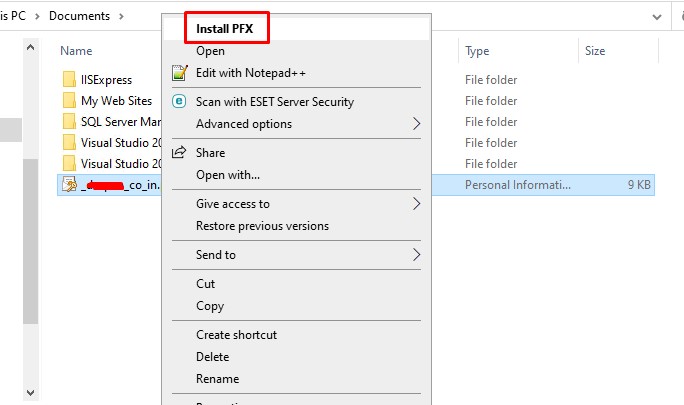
3. Right click on the .pfx file and you will come across a popup window with Install PFX option. Refer to the screenshot shared below.
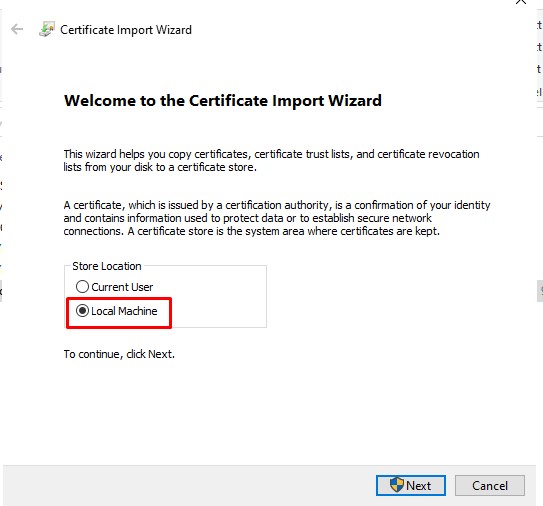
4. You will be navigated to the new window of Certificate Import Wizard as shown in the screenshot. Click on the Next button.
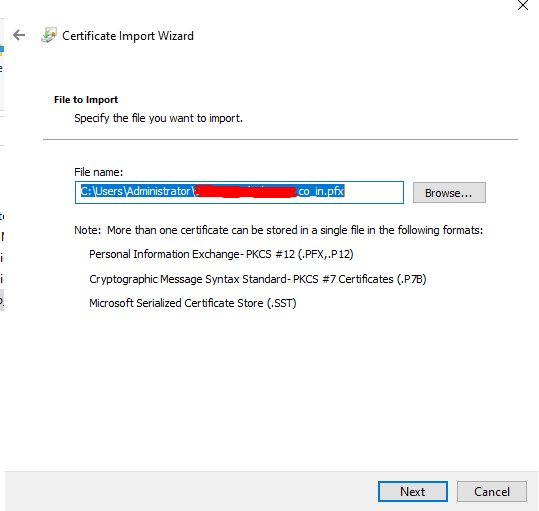
5. On clicking the Next button, it will bring up the File to Import window. Notice the Filename in the File to Import section, it is already filled in with the .pfx file name.
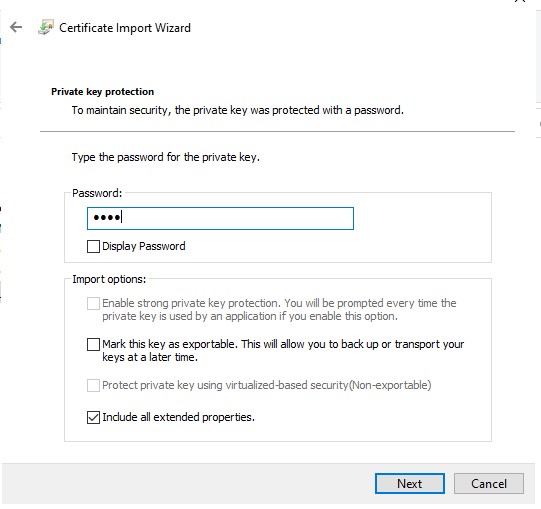
6. After clicking on the Next button, you will be navigated to the Password window. If you have already added the password while creating the .pfx file then use that password in the relevant text box. Or else move forward by clicking Next.
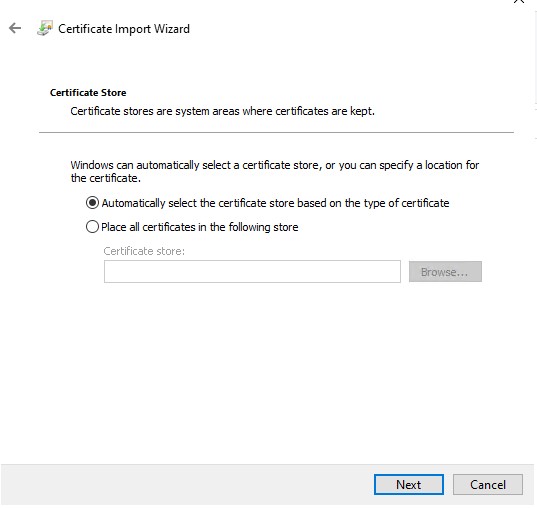
7. Once you click the Next button, you will be navigated to the Certificate Store Window as shown in the screenshot. You can either leave the default option or else go with the second option for a change.
8. As shown in the screenshot, once you click on the Next button, the Completing the Certificate Import Wizard window will open. Click on the Finish button to complete the process.
9. After clicking on the Finish button, an alert message will appear stating, “The import was successful,” as shown in screenshot.
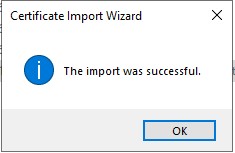
10. Click on OK.
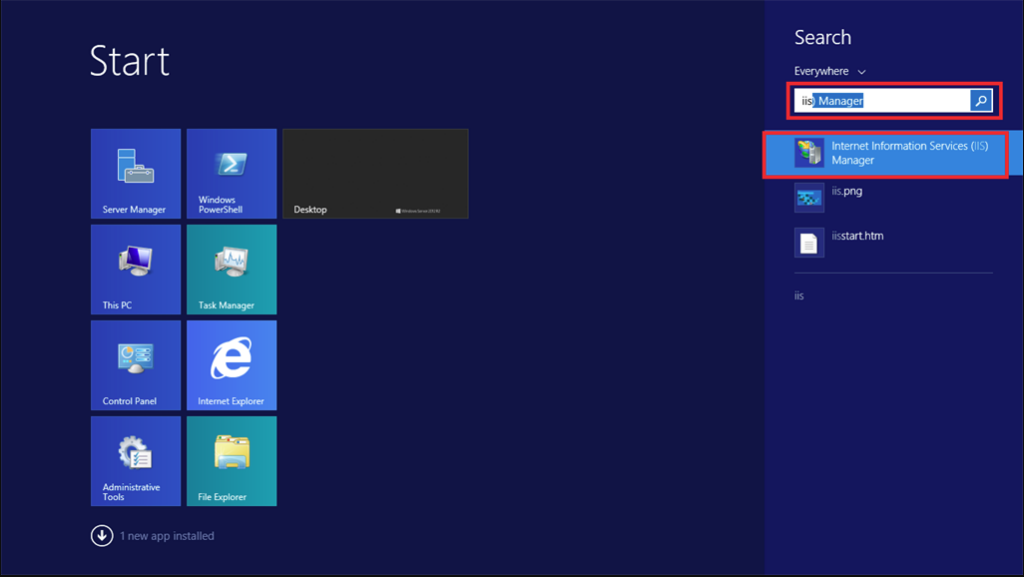
Now, we need to check whether the server certificate was installed or not. To do this, we need to go to IIS (Internet Information Services).
Press the Windows key on the keyboard, search for “IIS Manager” as shown in Screenshot 8, and click on IIS Manager in the list.
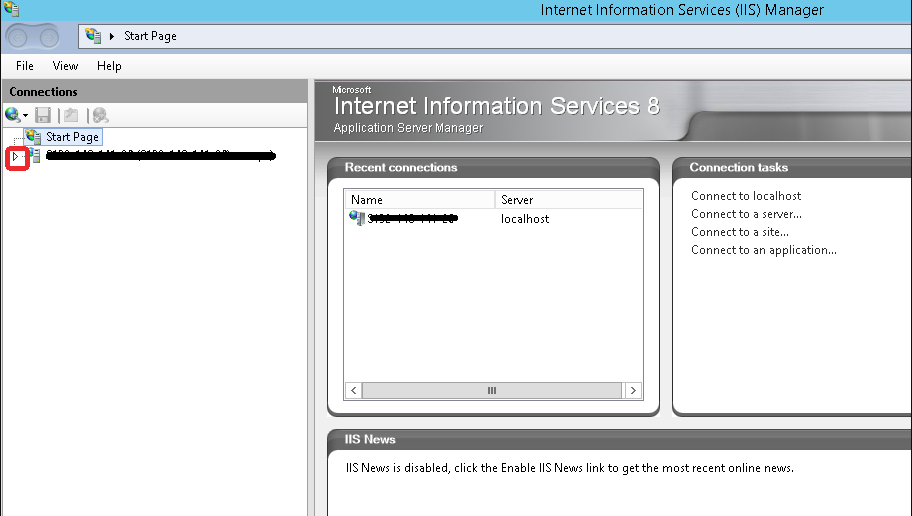
11. After clicking on IIS Manager, the IIS Manager window will open. Expand the tree structure of the server by clicking on the arrow in the highlighted area in Screenshot 9.
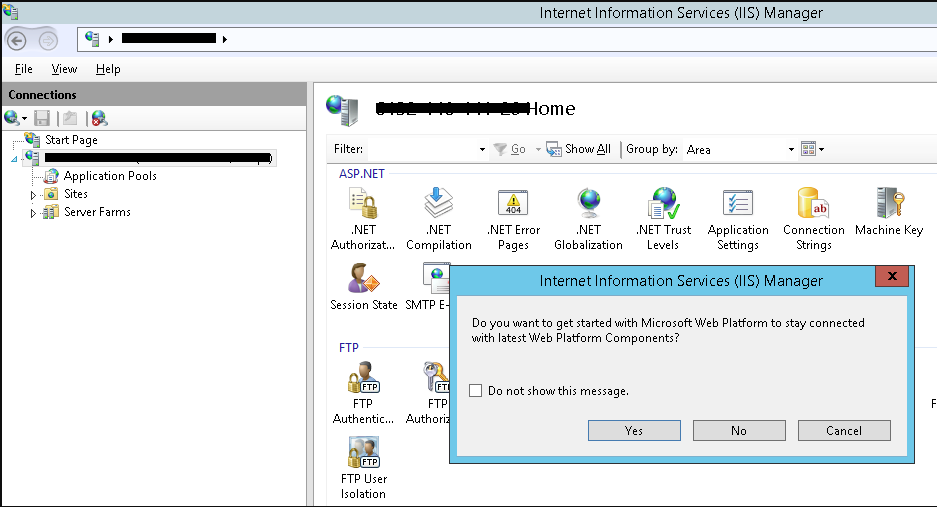
12. After clicking on the arrow, a popup message may appear as shown in Screenshot 10. For now, click on Cancel and proceed to the next step.
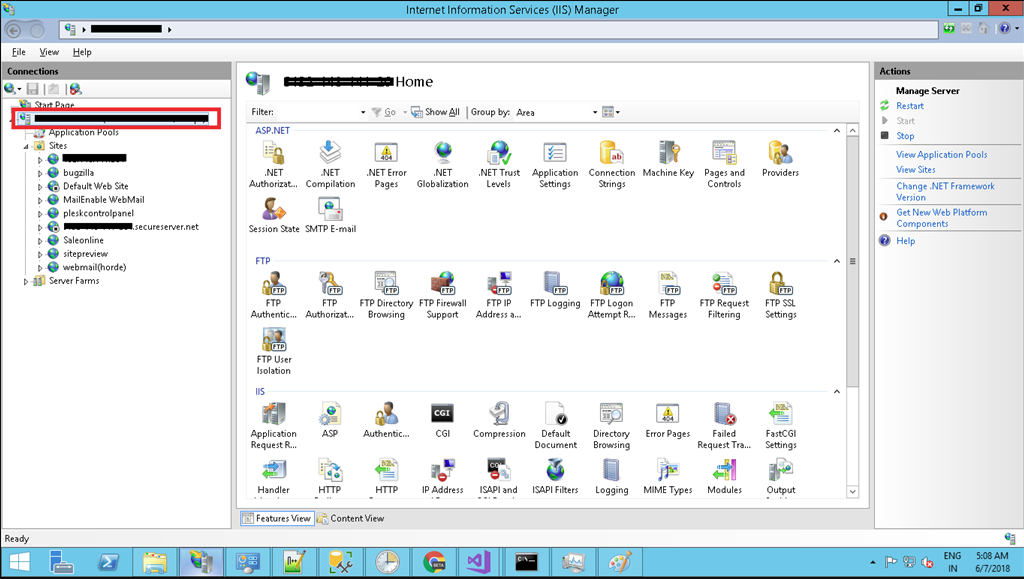
13. Now, select the Server (highlighted with a red border) as shown in screenshot.
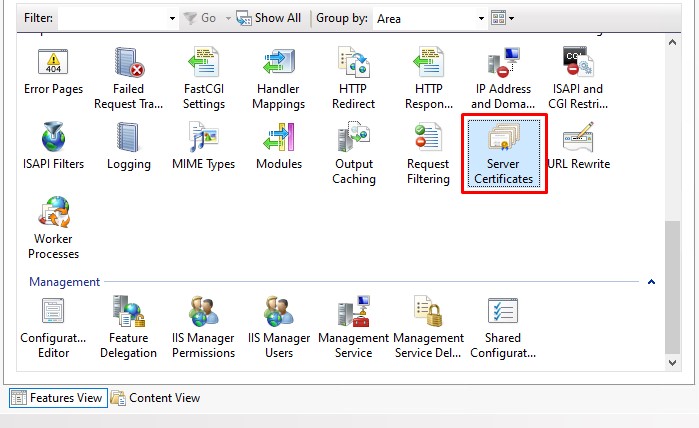
14. Next, scroll down a bit in the Features View as shown in screenshot. Find “Server Certificates” and double-click on it as shown in screenshot.
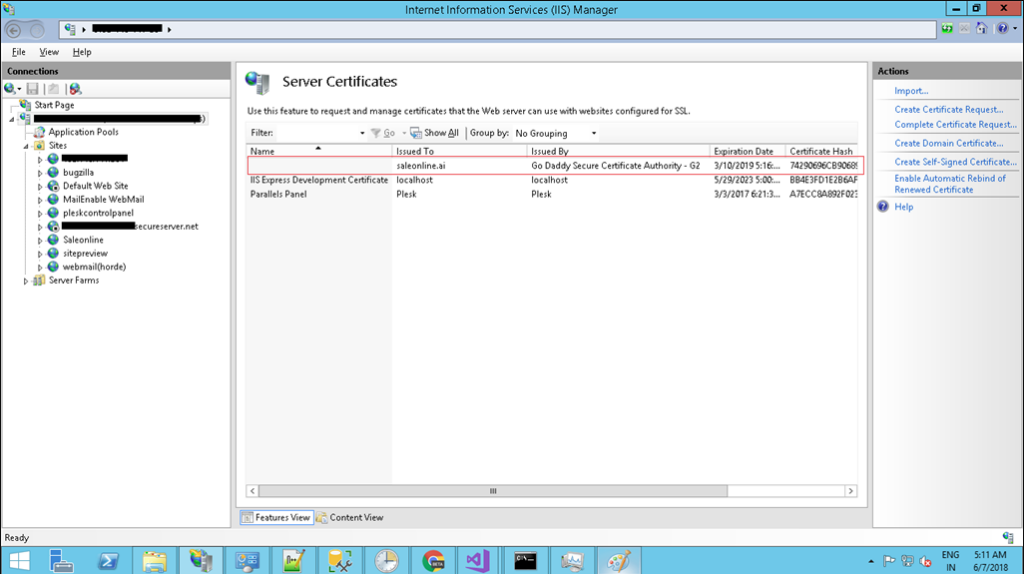
15. After double-clicking on “Server Certificates,” a list of the installed certificates will open. The installed certificate is highlighted in screenshot.
16. Go to the binding settings of the domain and update it for port 443 with newly install SSL certifcate.
Installing an SSL certificate on your IIS server is a crucial step in securing your web hosting environment. By following the steps outlined in this guide, you can successfully import a .pfx file and bind it to your website, ensuring that all data transmitted between your site and its visitors is encrypted and protected.
For a seamless and hassle-free web hosting experience, consider MilesWeb, a leading provider of reliable and secure hosting solutions. MilesWeb offers a range of hosting plans tailored to meet the needs of businesses of all sizes. With MilesWeb, you can enjoy top-notch performance, robust security features, and excellent customer support, ensuring your website runs smoothly and securely. Choose MilesWeb for your web hosting needs and take your online presence to the next level.


