To install the DNS server on Windows server 2019, follow the below steps:
1. Go to the Server Manager and click on Add Roles and Features either from the Quick Start menu or from the Manage menu on the top.

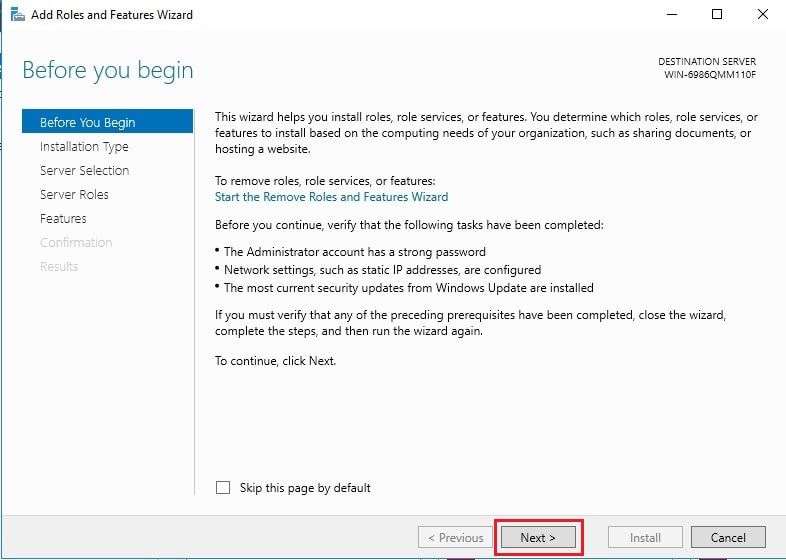
2. In the Before You Begin section, click on Next as we are going to keep the default settings.
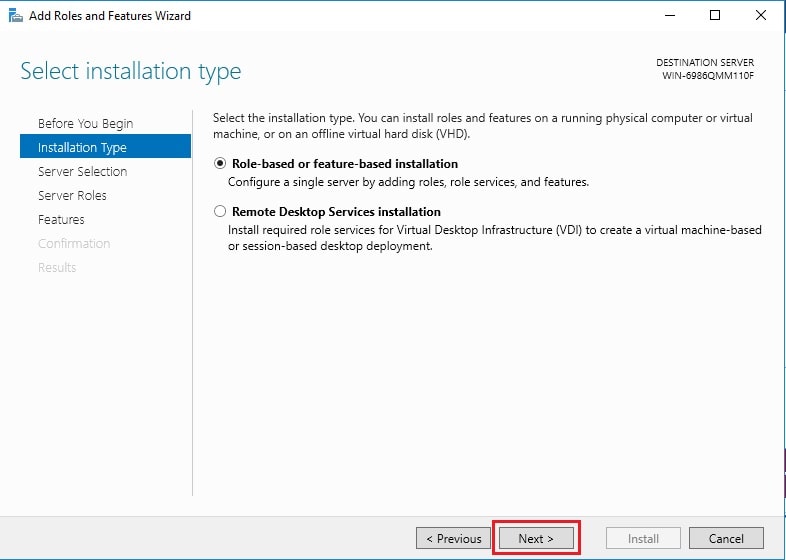
3. In the Installation Type section, click on Next as we are going to keep the default settings.
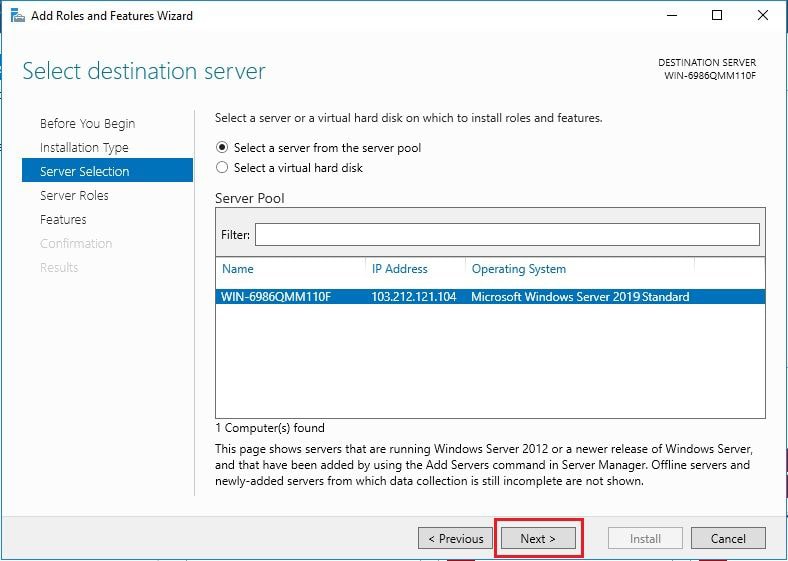
4. Then select the server from the Server Selection and click on Next.
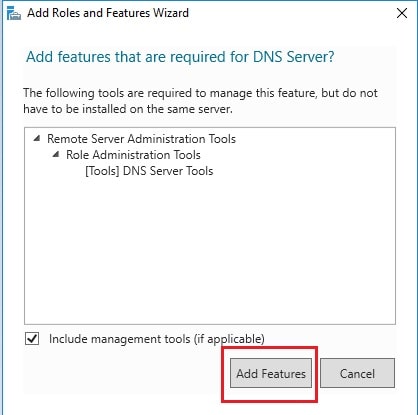
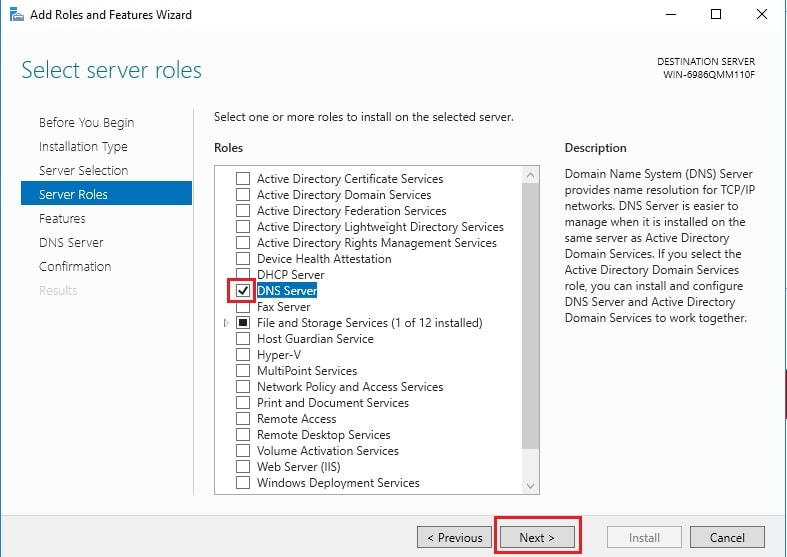
5. Select the DNS Server from the Server Roles. This will open the Add Roles and Features Wizard. Here click on Add Features.
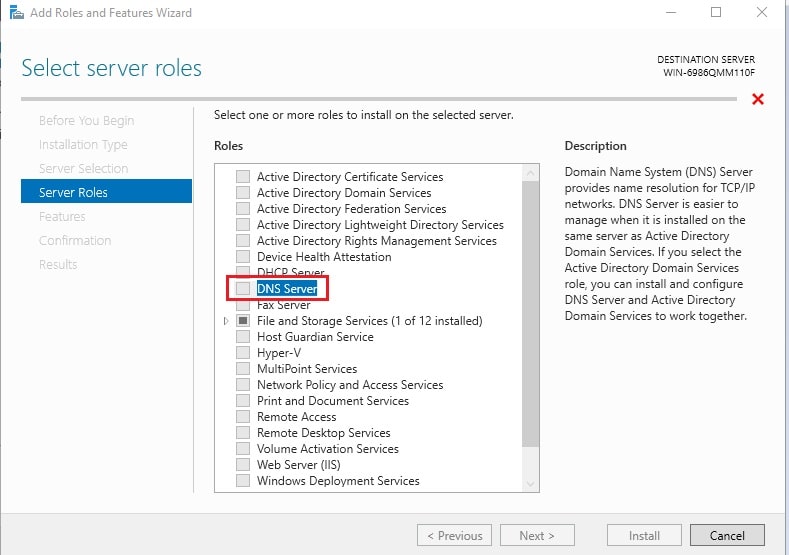
6. With this, the DNS Server option will get checked. Click on Next.
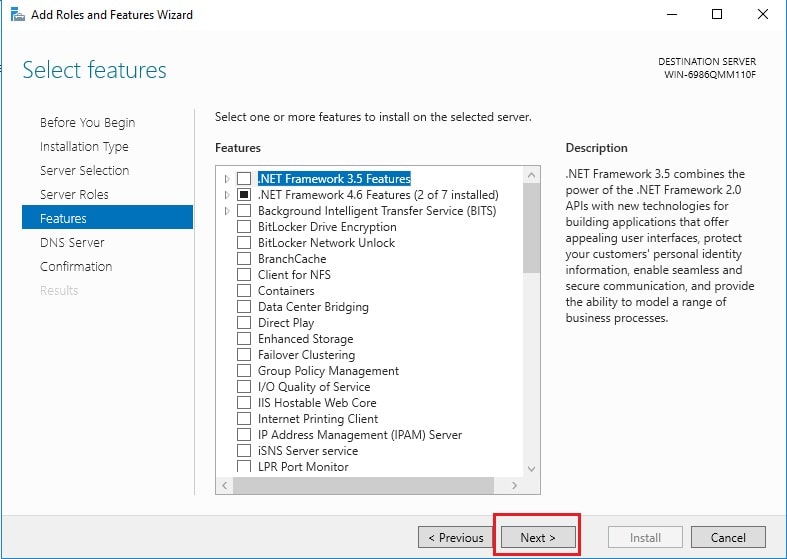
7. In the Features section, leave everything as it is and click on Next.
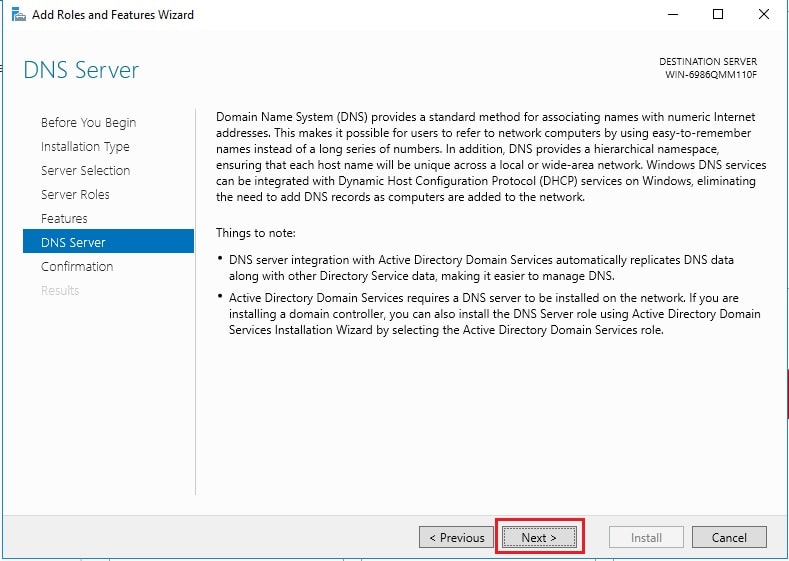
8. In the DNS Server section, just read everything and click on Next.
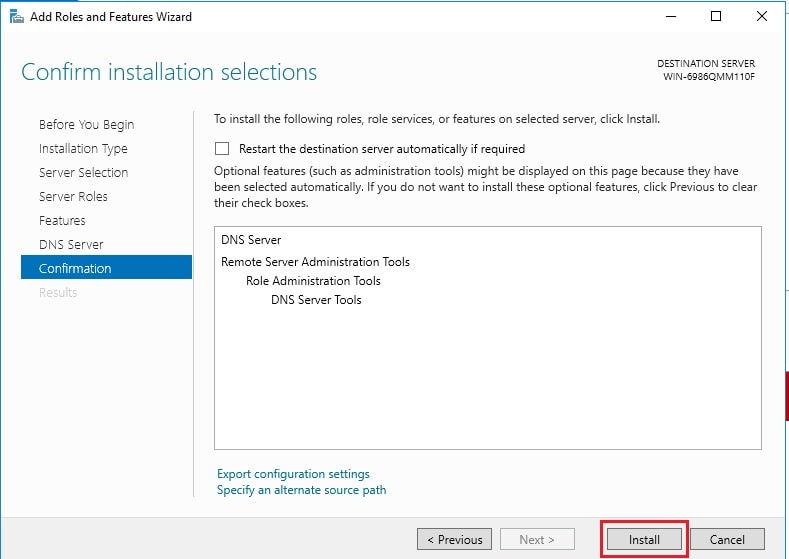
9. In the Confirmation section, click on Install.
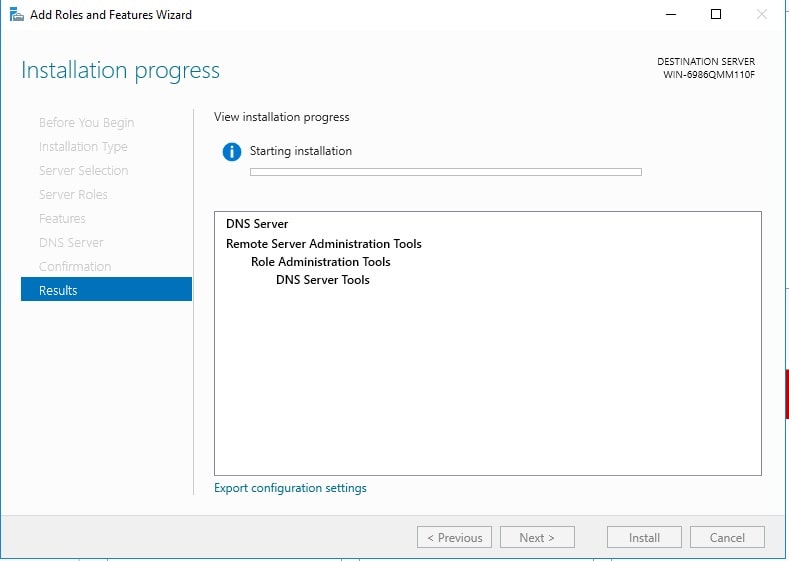
10. You can see the Installation Progress as below:
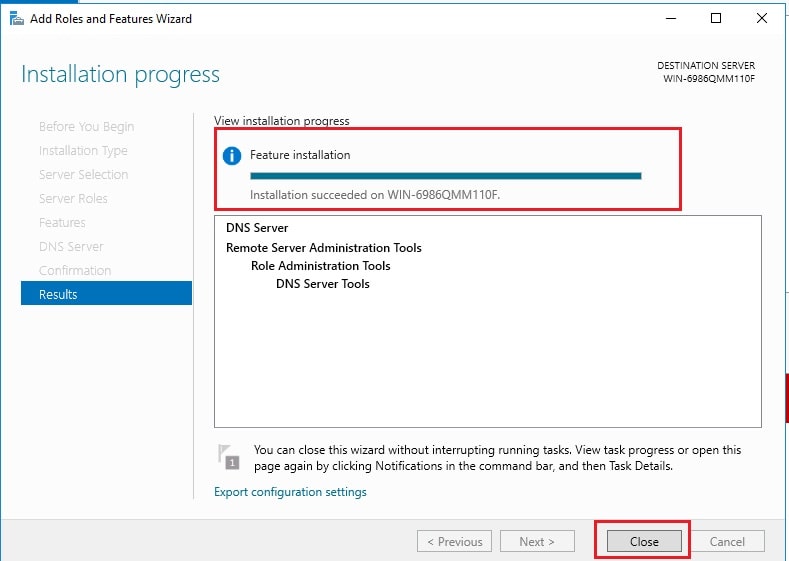
11. Once the DNS Server gets installed, you get a success message as below:
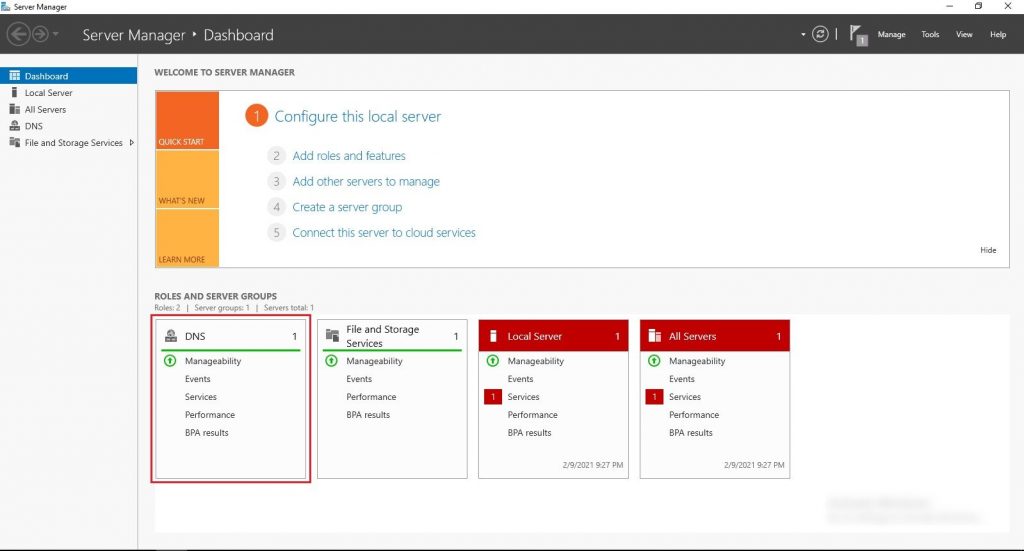
12. The DNS Server will get displayed in the Server Manager dashboard.
In this way, you can install the DNS Server on Windows Server 2019.


