In Plesk, it is possible to install free and paid SSL/TLS certificates SSL certificate with Let’s Encrypt’s “SSL It!” extension. You can also install the SSL/TLS certificates you already own.
To install the SSL certificate on Plesk with Let’s Encrypt:
1. Log in to your Plesk account.
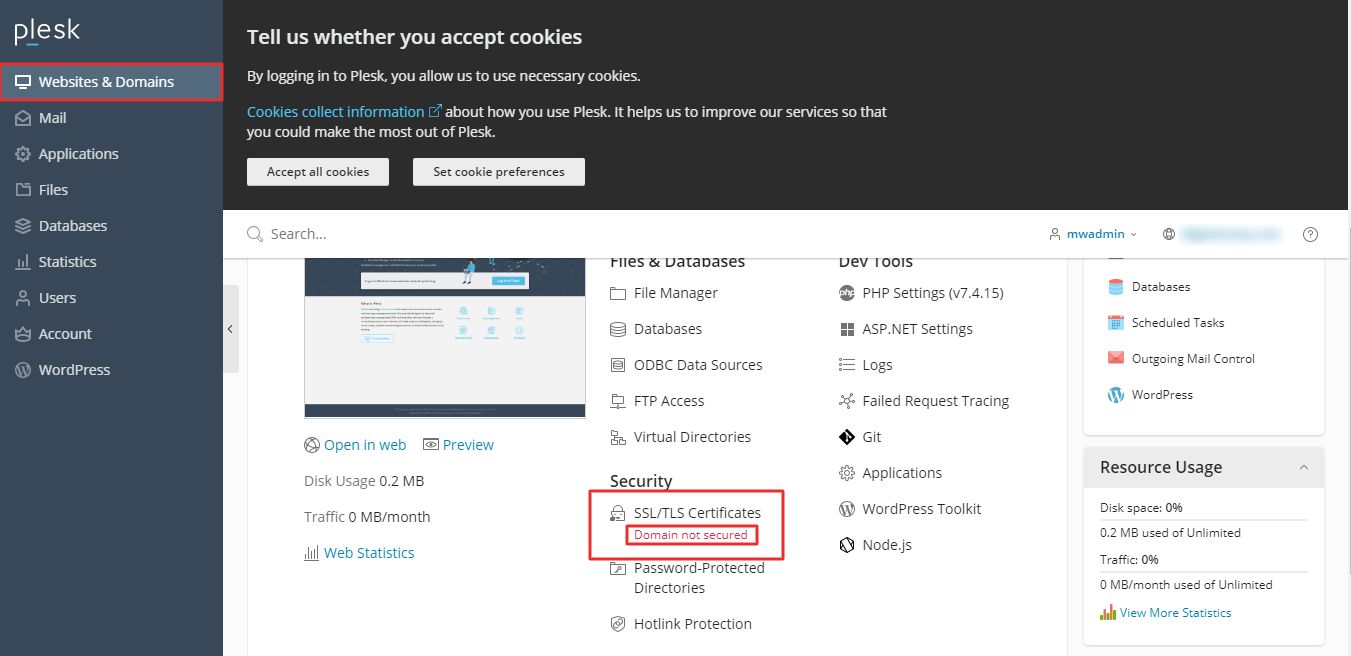
2. Go to the Website and Domains and click on SSL/TLS Certificates.

Note: Domain not secured will be displayed under the SSL/TLS Certificates indicating the domain is not yet secured with SSL.
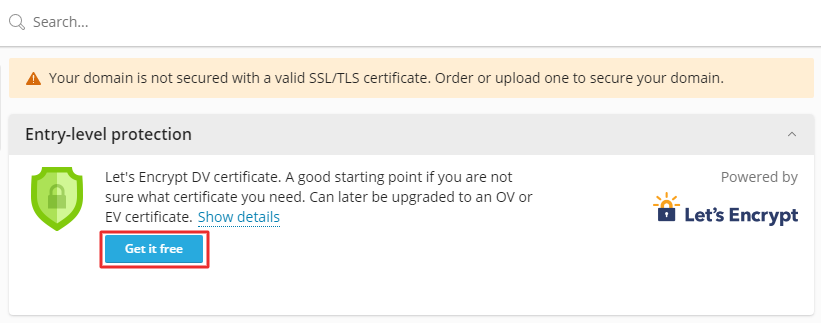
3. Click on Get it free.

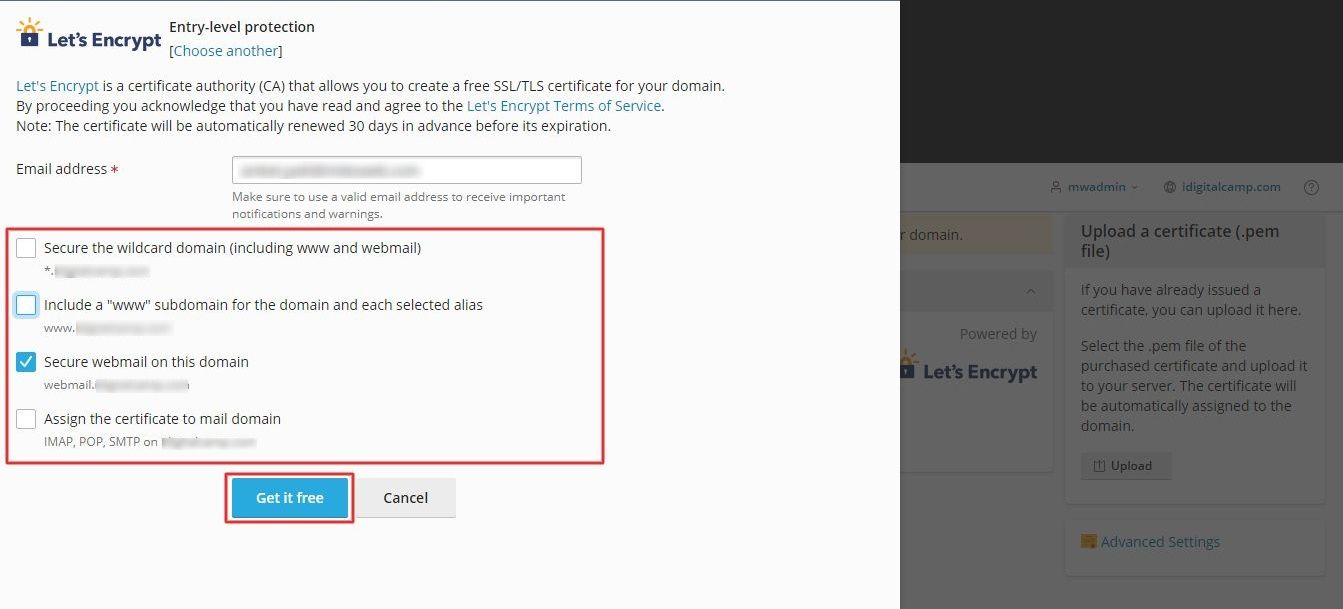
4. Let’s Encrypt window for SSL certification will open. Here, you have to add an email address to receive notifications and for lost-key recovery. You can select what to secure other than the main domain:
- Wildcard Domain or the resource record that will match one or more of your subdomains.
- The “www” subdomain as well as the selected domain aliases.
- The webmail on the main domain.
- IMAP, POP, SMTP mail domains.
All you have to do is tick the options you want to secure and then click the Get it free button.

Let’s Encrypt will issue and automatically install an SSL/TLS certificate.
When you click on SSL/TLS Certificates and check the list of Secured Components, your domain will be labeled as Secured.


