If you are having a Virtual Private Server or a Dedicated Server with WHM access, you can simply configure local backups on your server following the steps updated below. This will let you maintain the copies of your database locally on the same server that you host your website with.
Set local backup options
Step 1: Login to WHM with root access
Step 2: Type Backup in the find box, then click Backup Configuration
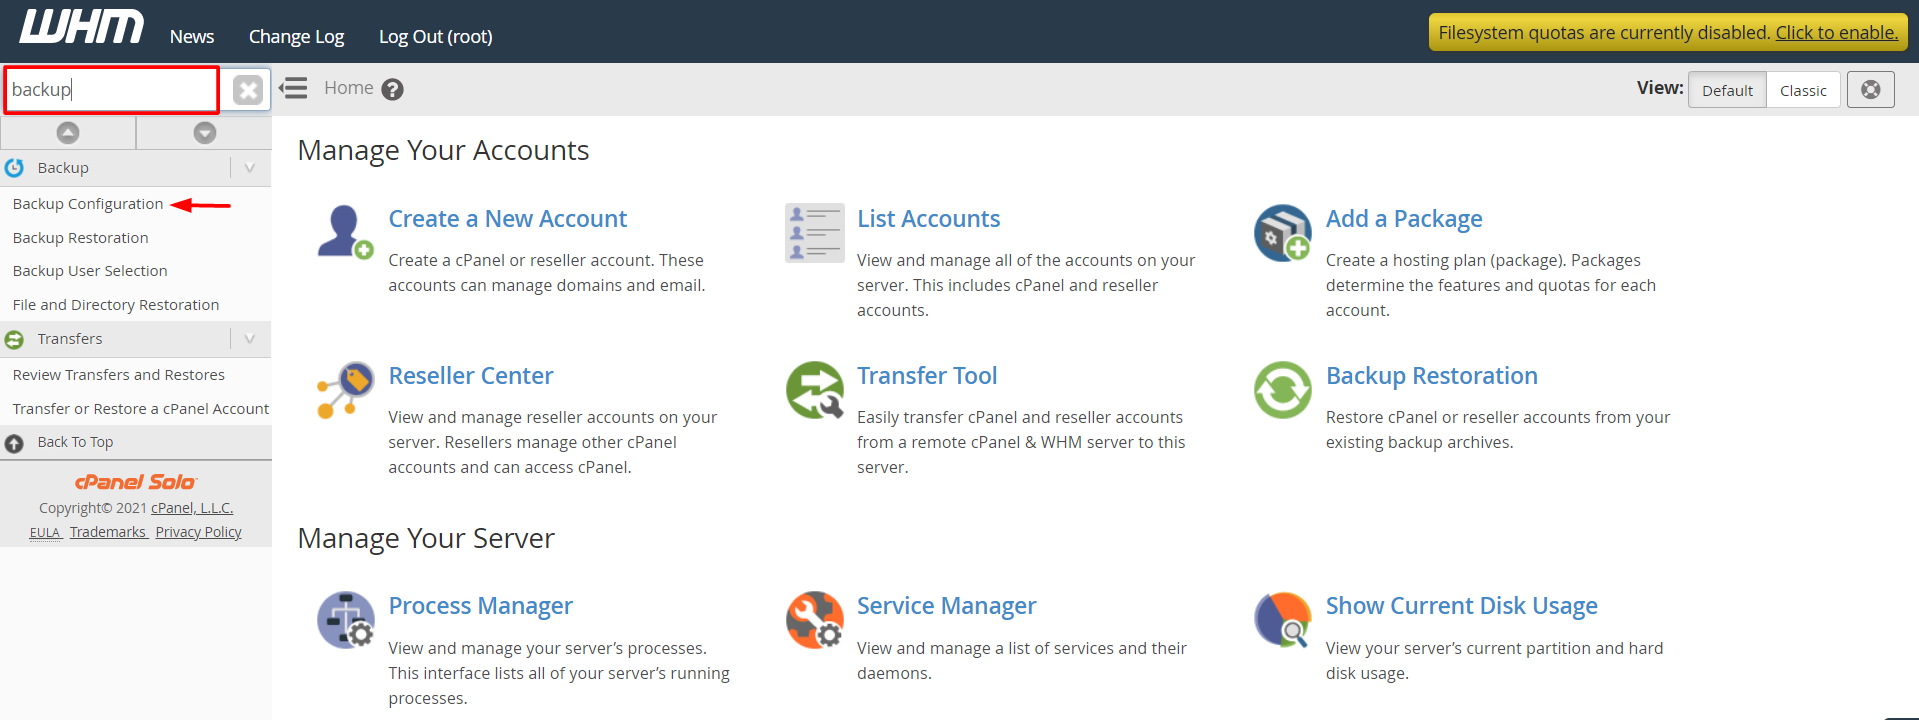
Step 3: Change Backup Status by checking the Enable Backups box

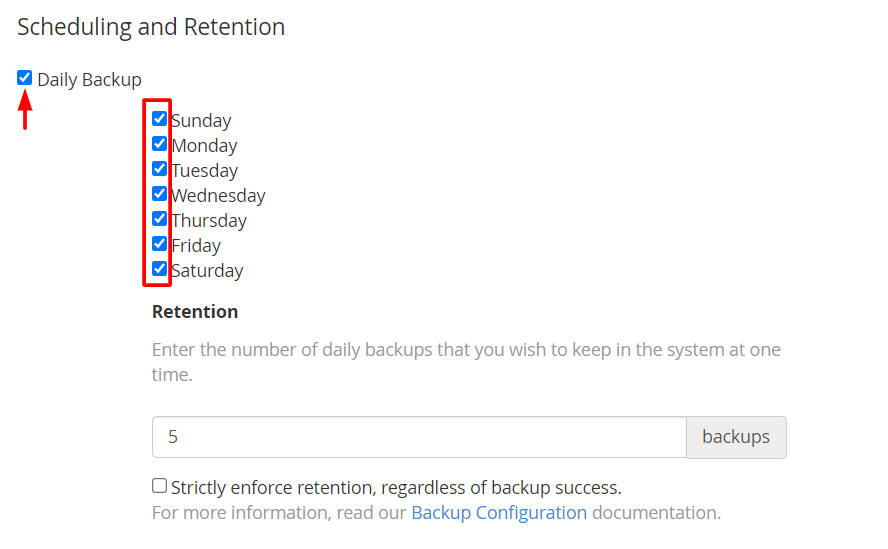
Step 4: Go to Scheduling and Retention
The settings will allow you to choose the time intervals to run backups. You will have the option to run backups on daily, weekly, or monthly periods. Alternatively, you can even come up with a combination of these settings to suit your requirements. Here’s a brief explanation of the timing settings:
- Daily Backup — The system will run backup process as per the weekly days you choose.
- Select the days to run backups.
- Enter the number of daily backup files to store on the system in the Retention field. It can be any number between 1 and 9999.
- Weekly Backup — Your system creates a new backup once each week on the day that you select. If you select this setting, you must perform the following actions:
- Select a day to run backups in the week.
- Enter the number of weekly backup files to store on the system in the Retention field. It can be any number between 1 and 9999.
- Monthly Backup — Your system creates a new backup either once or twice per month, on the first or 15th day of each month. If you select this setting, then you must perform the following actions:
- Select the days of the month to run the backup process.
- Enter the number of monthly backup files to store on the system in the Retention field. It can be any number between 1 and 9999.
You can remove both successful and unsuccessful backups. Select the Strictly enforce retention option and the system will remove all backups over the mentioned number set in the Retention field.
Note: You can schedule backups at incidentally the same time by combining different settings. For example, if you configured the settings to run daily and monthly backups on the same day, the system will prioritize running the daily backup first. In that case, the monthly backup will copy the constraints of daily backup upon its completion.
Step 5: Here, we have checked the Daily Backup box.
Step 6: Also, check all days.
Step 7: Check the Back up User Accounts to enable data backup for users.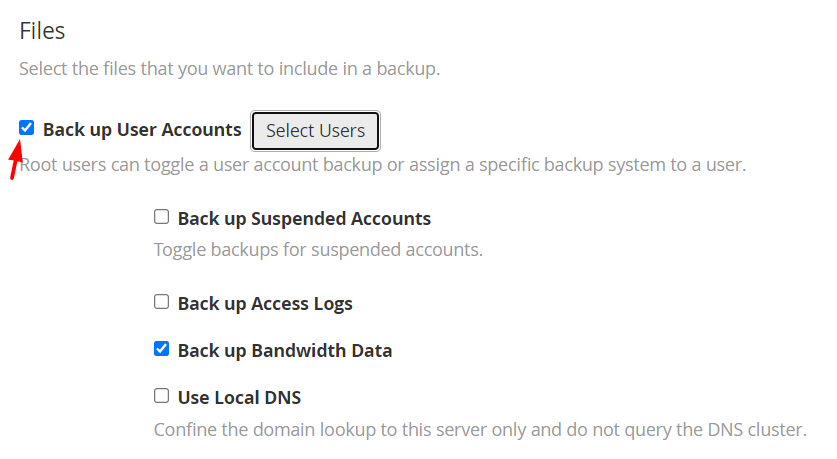
Step 8: For the Databases section, check the Per Account and Entire MySQL Directory option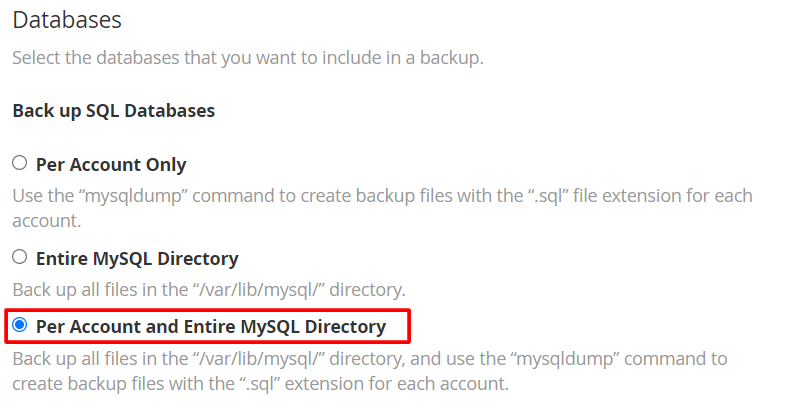
Step 9: Change Backup Destination to /backup
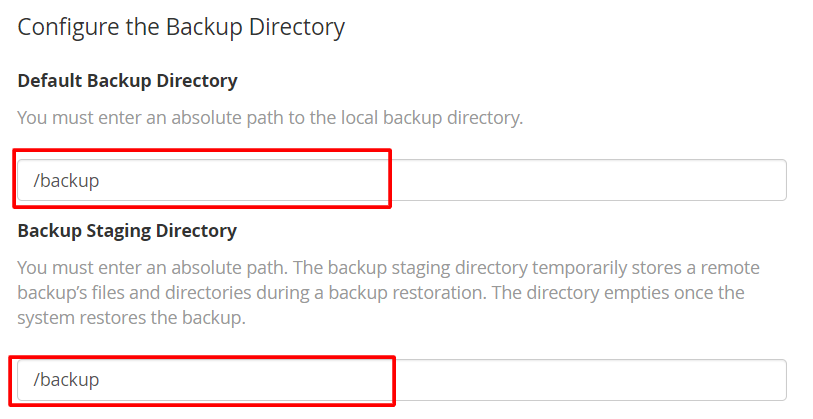
Step 10: Finally click the Save Configuration button.


