Auto-reply messages are very useful when the user is temporarily out of the office or unavailable to reply to e-mail messages immediately.
This knowledge base takes you through the steps to enable auto-reply messages for an e-mail account in Plesk.
# Enable Auto-reply message in Plesk
Perform following steps to enable auto-reply message in your Plesk :
1. Log in to Plesk.
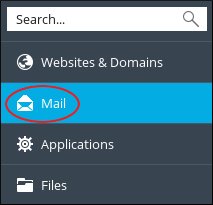
2. On the left side of sidebar, click on Mail.
3. On the Mail page appeared, click on the e-mail address for which you want to set up an auto-reply message.
4. Click on the Auto-reply tab.
5. Select the Switch on auto-reply check box.
6. Select the message format , next to Message format that you want to use (it can be in the form of plain text or HTML) .
7. Type your message content that you want to send in the Auto-reply message text text box.
8. Do you want to send the copy of original message to anyone else?
In the Forward to text box, you get the authority to optionally specify an e-mail address that will receive a copy of the original message.
9. Want to automatically disable auto-reply messages, select the Switch off auto-reply on check box, and then select on the date from when you want to stop sending auto-reply messages for the specific account.
10. Click on OK.
Also Read :


