This article will explain how you can upload and download files between your website and your computer using cPanel’s File Manager.
The File Manager allows you to manage your site via HTTP, where you can upload, create or delete files, organize files in folders and also change file permission.
# How to upload your files to a website using File Manager?
Upload files using the following steps :
1) Log in to cPanel. You can use the URL – http://yourdomain/cpanel
For example, if you are a MilesWeb hosting user then you can use URL: http://milesweb.com/cpanel
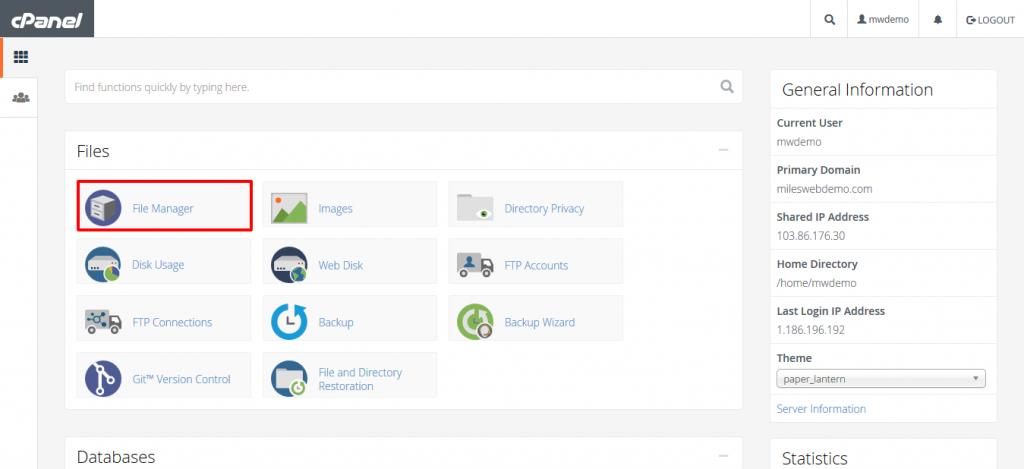
2) Click File Manager, in the Files section of the cPanel home screen.
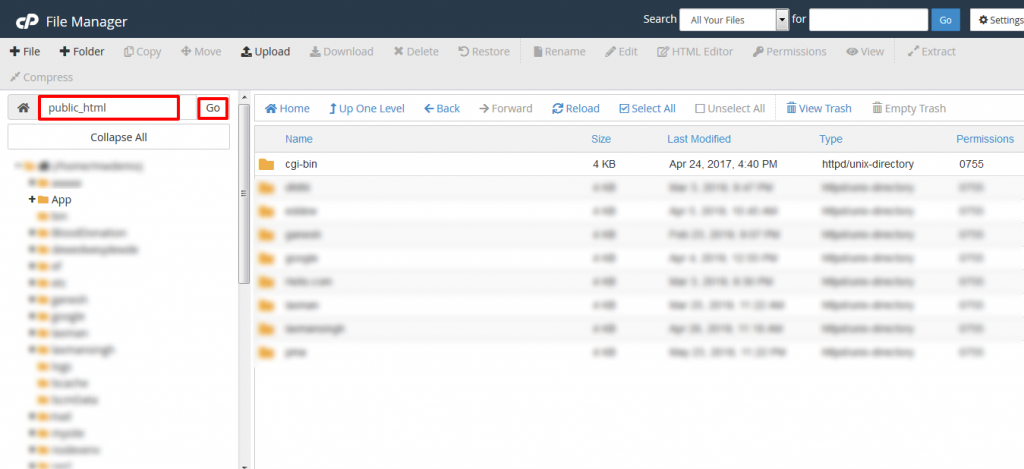
3) Now, select the directory in the File Manager main window, where you want to upload the file and click on “GO”.
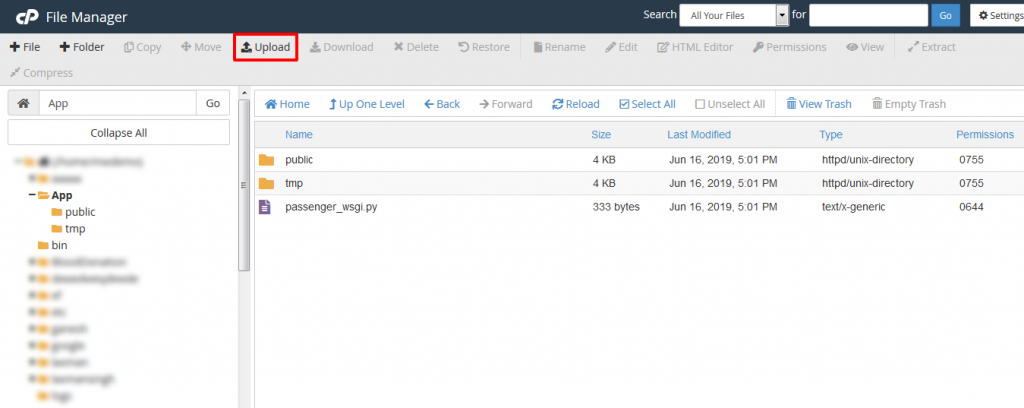
4) Click on Upload.
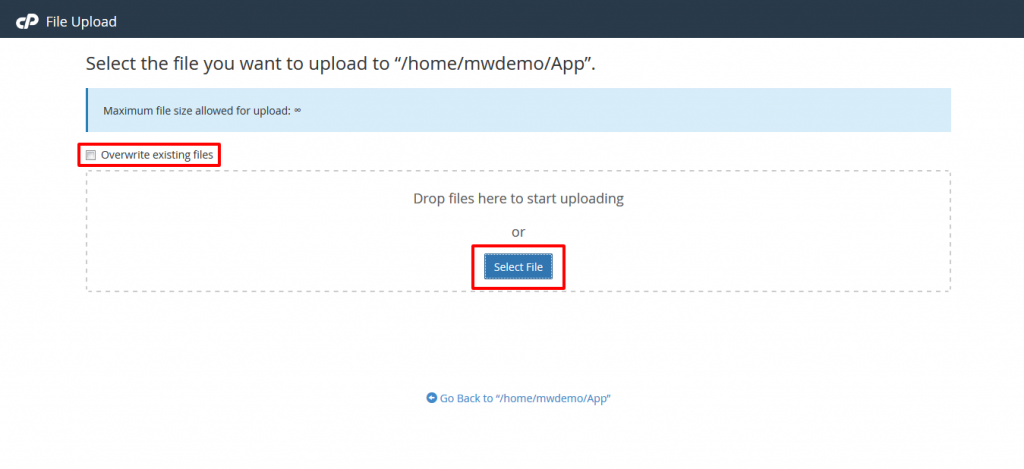
5) Do you want to overwrite on the server having the same filename?
Then select the Overwrite existing files check box.
6) Click on Select File.
7) Navigate to the location of the file on your computer (the file you want to upload) and then double-click on the file.
8) You can now see the File Manager Window.
You have successfully uploaded files using File Manager.
Related: Unable to upload files from cPanel file manager
# How to Download a File from your Website?
Download a file using File Manager using the following steps :
1) Log in to cPanel.
2) Under Files section of the cPanel home screen, click on Files Manager.
3) Now navigate to the directory from where you want to download a file.
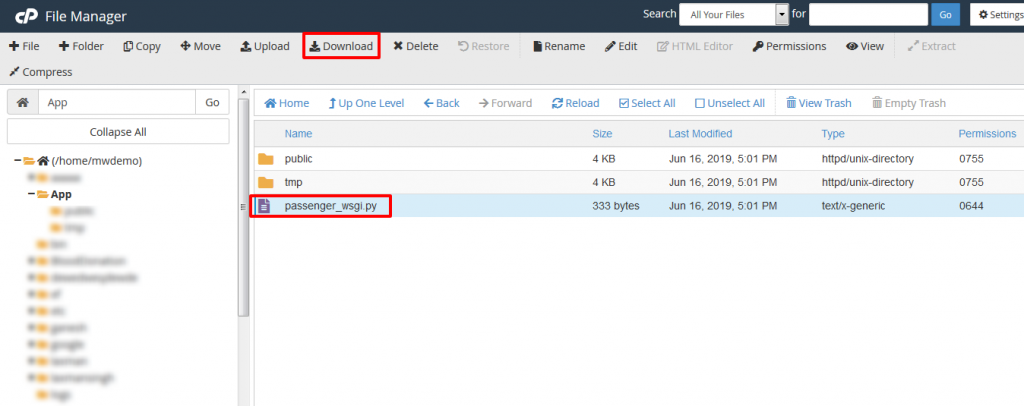
4) Select the file that you want to download.
5) Click on the Download option.
Go to the directory where you want to save the file and then save it.


