Zone Editor in cPanel is used to manage custom DNS records. This article guides you on how to use DNS Zone Editor.
What is DNS Records?
DNS (Domain Name System) record is a database record that is used to map a URL to an IP address. These DNS records are stored in DNS servers and work to help connect their websites to the outside world.
There are many types of DNS records, and some of them are :
1. Name Server (NS) Record: It describes a name server for the domain that allows DNS lookups within several zones. Every primary and secondary name server must be reported via NS record.
2. Address (A) Record: It is used to map a hostname to an IP address. Mostly, records are IP addresses. Suppose, if a computer has multiple IP addresses, adapter cards, or both then it must possess multiple address records also.
3. Canonical Name (CNAME) Record: It is used to set an alias for the host name. For example, you could create a CNAME record for email.example.com associated with example.com. So that, when a DNS lookup for email.example.com occurs, it will receive in response to the associated example.com domain and will perform a lookup on its A record. CNAME records allow you to define multiple domains without having to specify an IP address for each one.
4. Text (TXT) Record: It permits the insertion of arbitrary text into DNS record. These records add SPF records into a domain.
5. MX (Mail exchange) Record: MX records are used specify the e-mail server(s) that is responsible for a domain name. Each MX-record points to the name of an e-mail server and holds a preference number for that pointed server.
# Steps to use the Zone Editor in cPanel :
The Zone Editor provided by cPanel is used to quickly and easily change DNS records for your domain or domains.
To Add Record
Follow the steps to add a record using Zone Editor :
1. On the cPanel home screen, go to DOMAINS section and click on Zone Editor.
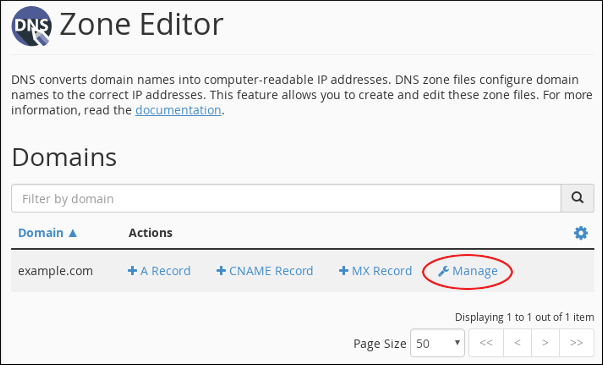
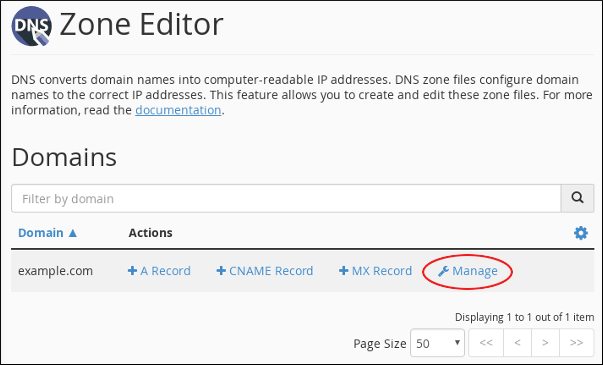
2. On the Zone Editor page, under Domains, locate the domain for which you want to add a record, and then click on Manage.
3. Next to Add Record, click on the drop-down arrow, and then click the type of record that you want to add.

4. In the text box for Name, type the fully-qualified domain name (FQDN) for the record.
5. In the text box for TTL, enter the time-to-live value in seconds.
Note: If you are not sure of the value to specify, enter 14400, which means four hours.
6. Confirm that the Type list box contains the type of record that you want to add.
7. In the text box for the record, enter the value for the record.
Note :
• If you are adding an A record, type the IP address to associate with the domain name that you have selected in step 2.
• If you are adding a CNAME record, type the associated canonical name for the domain name that you have selected in step 2.
• If you are adding a TXT record, type the data that you want to use for the TXT record.
8. Click on Add Record. cPanel will add the record.
# Steps to Edit a Record
To edit record using Zone Editor :
1. On the cPanel home screen go to DOMAINS section, and click on Zone Editor.
2. Under the Domains section, identify the domain for which you want to add a record and then click on Manage.
3. Locate your record that needs to be edited, and then under Actions, click on Edit.
4. You can modify the value or values that you want to edit and then click on Save Record. cPanel will update the record.
# Steps to delete a Record
To delete a record using the Zone Editor perform these steps :
1. On the cPanel home screen, go to DOMAINS section and then click on Zone Editor.
2. Under Domains, locate the domain for which you want to add a record and then click on Manage.
3. Identify the record that you want to delete, and then under Actions, click on Delete.

4. You will get a Confirm Deletion prompt, click on Continue. cPanel will delete the record.
Also Read :
1)Learn to manage Mailing lists in cPanel


