React is one of the most used Front end libraries. There are many other options for deploying React apps; shared hosting is one of the excellent ways to start a new project.
As it’s one of the affordable ways, but not the easiest, to deploy a React app as a developer.
In this article, we’ve made your job easy. We will understand the steps to how you can deploy a react app on shared hosting.
Generally, React App on your local machine runs on localhost: localhost: port.
First, to deploy the React app on shared hosting, you must replace the local address with your domain name.
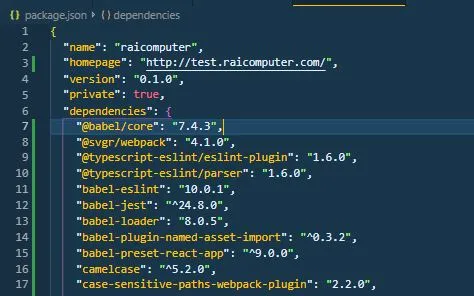
Step 1: Replace The Local Host With The Domain Name

In the package.json file of your react app, add a new property “homepage”:”http://yourdomain.com“
The next step is to build the App.
2. Building The App Using npm Run Build
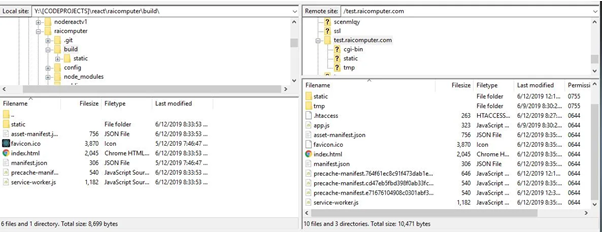
Your project directory will create a build folder containing all the static files for a project. You need an FTP with your hosting address to upload the app to your hosting address.
In FTP (FileZilla), on Local Site, open the build directory of React App; on the remote site, open the domain directory. Your hosting account will always have the domain directory with the same name as the domain if you have named it differently.
Then, copy everything from the build directory to the domain directory.

.htaccess File Configuration
The most crucial part is the .htaccess configuration; this file has all the configurations of which file to serve when anyone visits the domain if you have followed the above steps correctly.
If so, then copy and paste into your .htaccess
Please Note:
Note: ./index.html when your index.html and .htaccess are in different folders, then:
./abcfolder/index.html.
You will get to see the output given below:

This is how you can successfully deploy React applications on shared hosting.


