Follow below mentioned tips for installation and configuration process of Mozilla Thunderbird.
1. Visit the Thunderbird website. And, click on Free Download button given on the website.

2. You will get a new window, prompting to save the file. Click on Save File, by which the file will be saved on your computer.
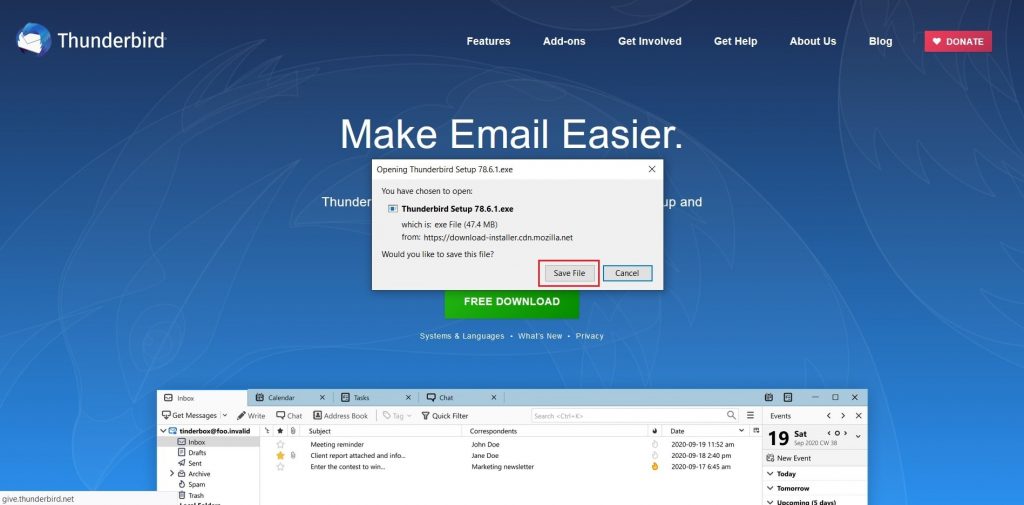
3. Now, double click on the downloaded file to download the extracted files. A pop-up will appear that will ask you to allow Thunderbird to make changes to your device. Click on Yes.
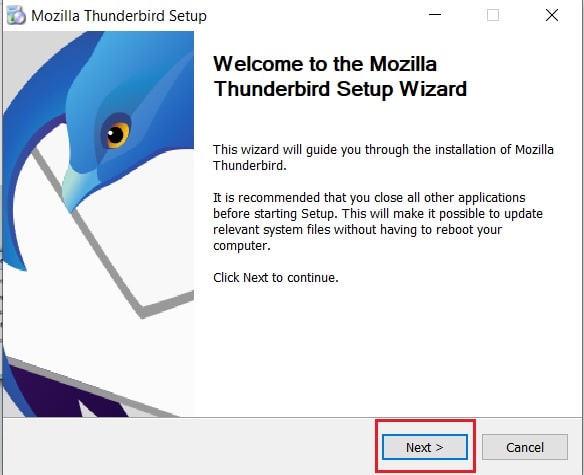
4. After this, a new window would be launched, which will show you the Thunderbird Setup wizard. Here click on the Next button.
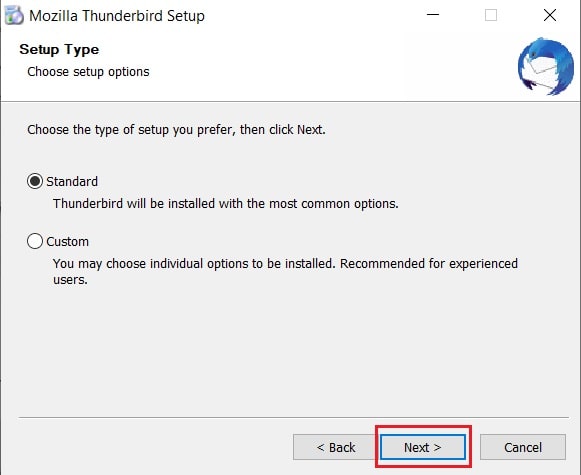
5. Then select either Standard type of setup (Thunderbird will be installed with most common options), or Custom setup (You may choose individual options to be installed. It is mostly recommended for experienced users).
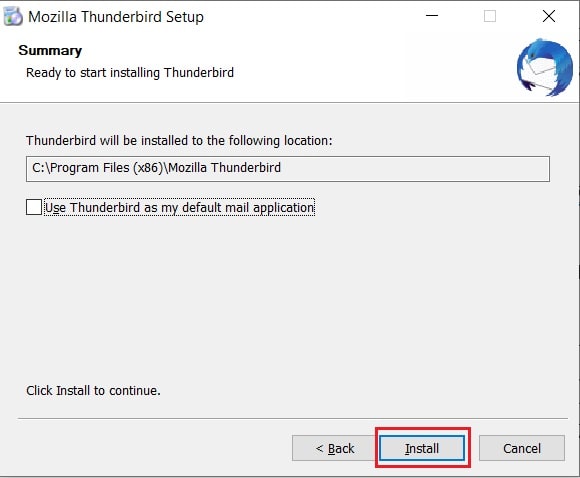
6. Click on Next. Here it will display the location where Thunderbird will be installed. Then click on Install to begin the Thunderbird installation.
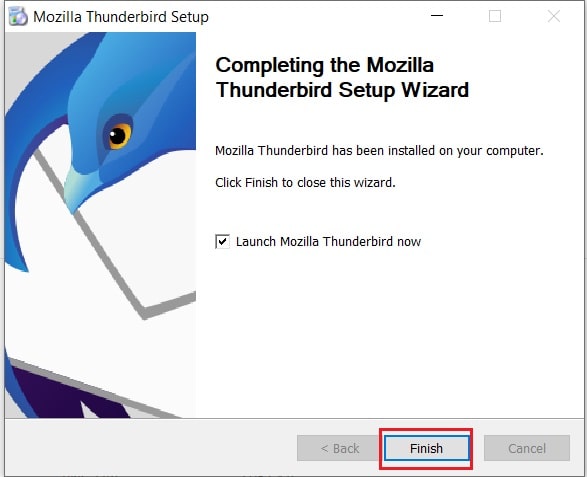
7. New window will prompt you to Finish with the setup wizard and launch Mozilla Thunderbird.
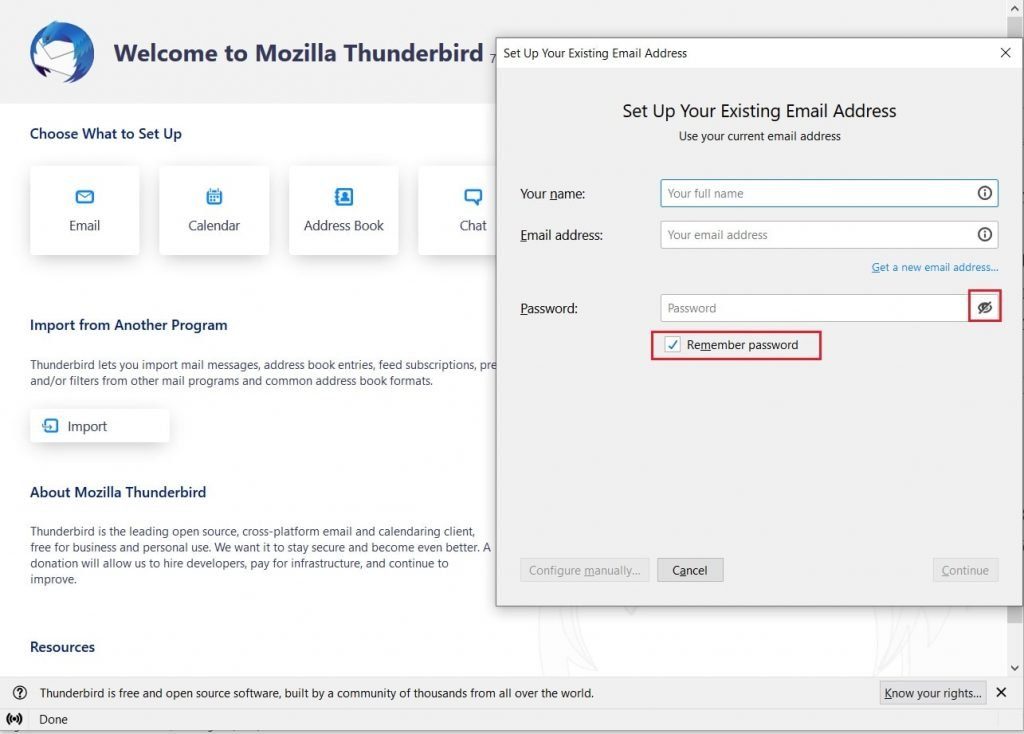
8. This will open two windows – one at the back named “Welcome to Mozilla Thunderbird” and one overlapping it in front named as “Set Up Your Existing Email Address”. If you want to set up your existing email address for Thunderbird, you can enter Your name, Email address (existing) and Password. In the Password field, you can view your password by clicking on the eye icon. You can also tick the Remember Password checkbox if you want Thunderbird to remember your password.
Note: In case the “Set Up Your Existing Email Address” doesn’t gets displayed, click on the Email option under Choose What to Set Up.
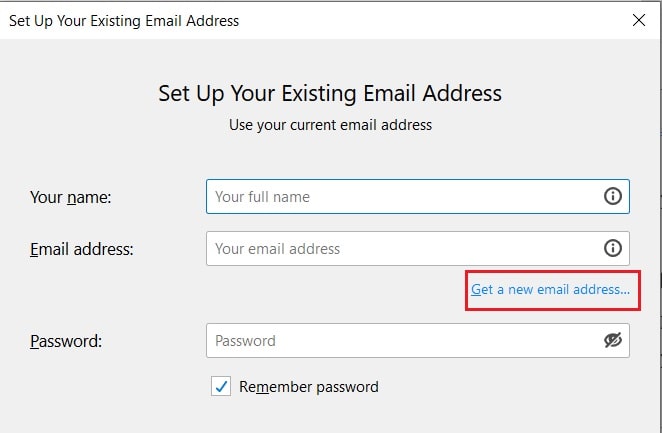
9. If you want to create a new email address for Thunderbird, you can click on the link Get a new email address… below the Email address field.
This will open a new window “Would you like a new email address?” Here enter your name and click on Search button. This will display a list of email addresses from which you can purchase one.
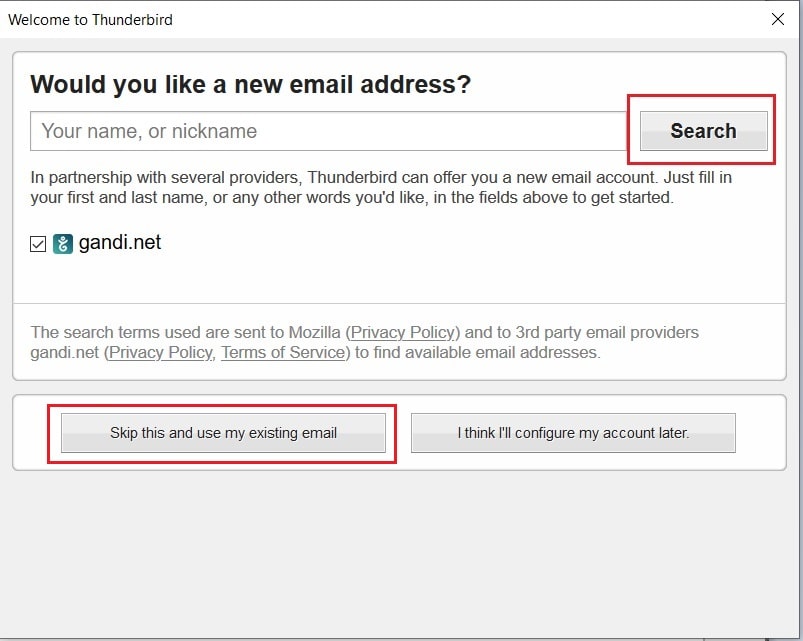
If you want to continue with your existing email click on Skip this and continue with my existing email.
10. Then once you are done with entering Your name, Email Address and Password, click on Continue. Make sure you enter your own email address.
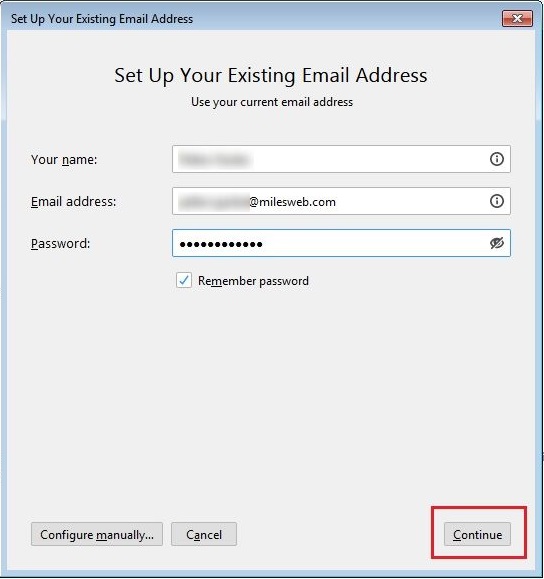
11. This will display the below settings:
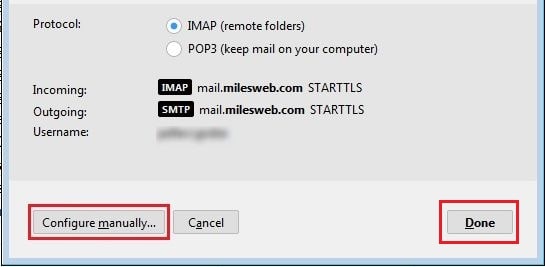
When the settings are displayed after clicking on Continue, you can select the Protocol (IMAP/POP3) as per your preference and click on Done.
Note: You can also configure the settings manually by clicking on Configure manually… button. The settings will get displayed as below:
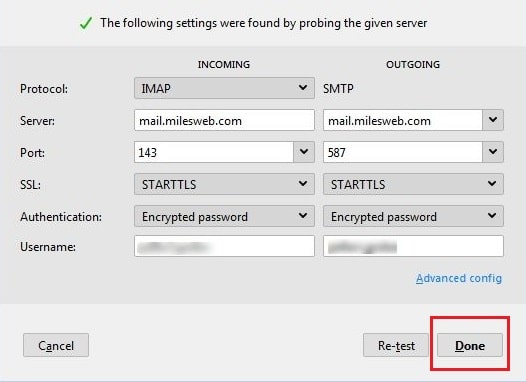
Here enter your own server name in the Server field, your port number in the Port field and your username in the Username field. You can click on Re-test button to check if the settings are correct. Then click on Done.
12. Now, Thunderbird will connect you to the mentioned email server. You can click on the Inbox button to start with downloading inbox messages.
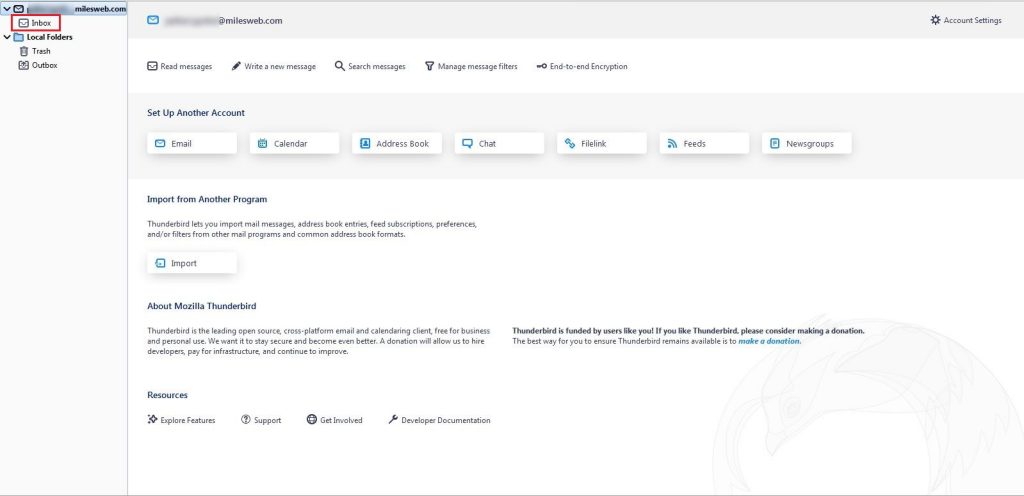
Your Thunderbird email account configuration is complete.


