WordPress Multisite provides the option for users to control several different websites in one single installation. It is very useful for corporations, schools, or any type of organization that has to manage several websites at the same time.
Prerequisites For How To Setup WordPress Multisite
Before Multi-WordPress is enabled, make sure that you meet the following requirements:
- Web hosting: Select a hosting package that offers multiple domain or subdomain options.
- WordPress installation: You may use either an old website or a new one (just ensure that all active plugins are disabled prior to installation).
- Admin access: Permission to edit the configuration files of the WordPress
- Robust Backup: Implement a complete backup of the WordPress site before making the changes.
Note: For a seamless foundation in the network, MilesWeb’s managed WordPress hosting plans offer a seamless foundation for multisite hosting. We recommend our top-tier plans as they are equipped with additional features, easier management, and an increased resource boost.
Steps to Setup WordPress Multisite Effortlessly
Step 1: Go to wp-config.php and enable multisites
- Go to the root directory of your website, and a file manager or downloader like FileZilla can be used for this purpose.
- Make sure your website is connected via FTP.
- Find the file called wp-config.php.
- Now add the line
define('WP_ALLOW_MULTISITE', true);Above
 /* That’s all, stop editing! Happy publishing. */:

/* Multisite */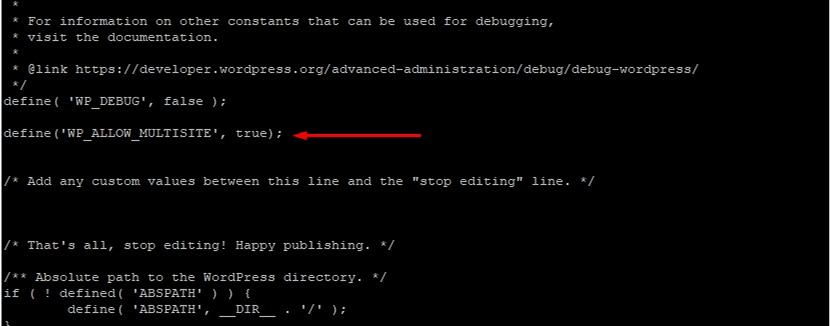
Once added, save and close the file.
Step 2: Configure the WordPress Multisite Network
- Log in to your WordPress dashboard.
- Navigate to Tools → Network Setup.
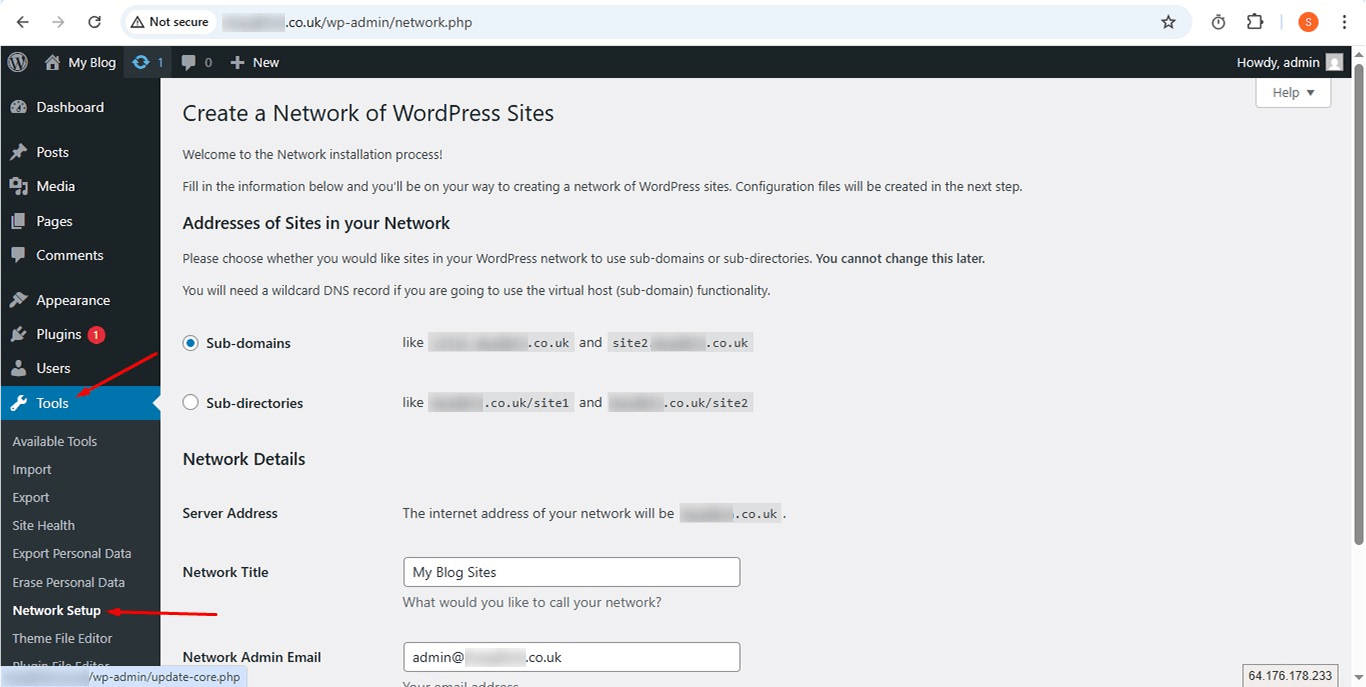
- Choose between subdomains (site1.example.com).
- If your site is older than 30 days, WordPress will default to subdirectories Subdirectories (example.com/site1)
- Enter the network title and admin email.
- Click Install.
Step 3: Configure a Wildcard Subdomain (if using subdomains)
- For subdomain-based multisite setups, you need to configure a wildcard subdomain:
- Go to your hosting panel and open DNS Zone Editor.
- Create a new wildcard DNS record:
- Name: *
- Points to: Your server’s IP address
- Save changes and wait for DNS propagation (24-48 hours).
Step 4: Update wp-config.php and .htaccess Files
- Return to Tools → Network Setup and copy the provided code snippets.
- Open wp-config.php and add the following above /* That’s all, stop editing! Happy publishing. */:
define('MULTISITE', true);

define('SUBDOMAIN_INSTALL', true);

define('DOMAIN_CURRENT_SITE', 'yourdomain.com');

define('PATH_CURRENT_SITE', '/');

define('SITE_ID_CURRENT_SITE', 1);

define('BLOG_ID_CURRENT_SITE', 1);
(Replace yourdomain.com with your actual domain.)
Open .htaccess (in the same directory as wp-config.php) and replace its content with:
RewriteEngine On

RewriteBase /

RewriteRule ^index\.php$ - [L]

# Add a trailing slash to /wp-admin

RewriteRule ^wp-admin$ wp-admin/ [R=301,L]

RewriteCond %{REQUEST_FILENAME} -f [OR]

RewriteCond %{REQUEST_FILENAME} -d

RewriteRule ^ - [L]

RewriteRule ^(wp-(content|admin|includes).*) $1 [L]

RewriteRule ^(.*\.php)$ $1 [L]

RewriteRule . index.php [L]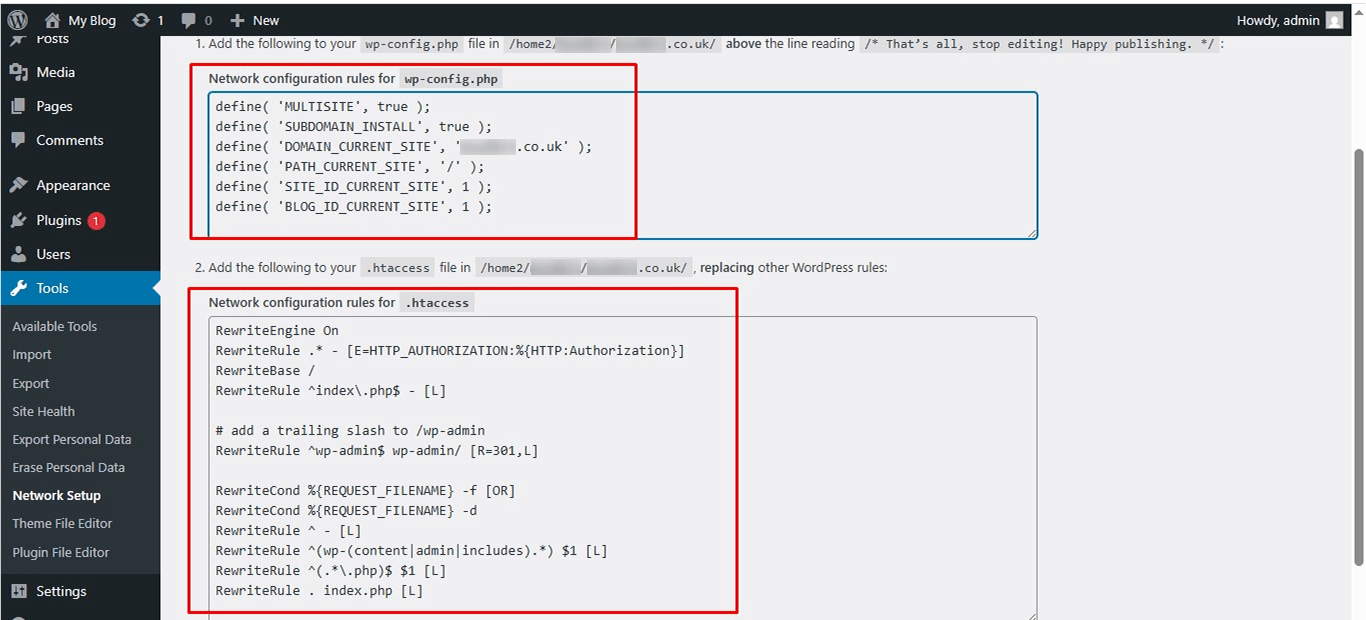
Save and upload the updated files.
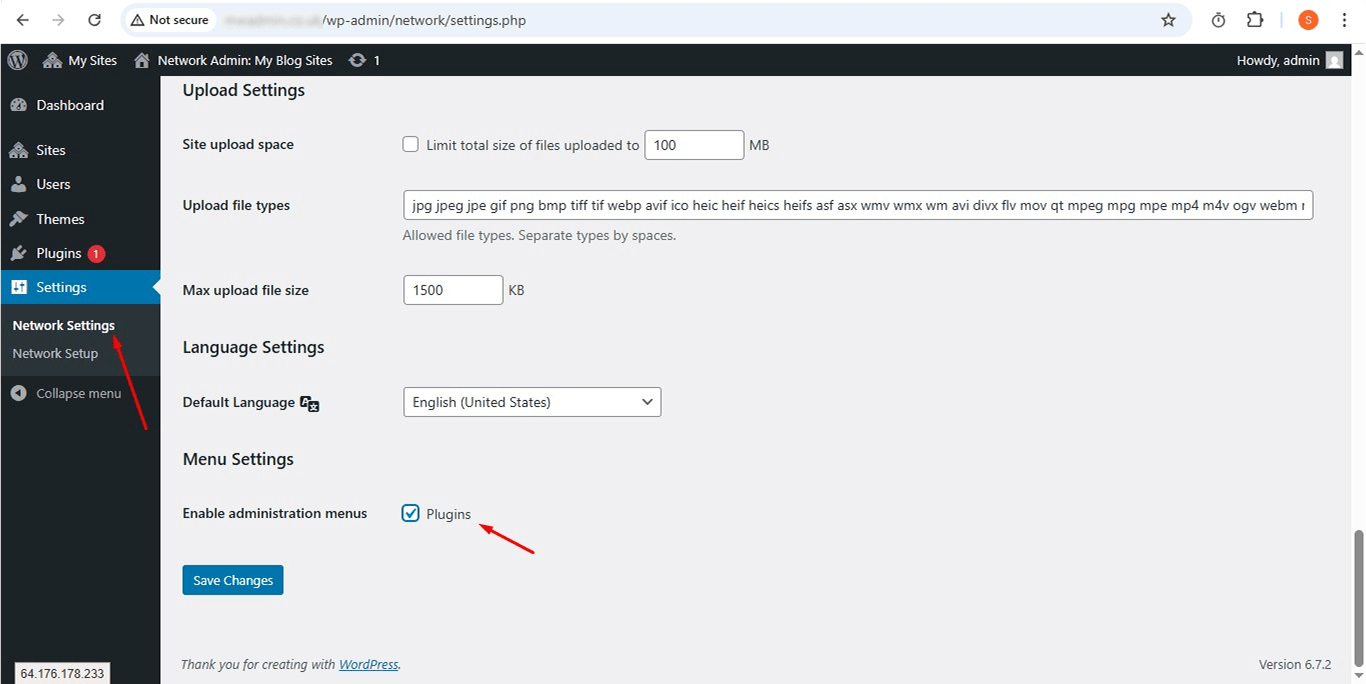
Step 5: Configure Network Settings
- Log back into WordPress.
- Navigate to My Sites → Network Admin → Dashboard.
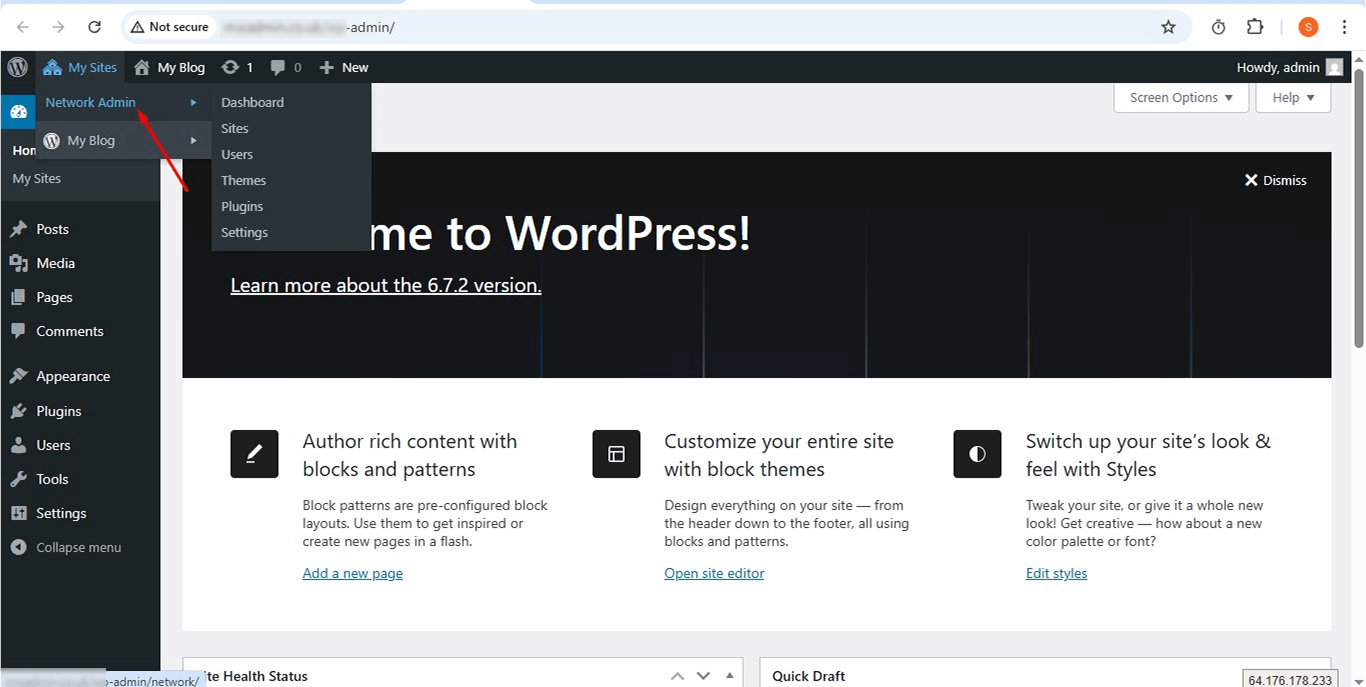
- Go to Settings → Network Settings and configure:
- Site registration settings: Allow or restrict new site creation.
- User settings: Control who can register users/sites.
- Upload settings: Set file upload limits and allowed file types.
- Plugin settings: Allow site admins to activate/deactivate plugins.
- Click Save Changes.
Step 6: Adding New Sites to Your Network
- Go to My Sites → Network Admin → Sites → Add New.
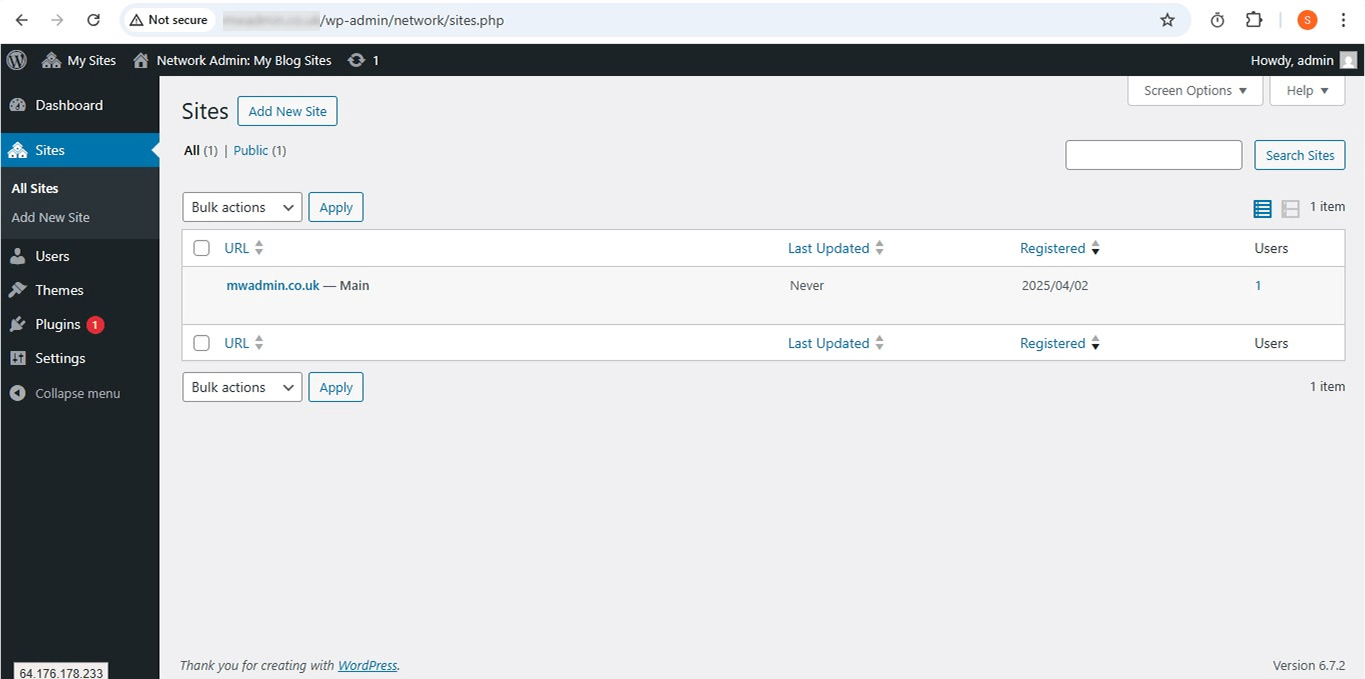
- Enter:
- Site Address (subdomain or subdirectory)
- Site Title
- Admin Email
- Click Add Site.
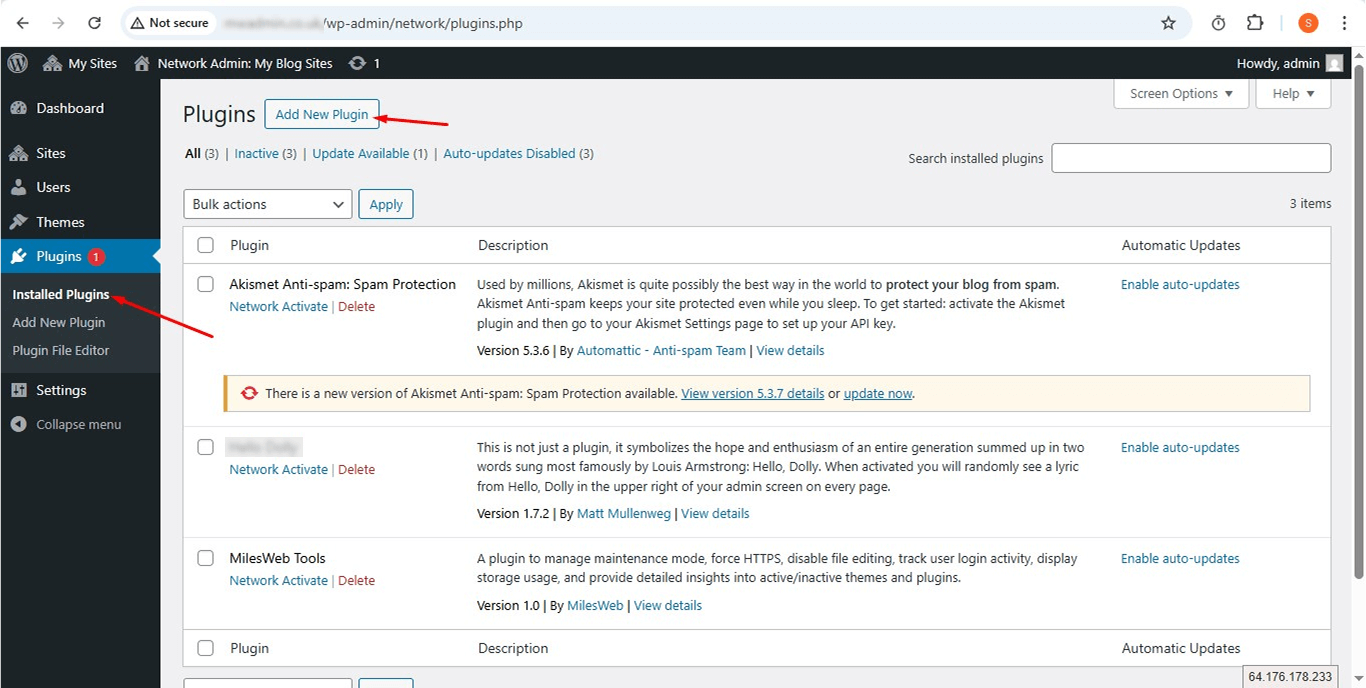
Step 7: Managing Plugins and Themes
- Super Admin: Can install and enable themes/plugins for the network.
- Site Admins: Can activate/deactivate allowed plugins but cannot install new ones.
- Go to Network Admin → Plugins or Network Admin → Themes to manage installations.
Your WordPress Multisite network is now set up! You can manage multiple sites from a single dashboard, install shared themes and plugins, and customize settings for each subsite.
For more advanced configurations, consider using domain mapping for top-level domains or exploring Multisite plugins to enhance network management.


